
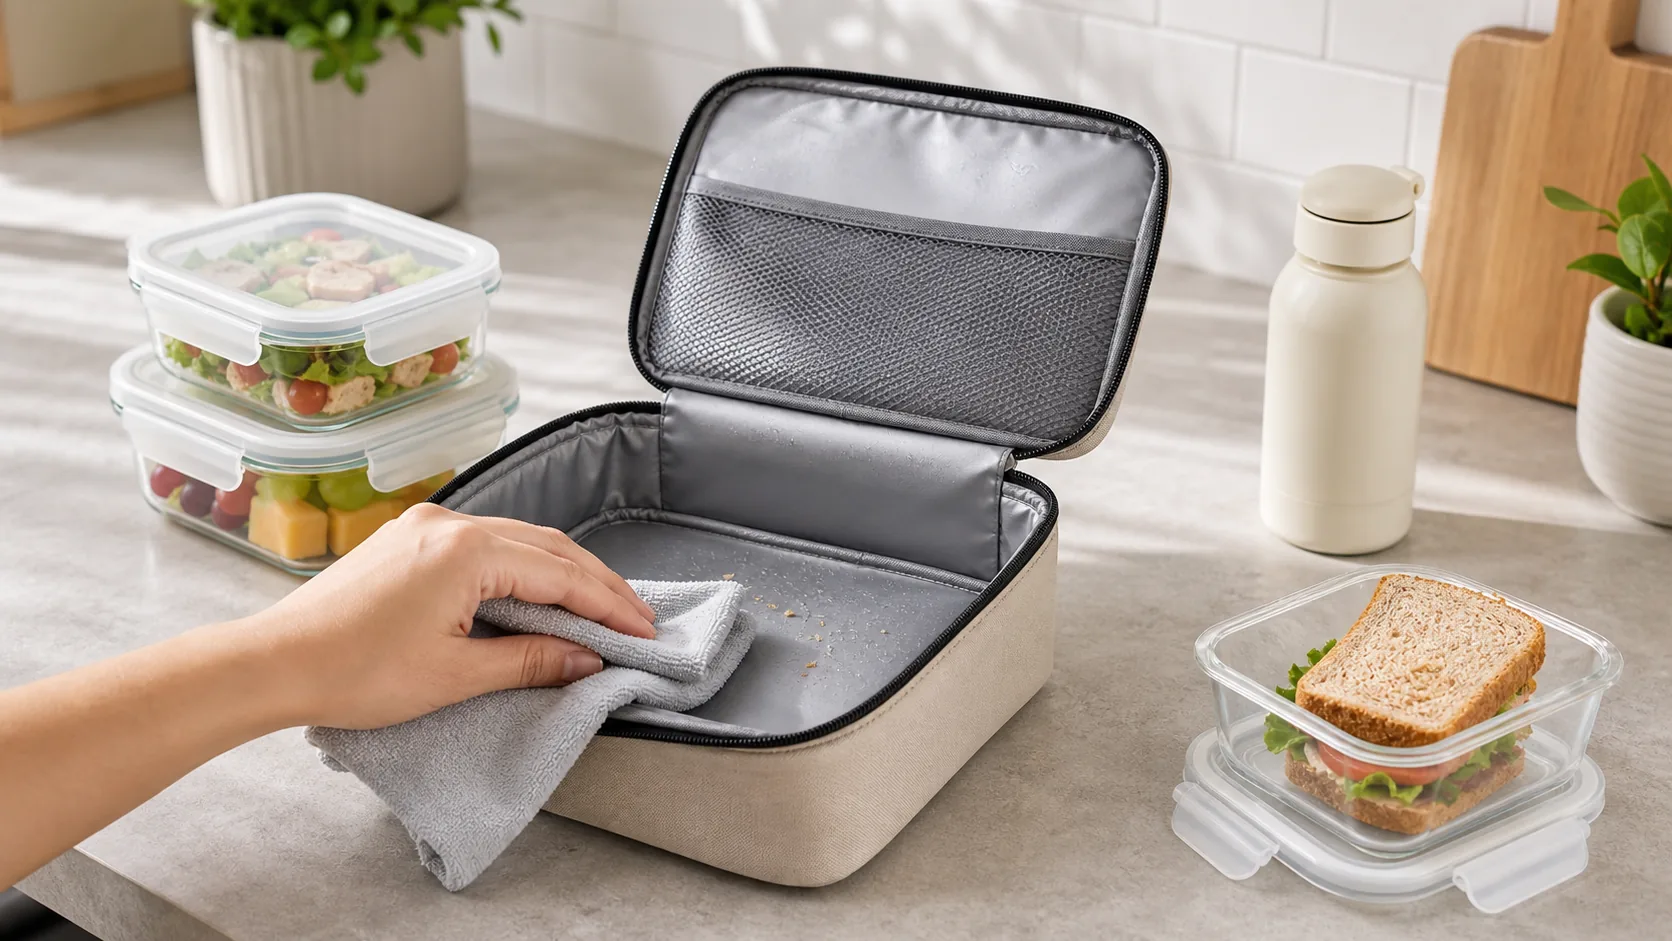
Cleaning an insulated lunch bag starts with warm soapy water, a soft cloth, and a full air-dry after every wipe-down. You pack fresh food each morning, yet the lining still smells sour by Friday. Crumbs settle, juice leaks, and mold quietly builds inside a warm, closed pouch. Knowing how to wash lunch bag interiors the right way helps protect food hygiene and keeps your bag looking retail-fresh for years. As a factory that ships custom lunch bags to many markets, we have tested the methods professional buyers ask about, and this guide gives you what actually works.
Why Does Learning How to Wash Lunch Bag Matter Daily?
A dirty lunch bag can turn into a bacteria pocket faster than you might expect, and daily attention keeps that risk low. Most users forget that foam insulation traps warmth, moisture, and food particles between layers. That mix creates the conditions mold likes. You protect your health, your food safety, and your bag’s lifespan with a five-minute wipe routine.

What Health Risks Hide Inside a Neglected Bag?
Neglected bags can shelter bacteria and mold spores that may transfer to food containers or fresh food. A sealed bag can get worse than an open one because trapped humidity keeps the interior damp.
- Bacterial growth increases in warm, dark, damp interiors.
- Odor buildup can signal mold or residue activity.
- Cross-contamination spreads from leaky containers to fresh food.
How Does Routine Care Extend Bag Lifespan?
Routine care can extend the useful life of your bag. Foam degrades more quickly when it stays wet, so drying matters as much as scrubbing.
Key Takeaway: Consistent daily wipe-downs give you cleaner food storage, longer product life, and one less thing to worry about at 7 a.m.
| Neglect Level | Typical Outcome | Bag Lifespan |
|---|---|---|
| No cleaning | Mold and sour smell in weeks | 3-6 months |
| Weekly clean only | Occasional odor, minor stains | 1-2 years |
| Daily wipe + weekly wash | Fresh interior, stable structure | 3-5 years |
The data above shows that a small daily habit can multiply your bag’s service life several times over.
What Tools Do You Need Before You Start Cleaning?
You need five simple items: mild dish soap, warm water, a soft sponge, an old toothbrush, and clean cloths. None of these cost more than a few dollars, and most sit in your kitchen already. Knowing how to wash lunch bag surfaces begins with picking gentle supplies that will not attack the waterproof lining.

Which Household Supplies Actually Work Best?
Basic pantry items can outperform harsh cleaners for lunch bag care. Kitchen-safe supplies clean well and do not leave strong chemical residue near your food.
- Mild dishwashing soap, fragrance-free preferred.
- White vinegar for natural disinfection.
- Baking soda for odor absorption.
- Soft microfiber cloths, not abrasive scrubbers.
What Cleaners Should You Avoid at All Costs?
Bleach, ammonia, and solvent-based sprays can damage insulation and PEVA linings. Even one harsh wash may crack the foam layer or weaken thermal performance.
Key Takeaway: The right toolkit is cheap, food-safe, and gentle on the materials that keep your food cold.
| Recommended | Avoid |
|---|---|
| Mild dish soap | Bleach |
| White vinegar | Ammonia sprays |
| Baking soda | Solvent cleaners |
| Soft sponge | Steel wool |
This side-by-side shows that food-safe supplies protect both your meal and your bag’s interior coating.
How to Wash Lunch Bag Interior Without Damaging Insulation?
Wipe the interior with a damp, well-wrung sponge dipped in warm soapy water. Never soak or submerge the bag unless the care label specifically allows it. Foam insulation can absorb water and take days to dry once saturated, which invites mildew. Understanding how to wash lunch bag linings the safe way keeps thermal performance intact for longer. Focus on stained corners, seams, and zipper channels where debris hides.

What’s the Right Wipe-Down Technique?
The correct technique uses light pressure, circular motions, and a barely damp cloth. Wringing your sponge until it stops dripping is the habit that separates careful cleaning from over-wetting.
- Wring sponge until only slightly damp.
- Wipe in small circles, not straight lines.
- Focus on seams, corners, and zipper base.
- Rinse cloth in clean water, then wipe again.
How Do You Reach Tight Corners and Seams?
Tight corners need an old, soft toothbrush and gentle scrubbing. Stiff bristles may tear coated linings, so soft is non-negotiable.
Key Takeaway: A damp, not wet, approach cleans thoroughly while protecting the foam that makes your bag work in the first place.
| Zone | Tool | Motion |
|---|---|---|
| Flat interior walls | Soft sponge | Small circles |
| Seams and corners | Soft toothbrush | Light back-and-forth |
| Zipper channel | Cotton swab | Sweep once, discard |
| Bottom panel | Microfiber cloth | Flat wipe |
This zone-by-zone breakdown shows that matching tool to surface protects both cleanliness and coating integrity.
How Do You Handle Stubborn Stains and Sticky Spills?
You handle tough stains with a baking soda paste, a soft brush, and patience, not aggressive scrubbing. Most stains lift after a short contact time if you use the right paste ratio. Sticky spills from yogurt, jam, or salad dressing need a slightly different treatment than dry crumbs.

What Removes Grease and Tomato Sauce Marks?
A paste of two parts baking soda to one part water lifts many grease and pigment stains. Store-bought stain removers may work faster, but they can leave residue near your food.
- Apply paste directly on the stain.
- Let sit ten minutes.
- Scrub gently with a soft toothbrush.
- Wipe clean with a damp cloth.
How Do You Rescue a Yogurt or Milk Spill?
Dairy spills demand immediate action because they curdle and smell within hours. Use cold water first, then warm. Hot water can set dairy proteins into the lining fibers.
Key Takeaway: Fast response plus the right pH-neutral paste beats harsh commercial cleaners for lunch bag stain removal.
| Stain Type | Best Treatment | Contact Time |
|---|---|---|
| Grease | Baking soda paste | 10 minutes |
| Tomato / marinara | Baking soda + drop of vinegar | 5 minutes |
| Yogurt / milk | Cold rinse, then mild soap | 3 minutes |
| Coffee / tea | Diluted vinegar wipe | 5 minutes |
The chart above shows that matching cleaner to stain chemistry cuts scrubbing time.
What’s the Right Way to Clean the Exterior Shell?
The right approach for the outer shell is a damp cloth with mild soap, followed by a dry buff. Outer fabrics like 600D polyester, RPET, and canvas handle water well but do not need direct soaking. The bottom panel gets the dirtiest since it touches counters, floors, and car seats. Learning how to wash lunch bag exteriors properly keeps colors sharp and helps prevent fabric fraying at stress points.

How Do You Clean Polyester and Canvas Panels?
Polyester and canvas both respond well to a diluted soap solution and a soft brush. Most exterior damage comes from over-wetting, not from dirt itself.
- Dilute a teaspoon of soap in one cup of warm water.
- Dip cloth, wring firmly, wipe in one direction.
- Focus on the bottom and handle base.
- Buff dry with a second clean cloth.
What Extra Care Do Printed Logos Need?
Printed logos, heat transfers, and embroidered patches need extra-gentle handling. Pressing lightly and avoiding scrubbing directly on print helps keep custom branding intact.
For buyers planning branded lunch bag programs, retail buyer scenarios can help connect cleaning expectations with shelf presentation and repeat use.
Key Takeaway: A dry-first, damp-second habit protects both the fabric color and any printed or embroidered branding.
| Exterior Material | Cleaning Method | Drying Note |
|---|---|---|
| 600D polyester | Damp cloth + mild soap | Air-dry flat |
| Canvas | Soft brush + diluted soap | Air-dry shaded |
| RPET recycled | Gentle wipe, cold water | Air-dry, no heat |
| Printed logo area | Blot, do not rub | Pat dry with towel |
This material table confirms that gentle, matched cleaning keeps your bag looking new from the shelf to daily use.
How to Wash Lunch Bag and Dry It the Correct Way?
You dry an insulated lunch bag by leaving it open, inverted, and in a well-ventilated spot for at least six hours. Drying is where many people fail, not washing. A properly cleaned but poorly dried bag can still grow mold.
Why Is Air Drying Non-Negotiable?
Air drying prevents trapped moisture from soaking the foam layer. Dryers, direct sun, and hair dryers can warp insulation and shrink linings.
- Open the bag completely, unzip fully.
- Prop it upside down over a bottle or rack.
- Aim a fan at it to speed the process.
- Wait until every corner feels dry.
How Do You Speed Up Drying Without Damage?
You speed up drying with airflow, not heat. A small desk fan can cut drying time compared with still air.
Key Takeaway: Patience during drying is what separates a bag that lasts for years from one that molds in months.
| Drying Method | Time to Dry | Risk to Bag |
|---|---|---|
| Open air, no fan | 8-12 hours | None |
| Open air + fan | 3-5 hours | None |
| Hair dryer, low heat | 1 hour | Foam warping |
| Clothes dryer | 30 minutes | Lining damage |
The table above makes it clear that airflow beats heat every time for safe, complete drying.
Can You Disinfect Without Harsh Chemicals or Bleach?
Yes, a fifty-fifty mix of white vinegar and water can disinfect safely for routine household care. Vinegar helps with many common odor and mold issues, no bleach needed. Food-safe disinfection matters most for parents packing kids’ meals daily.
How Does a Vinegar Spray Actually Work?
Vinegar’s acetic acid helps disrupt bacteria and mold on surfaces. If it leaves a smell, that smell usually fades after air drying.
- Mix one part vinegar with one part water.
- Pour into a small spray bottle.
- Mist the interior lightly.
- Wipe with a clean cloth, then air dry.
Are There Natural Alternatives for Sensitive Users?
Yes, several natural options work for vinegar-sensitive users. The choice often comes down to smell preference and material compatibility.
Key Takeaway: Vinegar wins on cost, safety, and usefulness for regular lunch bag disinfection.
| Disinfectant | Strength | Food-Safe |
|---|---|---|
| White vinegar 50/50 | Strong | Yes |
| Lemon juice + water | Mild | Yes |
| Hydrogen peroxide 3% | Strong | Yes, rinse after |
| Bleach | Very strong | No, damages foam |
This comparison shows that natural disinfectants can support daily use without the harsh chemical trade-offs.
How Often Should You Clean Your Insulated Lunch Bag?
Wipe the interior daily, deep-clean weekly, and disinfect monthly for a healthy, long-lasting bag. Frequency matters more than intensity. Small habits beat big scrubbing sessions every time. Skipping days lets residue build up until only aggressive cleaning removes it.
What Does a Daily Care Routine Look Like?
Daily care means a two-minute wipe with a damp cloth after unpacking. Once you build the habit, it feels no different from rinsing your coffee cup.
- Empty every container and wrapper.
- Shake crumbs into the trash.
- Wipe the interior with a damp cloth.
- Leave the bag open overnight.
When Should You Deep-Clean Instead?
Deep-clean weekly, or right after any liquid spill hits the lining. Waiting several days on a spill can lock the stain into the fabric or lining.
Key Takeaway: Build a rhythm: daily wipe, weekly wash, monthly disinfect, and you are much less likely to face a moldy bag.
| Frequency | Task | Time Required |
|---|---|---|
| Daily | Empty + wipe + air dry | 2 minutes |
| Weekly | Full interior wash | 15 minutes |
| Monthly | Vinegar disinfection | 20 minutes |
| As needed | Spill spot-treatment | 5 minutes |
The routine above shows how a few minutes each day prevent hours of scrubbing later.
What Care Habits Protect Your Bag for the Long Haul?
Long-term care habits include leak-proof containers, dry storage, and monthly odor checks. Most bag failures trace back to storage mistakes, not cleaning mistakes. Storing a damp bag zipped shut in a cupboard is the fastest way to grow mold on the inside.
How Should You Store Your Bag Between Uses?
Store your bag open, flat, and in a dry, ventilated cabinet away from direct sunlight. Sunlight can fade exterior fabrics and weaken plastic zipper teeth over time.
- Keep the zipper open at rest.
- Store on a shelf, not the floor.
- Add a small charcoal sachet inside.
- Avoid stacking heavy items on top.
What Small Habits Prevent Big Problems?
Small habits like packing food in leak-proof containers stop most stain problems at the source. A single silicone-sealed lid can save your bag from a full weekly deep clean.
Key Takeaway: Prevention beats cleaning. Pack smart, store smart, and your bag rewards you with years of service.
| Habit | Benefit | Effort Level |
|---|---|---|
| Leak-proof containers | Stops spills at source | Low |
| Open storage | Prevents mold | Low |
| Charcoal sachet | Absorbs odor | Very low |
| Sunlight avoidance | Preserves color | Low |
This habit list confirms that lunch bag longevity comes from small daily choices, not big cleaning sessions.
How Do You Know When It’s Time for a New Bag?
You know it is time for a new bag when odors return within a day, insulation feels lumpy, or the zipper fails to close. A well-made bag can last several years with basic care, so early failure may signal a quality problem rather than a cleaning problem. Learning how to wash lunch bag surfaces properly is only half the battle. The other half is buying a bag built to survive real daily use.
Persistent odors, foam lumps, and broken zippers are the three clearest retirement signals:
- Odor returns within twenty-four hours of cleaning.
- Insulation feels uneven or bunched.
- Zipper teeth skip or split.
- Lining shows tears or peeling coating.
Look for sealed-seam construction, thick foam, and durable outer fabric. Cheap bags can cost more over several years than one well-made bag. For online launches, e-commerce bag projects also need materials that photograph well and survive real customer routines.
| Warning Sign | Root Cause | Fix or Replace? |
|---|---|---|
| Odor stays after cleaning | Foam contamination | Replace |
| Bumpy insulation | Foam breakdown | Replace |
| Broken zipper | Hardware fatigue | Repair possible |
| Peeling lining | Coating failure | Replace |
Clean lunch bags mean cleaner food, better health, and a product that actually lasts. This guide walked you through daily wipe-downs, deep-clean routines, safe disinfection, correct drying, smart storage, and retirement signs. When the bag itself is engineered with sealed seams, food-safe linings, and rugged outer fabric, cleaning becomes a two-minute habit instead of a weekly battle. If you are sourcing a private label lunch bag that customers will love wiping down and using for years, contact us today.
FAQ
Can I put my insulated lunch bag in the washing machine?
Sometimes, but only if the manufacturer label says so. Machine washing can crack the foam insulation and warp the lining. Stick with hand wiping and use a gentle cold cycle only when the tag confirms it is safe.
What’s the best way to remove sour milk smell from a lunch bag?
White vinegar solves this problem fastest. Spray a fifty-fifty vinegar-water mix inside, let it sit ten minutes, wipe clean, and air dry overnight. The sour smell fades because vinegar neutralizes the acids that dairy leaves behind.
How do I know if mold has already ruined my lunch bag?
Check for black or green spots on the lining and a musty smell that returns within a day of cleaning. If either sign shows up, the mold may have reached the foam layer, and replacement is safer than trying to salvage it.
Can I use disinfectant wipes daily inside my lunch bag?
Yes, food-safe disinfectant wipes are fine for daily use. Pick alcohol-free, fragrance-free options, and always let the interior air-dry fully before you pack fresh food the next morning.
What’s the fastest way to dry a lunch bag before tomorrow morning?
Open it wide, prop it upside down, and aim a small fan directly at the interior. This can cut drying time from eight hours to about three, and your bag will be ready for a fresh lunch by breakfast.