
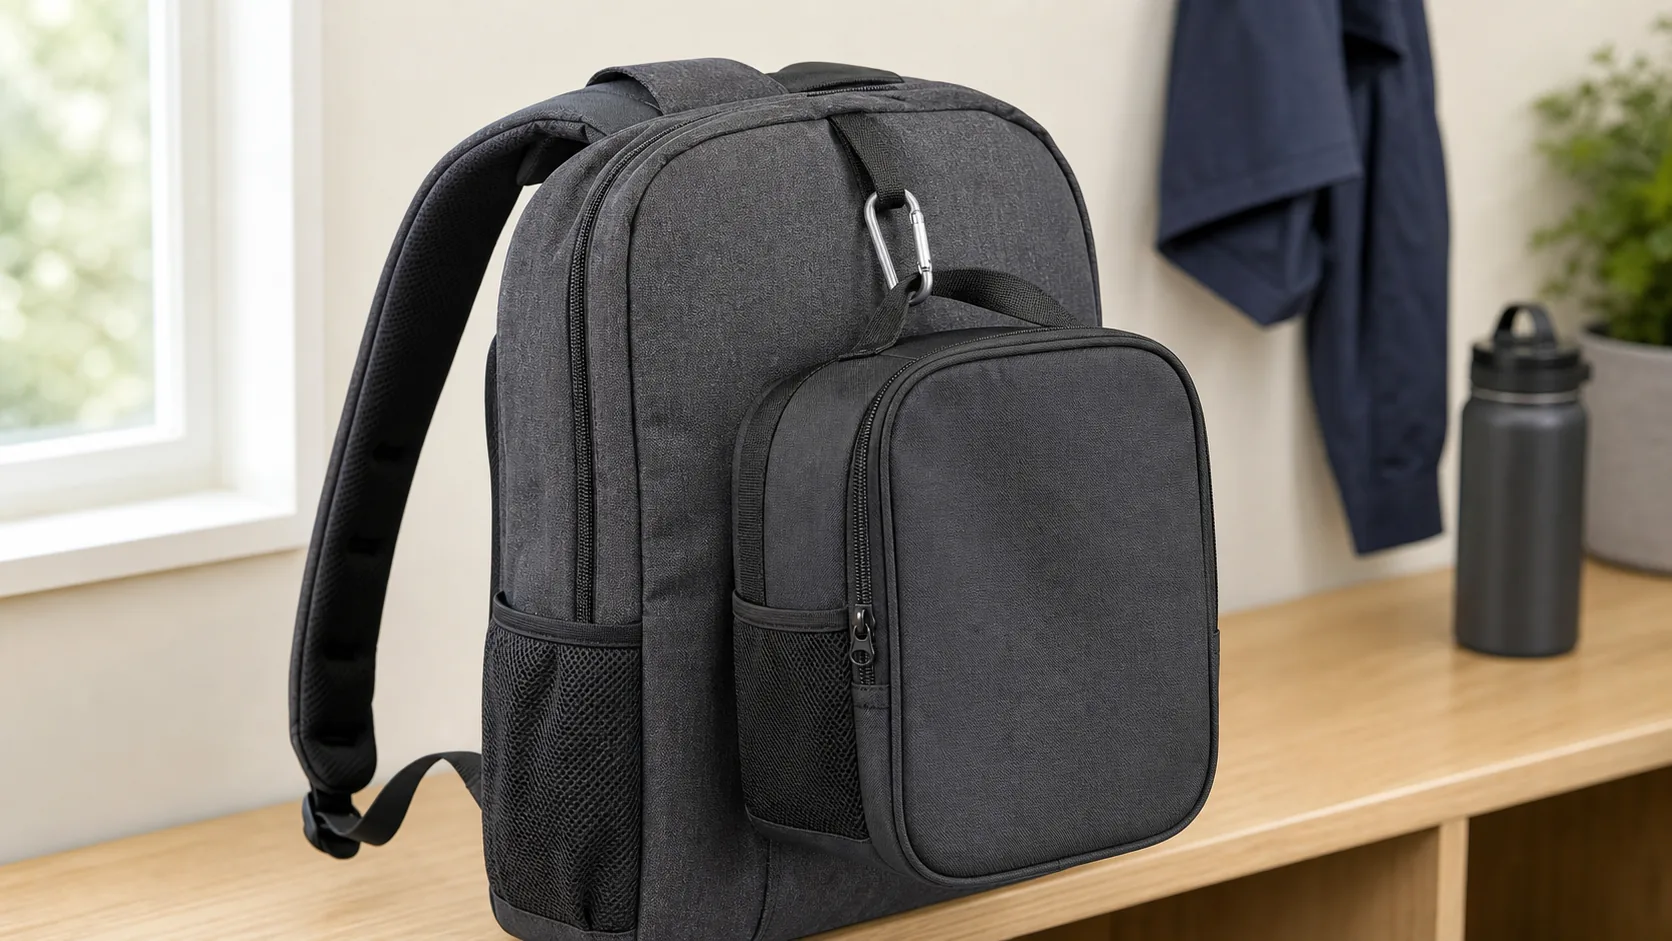
You can attach a lunch bag to a backpack with clips, loops, buckles, detachable sets, or a one-piece design. If you are comparing custom lunch bags for school, work, or retail use, you likely know that one bad setup can lead to leaks, swing, sore shoulders, and crushed food. A common scene proves it fast: you pack lunch in a rush, hook it on any strap, then watch it bounce into books, folders, or a laptop sleeve on your way out. This article shows ten clean ways to secure a lunch bag, keep movement low, and help you choose a setup that feels steady in daily travel.
How Can Clips Secure a Lunch Bag to a Backpack?

Clips can help how to attach lunch bag to backpack because they give you a fast hold with almost no setup time. A carabiner, snap clip, or swivel hook works well when your lunch bag has a firm handle and your backpack has a loop near its upper frame. a quick clip only works well when weight stays light and swing stays low.
What should you check before clipping?
Pick a clip that closes fully and does not press open under motion. Check handle stitching, loop thickness, and how far the lunch bag hangs from your back.
- Use a clip with a gate that shuts tight
- Pick a top loop, not a loose zipper pull
- Keep lunch weight light for daily use
Why do clips fail for some users?
Clips fail when a soft handle twists, a long drop lets the bag swing, or a weak loop takes all stress. a short clip path and a snug handle reduce bounce and keep food more level.
- Short hang length cuts sway
- Wide handles spread load better
- Firm lunch bags hold shape better
Key Takeaway: Clips suit quick school and office carry when your bag stays light and your hang point sits high.
| Check | Good Sign |
|---|---|
| Clip gate | Shuts tight |
| Hang length | Short drop |
| Load | Light meal |
That small checklist helps you avoid a shaky setup early.
Why Use Backpack Loops for a Lunch Bag?

Loops help how to attach lunch bag to backpack because they hold the lunch bag closer to the pack body. Sewn webbing, daisy chains, and side loops give a more stable anchor than random straps. less gap often means less swing.
Which loop placement works best?
Upper side loops and front webbing usually work best because they keep the bag from dragging. A center-facing point often feels cleaner than a low side point.
- Upper loops keep weight higher
- Front webbing helps visual order
- Low loops may hit your leg
What limits do built-in loops have?
Built-in loops work only if your lunch bag handle matches their size and angle. some loops look strong but were made for light add-ons, not a full meal.
- Test handle width against loop opening
- Avoid thin decorative loops
- Watch for twisting during walking
Key Takeaway: Loops are a solid pick when you want a neater fit and better control than a simple hanging clip.
| Loop Type | Best Use |
|---|---|
| Front webbing | Tight front carry |
| Side loop | Slim lunch bag |
| Upper loop | Short-hang setup |
That pairing works best with lunch bags that keep a slim profile.
Are Side Buckles Better for Daily Carry?

Side buckles are good for how to attach lunch bag to backpack when you want a cleaner lock and faster release. They suit users who pack often and want a repeatable setup that does not shift much during a walk. buckle quality and strap length shape the whole result.
What makes a side buckle setup feel secure?
A secure setup uses matched buckle halves, firm webbing, and enough strap tension to keep the lunch bag near the pack wall. This feels better than a free-hanging bag.
- Match buckle size on both sides
- Tighten webbing after each pack
- Keep bag close to outer panel
When do side buckles become annoying?
They become annoying when straps are too long, plastic feels weak, or attachment points sit too far apart. once adjusted, buckles save time and cut daily fuss for older kids, commuters, and teams packing on a schedule.
- Long straps raise bounce
- Weak plastic cracks under strain
- Poor spacing twists the lunch bag
Key Takeaway: Side buckles fit users who want a repeatable system with quick on and off use.
| Factor | Better Choice |
|---|---|
| Buckle body | Thick plastic or metal |
| Strap length | Short and snug |
| Bag distance | Close to pack |
That setup often feels smoother in busy morning routines.
Should You Choose a Detachable Lunch Bag Set?

A detachable set can help how to attach lunch bag to backpack because both pieces were built to work as one pair. Matching sets often look cleaner, pack faster, and hold position better than mix-and-match gear. For online sellers testing a matched school or office set, e-commerce bag projects also benefit from sample checks before a larger launch. fit matters more than style.
Why do matching sets feel easier?
Matching sets use shared dimensions, aligned fasteners, and a front mount that feels tidy in school or work settings. That reduces guesswork on day one.
- Fasteners line up from the start
- Front fit usually looks cleaner
- Packing feels faster for daily use
What trade-off comes with a detachable set?
The trade-off is bulk at the front panel and less freedom to swap lunch bag styles. Why that matters: one neat pair can still feel awkward if the lunch bag pushes too far out from your body.
- Front bulk may feel odd on stairs
- Fewer swap options limit flexibility
- Heavy meals may pull forward
Key Takeaway: A detachable set works well for users who want a matched look and low setup effort.
| Set Feature | User Benefit |
|---|---|
| Matched fasteners | Less trial and error |
| Aligned size | Cleaner carry |
| Fixed mount | Faster packing |
That makes detachable sets a strong pick for routine use, especially when a pilot order case needs to confirm daily fit, fastener strength, and customer comfort before scaling.
Is a Two-in-One Backpack Lunch Bag Smarter?

A two-in-one bag is smart for how to attach lunch bag to backpack because it removes the need for extra hooks and keeps the load built into one structure. A split design with a lunch zone and a book zone often feels more balanced than a bag hanging outside. control gets easier.
What does a two-in-one design do well?
It keeps lunch, books, and small gear in one frame while still giving each item its own space. That helps load placement and lowers side swing.
- One frame means less drift
- Split zones keep food apart from papers
- Carry posture often feels steadier
What is the weak side of this design?
The weak side is limited lunch space and less freedom to change meal size. for a normal workday or school day, that fixed structure can still feel cleaner than extra straps.
- Lunch area may feel small
- Thick containers may not fit
- You cannot swap sizes with ease
Key Takeaway: Two-in-one bags suit users who want the simplest carry pattern and less outside movement.
| Design Point | Result |
|---|---|
| Built-in lunch zone | Better control |
| Single frame | Less swing |
| Fixed size | Less flexibility |
That trade makes sense when stable carry matters more than bag swapping.
Can DIY Straps Work Safely?
DIY straps can work for how to attach lunch bag to backpack if you test them before daily use and keep your load modest. Velcro wraps, sewn tabs, and short webbing loops can turn a plain bag into a useful carry setup. homemade does not mean careless.
Which DIY parts are worth trying?
Short webbing straps, box stitching, and wide Velcro wraps tend to hold better than ribbon or thin cord. Soft ties slip more often and place too much stress on one point.
- Wide Velcro grips better
- Box stitching spreads strain
- Short straps reduce bounce
How do you test a DIY fix safely?
Test it with a full lunch at home, then walk stairs, sit down, and lift the backpack more than once. if a stitch pops or a wrap shifts, stop using it for daily carry.
- Load the bag fully
- Walk five to ten minutes
- Recheck all stress points
Key Takeaway: DIY works best as a low-cost fix when you test it hard before real use.
| DIY Part | Better Use |
|---|---|
| Velcro wrap | Light loads |
| Webbing strap | Daily carry |
| Thin cord | Avoid for meals |
That quick test saves you from a messy failure later.
How Do You Balance Lunch Bag Weight?
Weight balance shapes how to attach lunch bag to backpack because bad placement can pull your body off line. The best setup keeps the lunch bag close to your back, near the pack center, and high enough to avoid leg contact. short distance and even tension.
Where should the lunch bag sit?
It should sit high and close, not low and far out. A lunch bag that hangs near your hip line tends to knock against your side.
- Keep it near upper half of pack
- Avoid long front drop
- Tighten both shoulder straps
How do small habits change comfort?
Small habits matter because a neat setup can still feel bad if straps stay loose or one side takes all load. if you need how to attach lunch bag to backpack for warm meals, stable placement helps food stay level and cuts spill risk.
- Re-tighten straps after packing
- Keep heavier items near pack back panel
- Use slimmer containers for outside carry
Key Takeaway: Balance comes from high placement, short hang distance, and even strap tension.
| Balance Check | Better Result |
|---|---|
| High placement | Less swing |
| Tight straps | Better posture |
| Close load | More comfort |
Those small changes often do more than a new clip or buckle.
How Do Leaks Change the Attachment Method?
Leaks affect how to attach lunch bag to backpack because a spill can soak books, stain fabric, and leave odor trapped in seams or foam. A weak attachment system makes that worse since motion pushes liquid into corners and zipper lines. Even a good carry method fails if the lunch bag leaks.
What lunch bag build cuts mess best?
A wipe-clean lining, sealed seam area, and leak-resistant base lower the chance of spread. Shape matters too because a bag that stays upright protects soups, sauces, and fruit cups better.
- Pick wipe-clean lining
- Look for tight seam finish
- Favor upright bag shapes
How should you clean after a spill?
Clean fast with warm soapy water, wipe all inner surfaces, and leave the bag open until fully dry. trapped moisture feeds odor and mold far faster than most users expect.
- Wipe right after a spill
- Dry with zipper fully open
- Check corners and seam folds
Key Takeaway: Leak control starts with bag build, yet daily wipe care keeps small spills from turning into a bigger mess.
| Spill Issue | Fast Fix |
|---|---|
| Sauce leak | Wipe at once |
| Sour smell | Full air dry |
| Wet corners | Open and dry flat |
That care habit protects both lunch gear and backpack fabric.
What Bag Size and Setup Mistakes Matter Most?
Bag size matters for custom lunch bags because a lunch bag that is too wide, too tall, or too soft becomes hard to anchor. A compact, upright lunch bag usually sits better on school and commuter packs than a broad tote shape, and retail buyer scenarios often reward that kind of clear shelf-ready size match. Match scale before you match style.
Which size match feels cleanest?
A medium lunch bag on a medium backpack often feels best because it does not block pockets or hang below the pack base. Shape alignment matters as much as volume.
- Match lunch width with pack front width
- Avoid bags taller than front panel
- Keep depth modest for walking space
Does meal type change size choice?
Yes, meal type changes size choice because warm food, cold packs, and boxed meals take up space in different ways. a stable size match helps food stay in place and keeps carry lines neat for school, office, and travel use.
- Bento meals need flat width
- Soup meals need upright depth
- Snack packs fit slim designs
Key Takeaway: The right size feels close, clear, and easy to carry without blocking normal backpack use.
| Meal Style | Better Shape |
|---|---|
| Bento box | Wide and flat |
| Soup jar | Tall and upright |
| Snacks | Slim profile |
That quick size match improves both comfort and food stability.
Which mistakes ruin a lunch bag attachment setup?
Loose clips, weak stitching, bad placement, and overloading ruin how to attach lunch bag to backpack faster than anything else. Many users blame the lunch bag when the real issue comes from one poor connection point or a meal that is too heavy for the setup. small errors pile up fast.
What errors show up most often?
The most common errors are clipping onto zipper pulls, hanging too low, and trusting thin handles with full meal weight. Those choices raise swing and strain.
- Never clip onto a zipper pull
- Avoid low side drag
- Do not overload soft handles
How do you spot a bad setup early?
You can spot it early if the bag twists while walking, bumps your leg, or leaves strap marks after a short trip. if a setup feels noisy, uneven, or unstable at home, it will feel worse outside.
- Watch for twisting
- Check for leg contact
- Repack if one side drops
Key Takeaway: Most failures come from bad fit, not bad luck, so a short home test can save your lunch and your backpack.
| Mistake | Likely Result |
|---|---|
| Zipper-pull clip | Fast failure |
| Low hang | Leg bump |
| Overload | Stitch strain |
That quick review makes your next setup far more reliable.
Final Thoughts
How to attach a lunch bag to a backpack comes down to fit, load control, leak resistance, and daily comfort. Clips suit light meals, loops and buckles give better hold, detachable sets feel tidy, and two-in-one bags cut outside swing. If you want a cleaner carry system for school, office, retail, or private label planning, contact us today and discuss a bag setup that supports stable carry, easier cleaning, and a better user experience. Good bag design should help people move through a busy day with less mess, less strain, and more trust in what they carry.
FAQ
Q1: Can I hang a lunch bag from one strap only?
Yes, but only for very light loads. One-side carry often twists the backpack and raises swing, so a centered or two-point hold feels better.
Q2: What’s the best spot for a lunch bag on a backpack?
The best spot is high and close to the pack body. That position cuts bounce, lowers leg contact, and helps posture feel more even.
Q3: How do I know if a buckle setup feels too loose?
It is too loose if the lunch bag swings, twists, or drops after a few minutes of walking. Tighten the webbing and move the anchor point higher.
Q4: Can I use a lunch bag and backpack for school every day?
Yes, if the load stays moderate and the attachment point stays strong. Daily use works far better with leak-resistant lining and a short hang path.
Q5: What’s the best way to stop leaks and odor?
The best way is a sealed lining, upright packing, and fast wipe-down care after each spill. A full air dry helps stop sour smell from building up.