
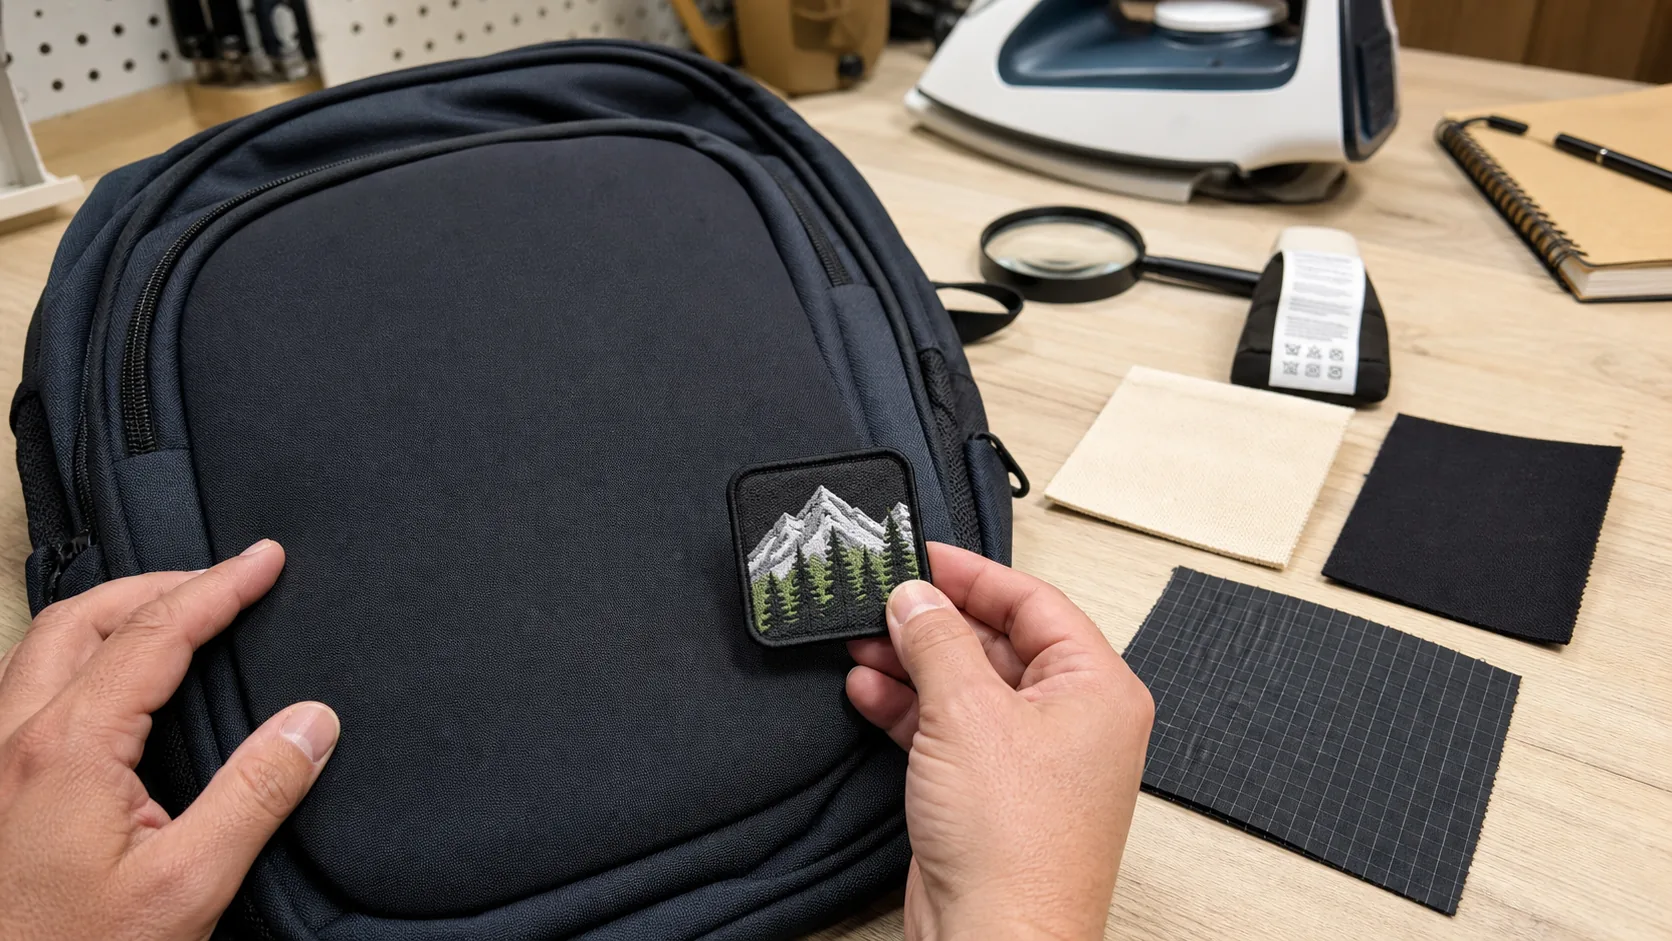
To iron on patches on a backpack, first confirm that both the backpack maker and patch supplier permit heat application. Then clean and flatten a compatible single-layer panel, position the patch, cover it with the specified pressing barrier, and apply dry heat, pressure, and cooling time exactly as the patch instructions require. If either product prohibits ironing or does not provide a safe process, use sewing, hook-and-loop, or another approved attachment method instead.
You know how frustrating it is when a batch of freshly decorated backpacks is damaged by heat that melts synthetic fabric, collapses foam, or delaminates a coating. This mistake destroys margins and delays client shipments. The safe method depends on the complete panel construction, not just the fiber name.
A structured compatibility and sample-testing process can reduce these failures. This guide explains the tools, placement checks, application sequence, maintenance, repair options, and production decisions that support a consistent result without promising that every backpack can be safely ironed.
Is Fabric Ready for How to Iron on Patches on Backpack?
You must check the backpack care label, material specification, coatings, foam, and patch instructions before applying heat. When you learn how to iron on patches on backpack, recognize that tactical and sports bags may combine several materials with different heat limits. Skipping this assessment can melt fibers, distort foam, delaminate coatings, or weaken seam tape.

Natural fibers often accept heat-activated adhesives more readily, whereas technical synthetic shells require precise compatibility checks. Verify whether you are dealing with polyester, nylon, canvas, cotton, a blend, or a laminate before plugging in the iron. This preliminary step protects the inventory and supports a consistent application.
Can Synthetic Fibers Handle High Iron Heat?
Proceed with extreme caution because lightweight nylon and polyester can soften, glaze, shrink, or melt before an adhesive activates. Coatings, laminated membranes, foam, reflective trim, and seam tape may fail at a different temperature from the face fabric.
Use heat only when the backpack and patch instructions provide a compatible range. A pressing barrier reduces direct contact but does not make an incompatible fabric safe.
- Confirm the exact fabric, coating, and patch adhesive before choosing heat.
- Use the pressing cloth or release sheet specified by the patch supplier.
- Start with a sample panel or approved hidden test area when possible.
- Avoid direct heat on thin ripstop nylon, laminated shells, reflective trim, or unknown coatings.
Why Do Cotton and Canvas Provide Safest Bonds?
Heavy canvas or cotton often tolerates heat better than lightweight synthetic shells and provides a textured surface for adhesive bonding. Even these materials may include finishes, printed graphics, foam, or blended fibers that scorch or distort, so they still require confirmation and testing.
Apply only the pressure required by the patch instructions on a stable surface; excessive body weight can damage hardware, pocket structure, or the work surface.
- Canvas texture can support adhesive contact when it is clean and flat.
- Cotton-rich fabrics may accept heat more readily than coated synthetics.
- Finishes, blends, prints, and interior components can still limit the safe setting.
How Do You Perform a Safe Fabric Spot Test?
Do not skip compatibility testing. The best test uses the production fabric, coating, padding, patch, adhesive, barrier, equipment, and settings on a sample panel. For a finished personal bag, use an inconspicuous single-layer area only when the manufacturer permits it; avoid testing directly over coatings, foam, seams, or linings.
This preventative check can identify discoloration, shrinkage, surface shine, coating transfer, foam collapse, or loss of flexibility before a full batch is exposed.
- Record the approved temperature, dwell time, pressure, barrier, and cooling time.
- Inspect the face and reverse sides under bright light.
- Check flexibility, color, coating adhesion, seam tape, and nearby padding.
| Fabric Type | Heat Tolerance | Recommended Settings | Risk Level |
|---|---|---|---|
| Cotton Canvas | Often higher | Follow patch and bag instructions | Lower, but finishes still matter |
| Heavy Polyester | Variable | Sample-test the complete panel | Medium to high |
| Ripstop Nylon | Often low | Prefer sewing or hook-and-loop unless approved | High |
Which Backing Fits How to Iron on Patches on Backpack?
You must select a patch backing that matches your backpack’s daily use patterns and fabric limits to ensure a lasting bond. When you evaluate how to iron on patches on backpack setups, you will find options ranging from heat-activated adhesives to modular hook-and-loop backings. Choosing the wrong backing can lead to premature peeling or ruin your ability to swap designs easily.

You want to balance cosmetic goals with long-term structural integrity when making this decision. By selecting the correct backing type, you ensure your branding remains intact during rugged daily activities.
What Is the Secret of Glue Backing?
Heat-activated backing uses a thermoplastic adhesive film that softens under a specified combination of heat, pressure, and time, then sets as it cools. Too little energy can leave edges loose, while too much can force adhesive outward or damage the bag.
You can achieve a very clean, low-profile look with this method because it requires no visible stitching on your bag.
- Thermoplastic glue provides a stiff, flat base that holds the patch shape beautifully.
- You do not need professional sewing skills to achieve an excellent initial bond.
- The adhesive layer is pre-applied to the patch back for maximum convenience.
Why Choose Hook-and-Loop Panels?
Hook-and-loop backing provides modular flexibility for a customizable backpack line. Customers can swap designs quickly when a permanent loop panel is sewn onto the bag and the patch uses a compatible hook backing.
You will find this method particularly popular among tactical gear brands, fitness clubs, and school teams.
- Hook-and-loop systems bypass the risk of heat damage to synthetic bag shells entirely.
- You can change branding or team names without needing an iron.
- The physical connection can suit repeated outdoor use when the loop panel and stitching are specified and tested correctly.
Is Sewing Backing a Stronger Alternative?
Sewing often provides stronger long-term retention than adhesive alone because thread creates a mechanical connection. It is commonly preferred for rugged use, but needle holes can affect coatings or water resistance and must be planned before construction.
You can combine a light iron-on process to hold the patch in place before you run it under your sewing machine needle.
- Stitched borders resist edge lifting when thread, stitch pattern, and seam allowance are correct.
- Washing durability still depends on the patch, thread, fabric, and care instructions.
- Waterproof or laminated fabrics may need sealed needle holes or a different attachment system.
| Backing Type | Best Application | Durability Rating | Customization Speed |
|---|---|---|---|
| Thermoplastic Glue | Casual / Promo Bags | Moderate | Fast (Iron-on) |
| Hook-and-Loop | Tactical / Modular Gear | Very High | Instant (Swap-on) |
| Sew-On Border | Rugged / Outdoor Packs | Maximum | Slow (Stitched) |
What Tools Support How to Iron on Patches on Backpack?
You need a reliable heat source, a protective pressing cloth, and a firm, flat backing surface to achieve a professional-grade patch installation. Preparing your workstation properly before you attempt how to iron on patches on backpack projects will prevent accidental scorch marks and uneven adhesion. If you try to cut corners with improvised household tools, you will likely end up with ruined gear.

You must ensure every tool in your setup is calibrated to distribute heat and pressure uniformly. By gathering the right equipment first, you streamline your workflow and secure clean, permanent results.
Is a Home Iron or Heat Press Best?
A commercial heat press generally provides more repeatable temperature, dwell time, and pressure than a home iron. A dry home iron may work for one approved patch on a simple flat panel, while production runs usually benefit from controlled heat-press equipment and documented settings. A heat press is not safe merely because it is precise; the bag must still be compatible.
You must choose the tool that fits your scale of operations to avoid inconsistent adhesive bonds.
- Heat presses can distribute heat more evenly across a flat patch.
- Home irons require careful stationary pressure, not unsafe full-body force.
- Digital controls improve repeatability but do not prevent an incorrect setting.
Why Do You Need a Pressing Cloth?
Place the specified pressing cloth or release sheet between the heat source and patch assembly. This barrier protects embroidery and bag fabric from direct contact with the hot plate, although it does not compensate for an unsafe temperature.
Use the clean cotton cloth or release sheet specified by the patch supplier. Do not substitute an unknown synthetic scrap that may melt, and do not assume every parchment or coated sheet is rated for the process.
- A cotton cloth distributes heat evenly to prevent localized hot spots.
- Teflon sheets prevent stray adhesive from sticking to and ruining your iron face.
- A clean barrier keeps dust and lint from bonding into your liquid glue layer.
Which Pressing Surface Is Ideal?
Use a firm, flat, heat-resistant surface that supports the target panel without crushing zippers, buckles, foam, or internal dividers. A soft ironing board can reduce pressure uniformity, while an unprotected table may be damaged by heat.
You will find that a firm backing allows the heat to bounce back, speeding up the overall glue activation process.
- A solid wooden cutting board placed inside the bag pocket provides excellent support.
- Heavy-duty workbenches prevent rocking and allow you to apply maximum body weight safely.
- Heat-resistant silicone mats protect your workstation from high temperatures.
| Tool Required | Ideal Specification | Primary Function | Substitutes to Avoid |
|---|---|---|---|
| Heat Source | Controlled dry heat within approved range | Activate glue | Uncontrolled heat sources |
| Pressing Cloth | Teflon or Clean Cotton | Protect Fibers | Thick Towels / Synthetic Scraps |
| Support Surface | Hard Wood / Steel Table | Maintain Pressure | Soft Padded Ironing Boards |
How to Iron on Patches on Backpack Step-by-Step?
You must follow a precise sequence of cleaning, positioning, heated pressing, and cooling to achieve a durable, factory-grade patch bond. When you execute how to iron on patches on backpack protocols, rushing through any step will lead to misaligned graphics or peeling edges. If you follow this professional methodology, you will create custom gear that looks clean and lasts for years.

You should prepare your workspace and read through each step before turning on your heat source. By applying disciplined execution to every phase, you secure a reliable result on any bag.
How Do You Align the Patch Accurately?
You must clean the target backpack surface and secure your patch in place using heat-resistant tape before applying your iron. once that thermoplastic glue melts, you cannot reposition the patch without leaving a messy adhesive residue behind. You can use a ruler or tailor’s chalk to mark the exact center of your pocket panel to ensure balanced alignment.
You should step back and visually verify the placement from a distance to make sure the angles look straight.
- Wipe the fabric surface with a dry cloth to remove dirt, grease, and dust.
- Secure the patch edges with temporary heat-resistant tape to prevent shifting.
- Use a small wooden block inside the pocket to push the target panel completely flat.
What Are the Heat and Timing Rules?
Apply steady vertical pressure at the exact temperature and dwell time stated for the patch and verified on the bag material. Too little heat may leave edges loose; too much may force adhesive outward or damage the fabric. Hold the iron or press stationary rather than rubbing, and use only the required pressure.
Do not automatically heat the reverse side. Interior coatings, foam, linings, printed labels, and seam tape may be more heat-sensitive than the outer fabric. Use reverse-side heat only when both manufacturers permit it and the sample test confirms it.
- Set dry heat to the tested value specified for the exact patch and fabric.
- Press for the approved dwell time over the specified barrier.
- Use reverse-side heat only when the panel construction is confirmed safe.
Why Is Curing Time So Important?
Allow the patch and bag to cool flat and undisturbed for the time stated by the adhesive supplier. Do not flex or pull the edges while the adhesive is warm. Some systems reach handling strength after cooling but require a longer cure before washing or heavy use.
You will achieve maximum bond strength by leaving the bag flat and undisturbed in a cool, dry room.
- Record the supplier’s handling and full-cure times.
- Avoid heavy loading until the required cure is complete.
- Keep the patch dry and flat during the specified cooling period.
| Phase | Duration | Core Action | Vital Checklist Item |
|---|---|---|---|
| Alignment | 2-3 Minutes | Clean, center, and tape | Ensure panel is completely flat |
| Heat Press | Supplier-defined dwell time | Press steadily without rubbing | Use verified dry-heat settings |
| Curing | Adhesive-specific | Rest bag flat in a suitable area | Do not pull warm patch edges |
Why Do Errors Happen in How to Iron on Patches on Backpack?
Errors happen because of improper moisture control, uneven heat distribution, and selecting incorrect temperature settings for synthetic fabrics. When you study how to iron on patches on backpack production models, you will notice that minor setting adjustments make the difference between a ruined bag and a premium product. If you fail to account for these microscopic environmental variables, your adhesive will quickly break down.

You must identify these common failure points so you can train your team or adjust your personal setup accordingly. By understanding why errors occur, you can easily implement preventative steps to maintain consistent custom quality.
How Does Steam Ruin the Glue Bond?
Steam can interfere with many hot-melt patch systems and may introduce moisture or uneven heat. Unless the patch instructions explicitly call for steam, use a dry process and ensure the panel and pressing barrier are clean and dry.
Empty the iron’s water reservoir and disable automatic steam when the approved process requires dry heat.
- Disable the automatic steam trigger on your iron panel.
- Ensure your pressing cloth and backpack panel are completely dry before heating.
- Avoid working in highly humid environments that introduce moisture into fabric weave.
Does Uneven Pressure Cause Peeling?
You will experience premature edge peeling if you apply heat with an uneven hand or fail to press the outer border of your patch firmly. the edges of a patch are the first areas to catch on clothing or gear straps during daily transit. If those borders do not receive identical heat and force, they will curl up and trap dirt, ruining the adhesive.
Pay special attention to pointed corners on star, square, or complex custom-shaped patches.
- Use a small flat platen or controlled iron position to cover edges without concentrating unsafe heat at one point.
- Place a small wood block inside the bag to counter any interior seam bulges.
- Inspect the patch perimeter post-pressing to ensure no tiny gaps remain.
Why Does High Heat Burn Synthetic Bags?
You will end up with warped, shrunken, or melted backpack panels if you apply excessive heat to popular synthetic fabrics like polyester. synthetic fibers are essentially spun plastics, meaning they have a low melting point compared to cotton canvas. If your iron heat exceeds this point, you will permanently disfigure the bag structure and ruin your customer’s order.
For heat-sensitive synthetics, use a verified low-temperature adhesive system or select sewing, hook-and-loop, or another approved method.
- Do not use one universal polyester temperature; verify the exact finished material.
- Apply only the tested dwell time for the approved patch and panel.
- Use the pressing barrier specified for the process.
| Failure Point | Direct Cause | Visual Result | Actionable Prevention |
|---|---|---|---|
| Moisture Trap | Steam Iron Usage | Bubbles & fast peeling | Empty iron reservoir completely |
| Uneven Force | No Backing Support | Border lifting | Insert flat wooden board inside pocket |
| Excessive Heat | Uncalibrated or wrong setting | Melted / shrunk fabric | Test and document the complete process |
Where Is the Best Spot to Iron on Patches on Backpack?
The best spots to place patches are wide, flat, single-layer fabric panels like front utility pockets and side accessory sleeves. When you plan your layout for how to iron on patches on backpack gear, you must consider physical access as much as visual style. If you choose a complex, curved area with multiple interior layers, you will struggle to apply flat heat.
You should map out your patch positions to avoid zipper paths, internal lining seams, and plastic buckles. By selecting highly accessible panels, you make the application process faster and far more reliable.
Why Are Front Pockets Ideal?
Front utility pockets often provide an accessible and visible location for custom brand patches. When the pocket can be isolated safely, a heat-resistant insert can support a flat pressing surface and help protect internal dividers or laptop sleeves.
You can display your team logo or brand identity proudly where it will receive maximum public exposure.
- Front pockets offer single-layered fabric zones that transmit heat cleanly.
- You can easily slide your hand inside to verify if the adhesive has bonded correctly.
- This location keeps your design centered and balanced for a professional aesthetic.
Should You Place Patches Near Seams?
You must avoid placing patches directly over or near thick structural seams, zippers, and heavy piping lines. these raised features create uneven ridges that lift your iron face off the flat parts of the patch. If your iron is held up by a thick seam, the neighboring flat adhesive won’t receive the pressure it needs to melt.
You should maintain at least a one-inch safety margin away from any major backpack seams.
- Steer clear of corner joints where three or more fabric panels meet.
- Keep patches away from zipper tape, as heat can warp the plastic teeth.
- Avoid placing adhesives directly over high-stress strap attachment points.
What Flat Panels Provide Best Support?
You will find that large side panels and flat top lids offer excellent alternative zones for showcasing custom embroidered designs. these flat areas allow you to use large heat press platens without interference from straps or metal hardware. If you are handling custom school bags or travel packs, utilizing these broad, flat spaces simplifies bulk manufacturing operations.
You must ensure that the interior side of these flat panels does not feature synthetic coatings that could melt.
- Side pockets offer excellent flat real estate for vertical or narrow rectangular patches.
- Top storm flaps provide a prominent, high-visibility canvas for main corporate logos.
- Flat back-panels (above the lumbar padding) accommodate wide, statement-making designs.
| Ideal Location | Accessibility Rating | Best Patch Shape | Placement Hazards to Avoid |
|---|---|---|---|
| Front Pocket | Excellent | Round / Square | Zipper teeth and internal mesh dividers |
| Side Panel | High | Vertical / Rectangular | Elastic bottle-holder bands |
| Top Lid Flap | Moderate | Horizontal / Oval | Plastic adjustment buckles |
How Do You Wash After How to Iron on Patches on Backpack?
Follow the backpack and patch care instructions after heat application. Spot cleaning or gentle hand washing is often the lower-risk choice for adhesive patches, but some products permit machine washing after a specified cure. Use the most restrictive instruction when the two labels differ.
You want to educate your retail customers on proper care techniques to minimize return rates and complaints about peeling. By practicing safe maintenance habits, you extend the operational life of both the bag and its custom branding.
Why Is Machine Washing Dangerous?
Machine agitation, warm water, and spin cycles can stress some thermoplastic bonds and embroidered edges. Do not machine wash unless both the bag and patch instructions permit it, and follow any temperature, cycle, and protection requirements they specify.
For an unknown adhesive system, treat machine washing as a higher-risk option and begin with spot cleaning.
- High spin cycles create mechanical stress that snaps delicate embroidery threads.
- Some detergents, bleaches, or solvents may affect adhesive, color, or coating.
- Heavy tumbling causes metal zipper pulls to strike and scratch your patch designs.
How Do You Spot-Clean Your Bag Safely?
Clean the customized bag by gently wiping dirty areas with a damp microfiber cloth and a small amount of cleaner permitted by the care label. This localized method removes mud, dust, and stains without soaking the patched panel. Work carefully around the patch edge to avoid lifting the border.
You can keep your backpack looking brand new without ever submerging the structural backing material in water.
- Mix warm water with a tiny drop of gentle dish soap or baby shampoo.
- Use a soft-bristled toothbrush to scrub fabric areas away from the patch edges.
- Wipe away soapy residue with a clean, damp cloth and pat dry immediately.
When Is Air Drying the Safer Choice?
Dryer heat and tumbling can soften some adhesives, distort foam, and damage coatings. Unless the care labels explicitly allow tumble drying, air-dry the backpack away from strong heat.
You should hang your bag upside down in a well-ventilated indoor space to dry naturally and safely.
- Hang the backpack by its grab handle over a tub or shower basin.
- Open all zippers and pockets wide to speed up the natural drying process.
- Keep the drying bag out of direct, intense sunlight to prevent fabric UV fading.
| Cleaning Method | Structural Risk | Fabric Safety | Recommended Usage |
|---|---|---|---|
| Spot-Cleaning | Minimal | Maximum | Frequent maintenance / mud removal |
| Hand-Washing | Low | High | Occasional seasonal deep cleaning |
| Machine Washing | Product-dependent | Variable | Use only when both care instructions permit |
Is Stitching Better Than How to Iron on Patches on Backpack?
Stitching usually provides stronger long-term edge retention for heavy-duty use, while iron-on application can be faster and leave no visible thread on the reverse side. The choice should reflect material construction, water-resistance requirements, production volume, and the target market’s durability expectations.
You should understand how these two methods compare to make smart production and design choices for your brand. By choosing the right method for the right application, you optimize both manufacturing costs and customer satisfaction.
Why Does Stitching Usually Last Longer?
Sewing creates a mechanical connection that does not depend on a hot-melt bond. It can still fail through thread abrasion, poor stitch balance, insufficient seam allowance, fabric tearing, or unsuitable wash conditions.
For rugged products, validate the patch, thread, stitch pattern, base fabric, and needle-hole sealing under the intended use and care conditions.
- Industrial lockstitching prevents the unraveling of borders even if a single thread snaps.
- Stitched borders flex naturally with the bag material without cracking or warping.
- You do not risk scorching or discoloring expensive synthetic fabrics during installation.
What Are the Iron-On Speed Benefits?
Heat-seal backing can reduce application time when the panel is compatible and the process has been validated. Actual cycle time and cost depend on alignment, preheating, dwell time, cooling, inspection, rejects, and equipment.
You can customize blank backpacks on-demand as orders arrive, reducing your upfront inventory holding costs.
- The application takes a fraction of the time required to set up a sewing machine.
- You do not need to open the bag’s main seams to access tricky panel locations.
- Iron-on backings provide an incredibly clean, stitch-free appearance on the inside of pockets.
How Do You Combine Both for Strength?
A hybrid method can hold a compatible patch flat before perimeter stitching. Use heat only when approved, and confirm that the adhesive does not contaminate the needle, distort the panel, or interfere with seam sealing.
The hybrid method should be validated against a stitched-only and adhesive-only control rather than assumed to be universally strongest.
- Use the approved temporary-tack setting or another positioning method.
- Run a tight border stitch or satin stitch around the patch perimeter.
- Secure the thread ends with a simple lockstitch to prevent unraveling over time.
| Feature Comparison | Iron-On Adhesives | Sew-On Thread | Hybrid (Both) |
|---|---|---|---|
| Assembly Time | Usually faster after validation | Slower and skill-dependent | Adds both process steps |
| Lifespan | Adhesive- and use-dependent | Stitch- and fabric-dependent | System-dependent |
| Material Fit | Heat-compatible panels only | Broad, but coatings need review | Compatible panels only |
How Can You Fix Errors in How to Iron on Patches on Backpack?
Some application errors can be fixed by repeating the approved heat process or using a compatible repair adhesive. A small-batch product testing example can help product teams identify edge lifting, color change, residue, or panel distortion before scaling production.
A bag does not always need to be discarded because a corner lifted during cooling. Assess the fabric and adhesive first, then use only the approved repair process.
How Do You Re-Press Lifting Edges?
If the supplier permits re-pressing, clean the lifted area, replace the approved pressing barrier, and repeat the validated setting. Do not concentrate untested high heat through a narrow iron tip because it can scorch the patch edge or melt the panel.
You must ensure that no dust or lint has accumulated under the lifting edge before you attempt to press it down.
- Use a small, soft brush to sweep away any debris from under the loose border.
- Apply even pressure for the supplier-approved dwell time.
- Keep the edge flat while it cools, using a safe release sheet and flat tool if specified.
When Should You Use Fabric Glue?
Consider flexible fabric adhesive when the patch supplier recommends it and the glue is compatible with the bag’s fiber, coating, color, and care process. Repeated reheating can damage both the original adhesive and the backpack, so stop after the approved retry limit.
Liquid adhesive is not automatically safe for heat-sensitive synthetics; solvents can stain, stiffen, or delaminate some coatings.
- Choose an adhesive with documented compatibility and the required water resistance.
- Apply a thin, even layer of adhesive under the loose patch edges using a toothpick.
- Hold or clamp the edge as instructed and allow the specified cure time.
Can You Safely Remove a Patch?
Patch removal can leave adhesive residue, color shadows, coating damage, needle holes, or torn fabric. Do not assume that reheating and pulling with pliers is safe. Follow the adhesive supplier’s removal guidance, test on a sample, and consider professional repair for coated, laminated, padded, or valuable bags.
Use an adhesive remover only when its manufacturer confirms compatibility with the exact fabric and coating. Ventilate the area, follow the safety data and label, and test for color change.
- Protect hardware, lining, foam, and nearby graphics before any approved removal step.
- Lift an edge only with a tool that will not cut the fabric.
- Stop if the coating, color, or weave begins to move with the patch.
| Error Encountered | Immediate Solution | Primary Tool | Time Required |
|---|---|---|---|
| Lifting Border | Approved re-pressing | Flat heat source + barrier | Setting-specific |
| Failed Adhesive | Compatible repair adhesive | Tested fabric glue | Cure-specific |
| Crooked Alignment | Assess removal risk | Supplier method or repair service | Condition-specific |
How Do You Achieve Consistent Custom Gear Production?
Brands can improve consistency by defining the patch system during backpack development rather than adding an unknown adhesive to finished inventory. Factory planning can reserve flat application zones, select compatible materials, add hook-and-loop panels, or specify perimeter stitching before the bag is assembled.
Building customization into the specification also makes testing, inspection, work instructions, and product-care guidance easier to control. For online launches, e-commerce bag projects benefit from clear material claims and photographs that show the actual attachment method.
How Do We Resolve Sourcing Challenges?
Combining bag production and patch installation with one qualified supplier can reduce handoffs and make responsibility clearer. The project should still define approved materials, patch position, attachment method, inspection criteria, packaging, and handling.
Confirm commercial terms and capabilities for the specific project rather than relying on generic promises.
- Confirm MOQ, sampling time, and capacity in the written quotation.
- Approve a physical sample made with production-intent fabric, patch, and attachment settings.
- Request current certification documents when a standard or audit is required.
What Is Our Commitment to Your Brand?
Your brand’s reputation depends on the physical durability and visual finish of the delivered gear. The inspection plan should define patch alignment tolerance, edge adhesion or stitch quality, heat damage, color change, residue, panel distortion, and sampling frequency.
Inspection cannot guarantee zero defects, so acceptance criteria and corrective-action steps should be agreed before production.
- Select fabrics using the required abrasion, coating, colorfastness, and attachment tests.
- Review patch zones before pattern and pocket construction are frozen.
- Confirm communication, shipment terms, and quality responsibilities in the order documents.
Why Is Partnering with Us Your Best Step?
Factory integration is especially useful when the product needs sewn patches, modular loop panels, embroidery, or repeatable heat-press fixtures. Compare the installed samples and test results before selecting the method.
The goal is to reduce melted panels, peeling edges, crooked placement, and inconsistent care instructions through design and process control.
- We offer fully integrated production lines from fabric cutting to custom embroidery.
- Select fabrics and patch systems that pass the approved compatibility test.
- Confirm capacity and seasonal lead times for the specific order.
| Sourcing Challenge | Factory Solution | Brand Benefit |
|---|---|---|
| Melted Fabrics | Compatibility testing and approved materials | Lower reject risk |
| Peeling Adhesives | Validated heat process or perimeter stitching | Better retention |
| High Setup Costs | Consolidated planning and repeatable fixtures | More predictable costing |
For a project that needs patch-ready panels, hook-and-loop zones, embroidery, or sewn branding, contact ZWbags to review materials, construction, samples, testing, and commercial requirements.
FAQ
Can I iron patches onto ultra-lightweight ripstop nylon?
Avoid ironing ultra-lightweight ripstop nylon unless the backpack and patch manufacturers provide a tested compatible process. Thin nylon, coatings, laminates, and seam tape can be damaged at temperatures below those needed by a standard patch adhesive. Sewing, a factory-installed loop panel, or another approved low-temperature method is usually the safer choice.
What’s the best heat setting for 900D polyester bags?
There is no universal heat setting for 900D polyester. Denier describes yarn mass, not the safe temperature of the finished fabric, coating, foam, print, or seam tape. Use the patch supplier’s range only after the backpack maker confirms compatibility and a production-intent sample passes the test.
How do I know if my backpack patch is securely bound?
After the specified cooling period, inspect the perimeter under bright light for gaps, adhesive squeeze-out, discoloration, or lifted corners. Use the supplier’s approved peel or adhesion check rather than prying aggressively with a fingernail. Re-press only when the instructions permit it; otherwise use the approved repair method.
Can I wash a backpack in a machine after heat pressing?
Machine washing is acceptable only when both the backpack and patch care instructions permit it after the full cure. Otherwise, use spot cleaning or the specified hand-wash process. Avoid heat drying unless it is explicitly approved.
How do I fix patch corners that are starting to peel?
Clean the loose edge and check the patch supplier’s repair instructions. If re-pressing is allowed, repeat the validated setting with the approved barrier and even pressure. If a compatible repair adhesive is specified, apply only the required amount and follow its cure time. Stop if the fabric, coating, or patch edge shows heat damage.