
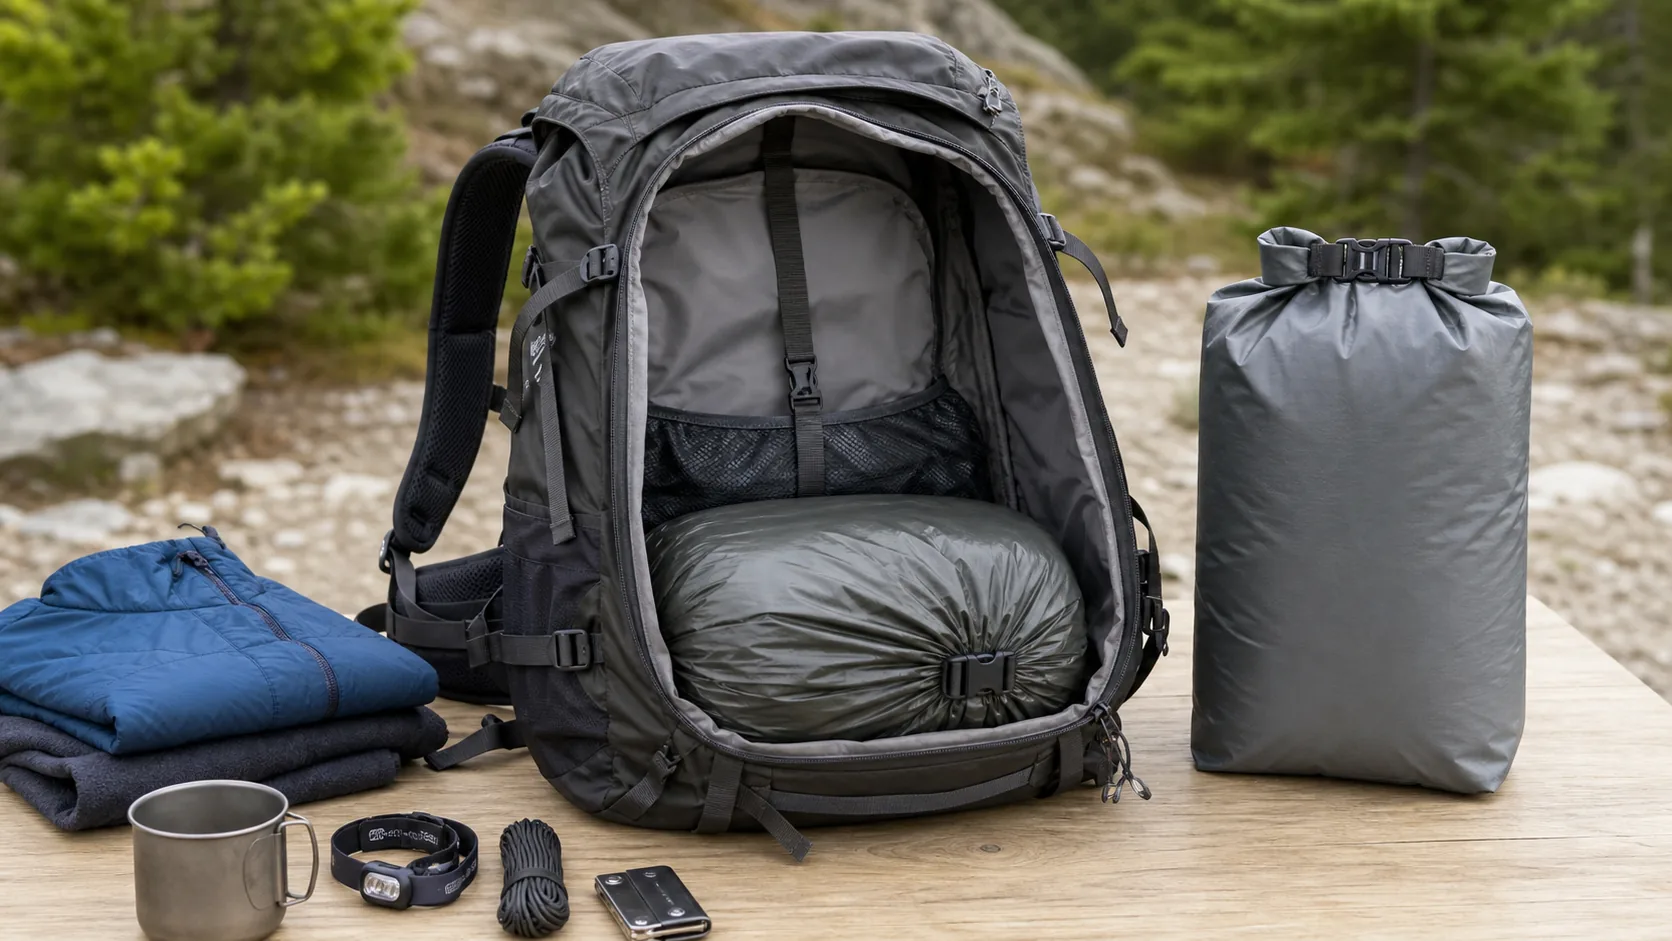
The safest place for a sleeping bag is usually inside the backpack, low in the main compartment and protected by a waterproof liner. When it must ride outside, attach the compressed bag only to manufacturer-approved compression straps, lid straps, daisy chains, or bottom lash points, then verify that the load cannot shift, snag, or interfere with the harness. The methods below explain how to attach a sleeping bag to a backpack while protecting its insulation and keeping the load balanced.
Why Should You Learn How to Attach a Sleeping Bag to a Backpack Correctly?
You should learn this skill because a poorly lashed sleeping bag shifts the load, catches on branches, and can drop mid-trail. A dry, secure sleeping bag remains a reliable part of the sleep system, while a wet or lost bag can create a serious problem in cold or remote conditions.

Balance and Load Transfer Matter
Weight placement affects how a pack rides on the hips and shoulders. When a bulky bag hangs too far from the back panel or to one side, leverage and sway increase. Keep the sleeping bag centered and as close to the pack body as the approved attachment system allows.
- Rigged close to the pack body: less leverage and movement
- Rigged low and loose: greater snag, ground-contact, and sway risk
- Off-center rigging: causes lateral sway on descents
Weatherproofing Is Non-Negotiable
Down insulation loses loft and warmth when wet, and damp synthetic insulation also performs below its dry condition. Put the sleeping bag in a properly closed waterproof dry sack before carrying it outside the pack, and inspect the sack for abrasion or leakage.
| Rigging Factor | Poor Setup | Correct Setup |
|---|---|---|
| Load Balance | Bag sways side to side | Bag hugs back panel |
| Weather | Bag exposed to rain | Bag sealed in dry sack |
| Access | Must unpack fully | Bag detaches in seconds |
The table makes it obvious that small rigging choices decide whether you finish the trek dry and rested or wet and exhausted.
What Gear Do You Really Need for How to Attach Sleeping Bag to Backpack Jobs?
You need a correctly sized waterproof or lined compression sack and a pack with suitable external attachment points. Approved accessory straps or cord can provide backup retention when their material, diameter, knots, and anchors are compatible. Expensive hardware does not replace a secure, inspected setup.

Core Attachment Hardware Checklist
Most modern packs already carry the parts you need, though older models may force you to add your own cord.
- Accessory cord or webbing specified for the intended knots and anchors
- Compression stuff sack with four side straps
- A waterproof dry sack or protected liner system
- Accessory carabiners when useful for routing, not as climbing equipment
When to Add Aftermarket Straps
Add aftermarket straps only when they can route through structural, manufacturer-approved lash points without damaging fabric, blocking access, or interfering with the suspension. Select webbing, buckles, and working-load guidance from the component supplier for the packed sleeping bag and expected trail conditions.
| Item | Selection Basis | Primary Function |
|---|---|---|
| Accessory Cord | Compatible diameter, material, and knot | Backup retention |
| Compression Sack | Fits the sleeping bag without damaging insulation | Reduces packed bulk |
| Waterproof Dry Sack | Sealed construction sized to the compressed bag | Moisture protection |
| Accessory Carabiner | Sized for the lash point and cargo routing | Routing convenience |
The exact kit depends on the pack and sleeping bag. Test the complete setup at home before relying on it in the field.
How Do You Attach a Sleeping Bag to a Backpack With No External Loops?
A backpack with no structural external loops is not automatically suitable for carrying a sleeping bag outside. The preferred solution is to repack the load, use a larger pack, or install a manufacturer-approved retrofit. A temporary cross-wrap may be considered only when the cord can bear on stable parts of the pack body without crushing contents, contacting the wearer, covering critical openings, or sliding off the tapered shell.

The Cross-Wrap Cord Method
If the pack construction and manufacturer guidance permit a cross-wrap, use two independent restraints to create a cradle around the sealed sleeping-bag sack.
- Center the sealed bag on the pack face and away from zippers or hydration access
- Route the first restraint through stable approved points rather than loose fabric or shoulder straps
- Add a second independent restraint across the first
- Tighten without deforming the pack, then walk and move the pack to check for shift or contact
A Word on Knot Selection
Choose a knot that is compatible with the cord material and diameter, then lock and dress it correctly. Some low-friction high-modulus cords do not hold common adjustable hitches reliably. Practice the selected system at home and follow the cord supplier’s guidance.
| Knot Type | Typical Function | Important Limitation |
|---|---|---|
| Taut-Line Hitch | Adjustable tension | Performance depends on cord friction and dressing |
| Trucker’s Hitch | Creates mechanical advantage | Must be locked off and not overtightened |
| Bowline | Fixed anchor loop | Does not tension the load by itself |
| Square Knot | Joins similar ends in limited uses | Not a secure cargo-tensioning knot |
Knot choice sits at the heart of a stable rig, so practice at home before you count on it in the backcountry.
How to Attach Sleeping Bag to Backpack When Your Pack Has a Floating Lid
When the pack manual permits external cargo under a floating lid, place the sealed sleeping bag beneath the extended lid and tension both lid straps evenly. This is a useful feature to evaluate in custom travel backpack designs, but strap length, buckle engagement, head clearance, and load stability still need to be verified.

Stepwise Lid-Strap Method
Loosen both lid straps first, otherwise you’ll fight the buckles the entire time.
- Loosen the two front lid buckles fully
- Place the compressed bag on top of the main pack
- Pull the lid over the bag and re-clip both buckles
- Cinch symmetrically, alternating left and right pulls
Adjusting for Bag Length
If the bag is longer than the lid span, do not leave an unsupported end projecting into branches or behind the wearer’s head. Reposition it only if both ends remain captured; otherwise use another approved mount or carry it inside.
| Lid Type | Adjustment Range | External-Carry Consideration |
|---|---|---|
| Floating Lid | Usually the greatest | Confirm strap extension and head clearance |
| Fixed Lid | Limited | Use only when the bag remains fully captured |
| No Lid | None | Use approved alternative lash points or carry inside |
That short comparison shows why buyers keep asking for floating-lid designs in production runs targeting outdoor retail.
Can You Attach a Sleeping Bag Using Side Compression Straps Only?
You can use side compression straps when the pack manufacturer permits cargo lashing and the straps are long enough to capture the sealed bag without reducing buckle engagement. Some compression straps are designed only to control pack volume, so inspect their anchors and routing before treating them as cargo restraints.

Front-Panel Cross Rigging
If opposing straps can be rerouted without twisting, overstressing, or disconnecting permanently sewn parts, pass an upper and lower pair over the bag to form a cradle.
- Position bag horizontally across the front panel
- Cross compatible straps only when their buckles and anchor geometry allow it
- Keep an upper and lower restraint around the sack
- Cinch until the bag stops rotating
Preventing Strap Slippage
Keep webbing flat through buckles unless the hardware manufacturer specifies another routing. Retainers, strap keepers, or a compatible backup strap are safer ways to control loose tails and gradual slippage than introducing a twist at the buckle.
| Strap Configuration | Potential Stability | Rigging Requirement |
|---|---|---|
| 2 Straps, Parallel | Fair | Easy |
| 2 Straps, Crossed | Good | Easy |
| 4 Compatible Straps | High | All anchors and buckles must remain correctly loaded |
For an OEM design, validate strap length, anchor reinforcement, buckle orientation, seam loading, and movement with the intended sleeping-bag sack rather than assuming more straps automatically create a secure system.
How Do You Attach a Sleeping Bag to a Backpack With Only One Side Strap?
One side strap does not provide enough independent restraint for a bulky sleeping bag. Do not assume a top grab handle, shoulder-strap junction, or decorative loop is a cargo anchor. Carry the bag inside or use a retrofit approved by the pack manufacturer that connects to structural points and provides at least two-direction restraint.
Why the Grab Handle Is Not a Default Anchor
A grab handle may be designed only for briefly lifting the pack, not for continuous outward and downward loading. Using it as the top of an inverted-T can damage its seam or let the cargo pivot around the single side strap.
- Check the manual or ask the manufacturer which points are structural cargo anchors
- Use a compatible retrofit panel or strap set only when those anchors are available
- Capture the sealed sleeping bag in both vertical and horizontal directions
- Confirm that neither restraint bears on the harness, body, or zipper path
When to Add a Second Cord
If a correctly installed approved system still shifts, stop and repack it rather than adding cord to weak or undocumented points. A second restraint is useful only when both restraints attach to suitable anchors.
| Available Anchors | Recommended Decision | Reason |
|---|---|---|
| Approved upper and lower lash points | Use compatible two-direction restraints | Controls rotation and vertical movement |
| One structural strap only | Carry inside or install an approved retrofit | A single axis allows pivoting or escape |
| Grab handle or decorative loops only | Do not use for external cargo without approval | Seam strength and load direction are unknown |
A daypack that lacks suitable anchors may simply be the wrong pack for an overnight external load. Choosing a purpose-built model is safer than improvising around nonstructural components.
How to Attach Sleeping Bag to Backpack Using Bottom Loops and Straps
When the pack has dedicated bottom cargo straps, place the sealed sleeping bag against the base and tension both straps evenly. Bottom mounting keeps a bulky, lightweight item out of the main compartment, but it lowers the load position and exposes the sack to ground contact, brush, and spray.
Bottom-Strap Rigging Steps
Extend the bottom straps first, then slide the bag underneath.
- Fully extend both bottom straps
- Slide the compressed bag under the pack
- Clip and cinch symmetrically
- Add an approved independent restraint if the sack can slide sideways
Watch for Ground Contact
Make sure the bag does not become the pack’s contact point when the pack is set down. If the sack touches the ground, projects below the frame, or rubs against the user’s legs, move it inside or choose another approved position.
| Mount Location | Pros | Cons |
|---|---|---|
| Bottom Strap | Uses dedicated low lash points | Ground, brush, and spray exposure |
| Front Panel | Easy to inspect | Adds leverage away from the back panel |
| Top Lid | Uses extended lid straps | Raises bulk and can affect head clearance |
Bottom mounting is most practical when the sack stays clear of the ground and trail debris. No external position replaces a properly sealed sack.
How Do You Attach a Sleeping Bag to a Backpack With Daisy Chains?
When the manufacturer identifies daisy-chain loops as cargo anchors, route compatible straps or cord through selected opposing loops and cinch the sleeping bag against the pack. Well-designed custom tactical backpacks often use reinforced modular attachment fields, but loop construction and load ratings still vary by product.
Daisy Chain Rigging Patterns
Multiple loops let you adjust vertical and horizontal position, but the sack still needs a complete restraint rather than isolated clips at two small points.
- Select opposing manufacturer-approved daisy loops
- Route a compatible strap or cord through the anchors
- Wrap cord over the bag in an X pattern
- Cinch and lock the selected knot or buckle according to its instructions
Using Bungee Cord Instead
Shock cord can help control a loose tail or stabilize light gear, but its elasticity can allow a sleeping bag to bounce or escape. Do not use bungee or shock cord as the only restraint for a sleeping bag.
| Attachment Method | Speed | Adjustability |
|---|---|---|
| Carabiners + Cord | Fast | Excellent |
| Bungee Only | Very Fast | Not suitable as the sole restraint |
| Fixed Knots | Slow | Poor |
Accessory carabiners can simplify routing, but the retaining strap or cord must capture the sack and remain operable with cold hands. These accessory components are not climbing or fall-protection equipment.
How to Attach Sleeping Bag to Backpack for Long Multi-Day Treks
For multi-day routes, use a waterproof sack, a primary manufacturer-approved restraint, and an independent compatible backup when the design supports one. Brands developing products for the outdoor and tactical industry should validate the full external-carry system against rain, abrasion, movement, buckle release, and repeated loading.
The Redundancy Principle
Do not rely on a single restraint when its failure would release the sleeping bag. A backup must connect through suitable anchors and must not create a new snag or pressure point.
- Primary hold: main compression straps
- Secondary hold: accessory cord backup
- Additional retention: use only when approved anchors and the dry sack’s lash construction permit it
Daily Inspection Routine
Check every knot, buckle, strap, anchor seam, and dry-sack contact area before departure, shortly after starting, and whenever terrain, weather, or a snag could have changed the setup.
| Trigger | Inspection Focus | Required Response |
|---|---|---|
| Before departure | Buckles, knots, anchors, sack seal | Correct any looseness or damage |
| After the first walking interval | Settling and strap tension | Retension compatible hardware |
| After rain, brush contact, or a fall | Abrasion, water entry, displaced cargo | Stop, inspect, dry, or repack as needed |
Longer and rougher trips increase cumulative exposure, but inspection frequency should respond to conditions and system behavior rather than a fixed number of hours.
What Mistakes Should You Avoid With Sleeping Bag Rigging?
You must avoid loose straps, unprotected fabric, off-center placement, and any knot that can slip under vibration. Getting how to attach sleeping bag to backpack wrong costs you sleep, gear, and sometimes safety, so knowing the common failure modes matters as much as knowing the techniques.
Top Five Rigging Mistakes
Most rigging failures come from five recurring errors.
- Skipping the waterproof liner
- Cinching only one side of a strap pair
- Using a knot that is incompatible with the cord material or load direction
- Mounting the bag too far from the back panel
- Forgetting to re-check tension after the first hour
Field-Repair Habits That Save You
Carry compatible spare cord, strap hardware, and repair items in a dedicated field-repair kit. A replacement buckle must match the original size and geometry; otherwise use the pack manufacturer’s approved repair method or move the sleeping bag inside.
| Mistake | Consequence | Prevention |
|---|---|---|
| Wet bag | Lost insulation | Dry sack liner |
| Loose strap | Bag drops | Cinch symmetrically |
| Wrong knot | Slippage | Match the knot to the cord and load |
| Off-center rig | Sway and torque | Center on back panel |
| No re-check | Gradual loosening | Recheck at 1 hour |
That failure-mode matrix also works as a product-development checklist. A relevant backpack durability case shows why fabric, seams, straps, and field-use conditions need to be evaluated together.
The right method depends on the backpack’s approved anchor points, the sleeping bag’s sealed packed size, and the trail conditions. Carry the bag inside whenever possible; if it must ride outside, use compatible restraints, keep the load centered, and inspect it throughout the trip. Retail brands and private-label buyers developing production-grade attachment systems can contact us today to discuss product specifications, sampling, and validation requirements.
FAQ
Can I attach a sleeping bag to any backpack, even one without straps?
No. A pack without manufacturer-approved structural lash points may not be suitable for external sleeping-bag carry. Do not use shoulder-strap junctions, decorative loops, or a grab handle as cargo anchors unless the manufacturer specifically approves that load direction.
What’s the best position for a sleeping bag on a backpack?
Inside the backpack’s bottom zone is usually best. For external carry, keep the sealed bag centered, close to the pack body, and fully captured by approved straps without blocking head movement, pockets, or the harness.
How do I know if my sleeping bag is secured tightly enough?
The sack should not rotate, slide, bounce, or contact the wearer during normal movement. Test the loaded pack at home and recheck it after a short walking interval. Do not overtighten to the point that buckles, seams, insulation, or pack contents are damaged.
What’s the best cord for rigging a sleeping bag to a backpack?
Use cord or webbing whose material, diameter, working guidance, and knot compatibility suit the pack anchors and cargo. Nylon, high-modulus cord, and utility cord behave differently, so there is no single best diameter or knot for every product.
Can I keep my sleeping bag dry when it’s strapped outside the backpack?
Use a properly closed waterproof dry sack sized for the sleeping bag, but continue to inspect for abrasion, punctures, and leakage. External carry increases weather and contact exposure, so carrying the bag inside a waterproof pack liner remains the more protected option when space allows.