To learn how to pack a hiking backpack for travel, build the load around fit, weight balance, fast-access pockets, waterproof protection, and clear gear zones. A hiking-style pack can work well for airports, hostels, city transfers, and outdoor routes, but only if it is packed differently from a weekend trail bag. The goal is not to stuff every pocket. The goal is to make the backpack stable, easy to search, and comfortable enough to carry through long travel days. For brands planning how to pack a hiking backpack for travel content or product layouts, the same logic also helps define pocket maps, strap support, and travel-ready storage.
Why does choosing the right pack matter before packing?
Choosing the right pack matters before packing because how to pack a hiking backpack for travel depends on the bag's opening style, frame support, and compartment layout. A narrow top-loading hiking pack may carry well on a trail, but it can become frustrating in airports when documents, toiletries, or chargers are buried under clothing.
Why should you avoid deep top-loading designs?
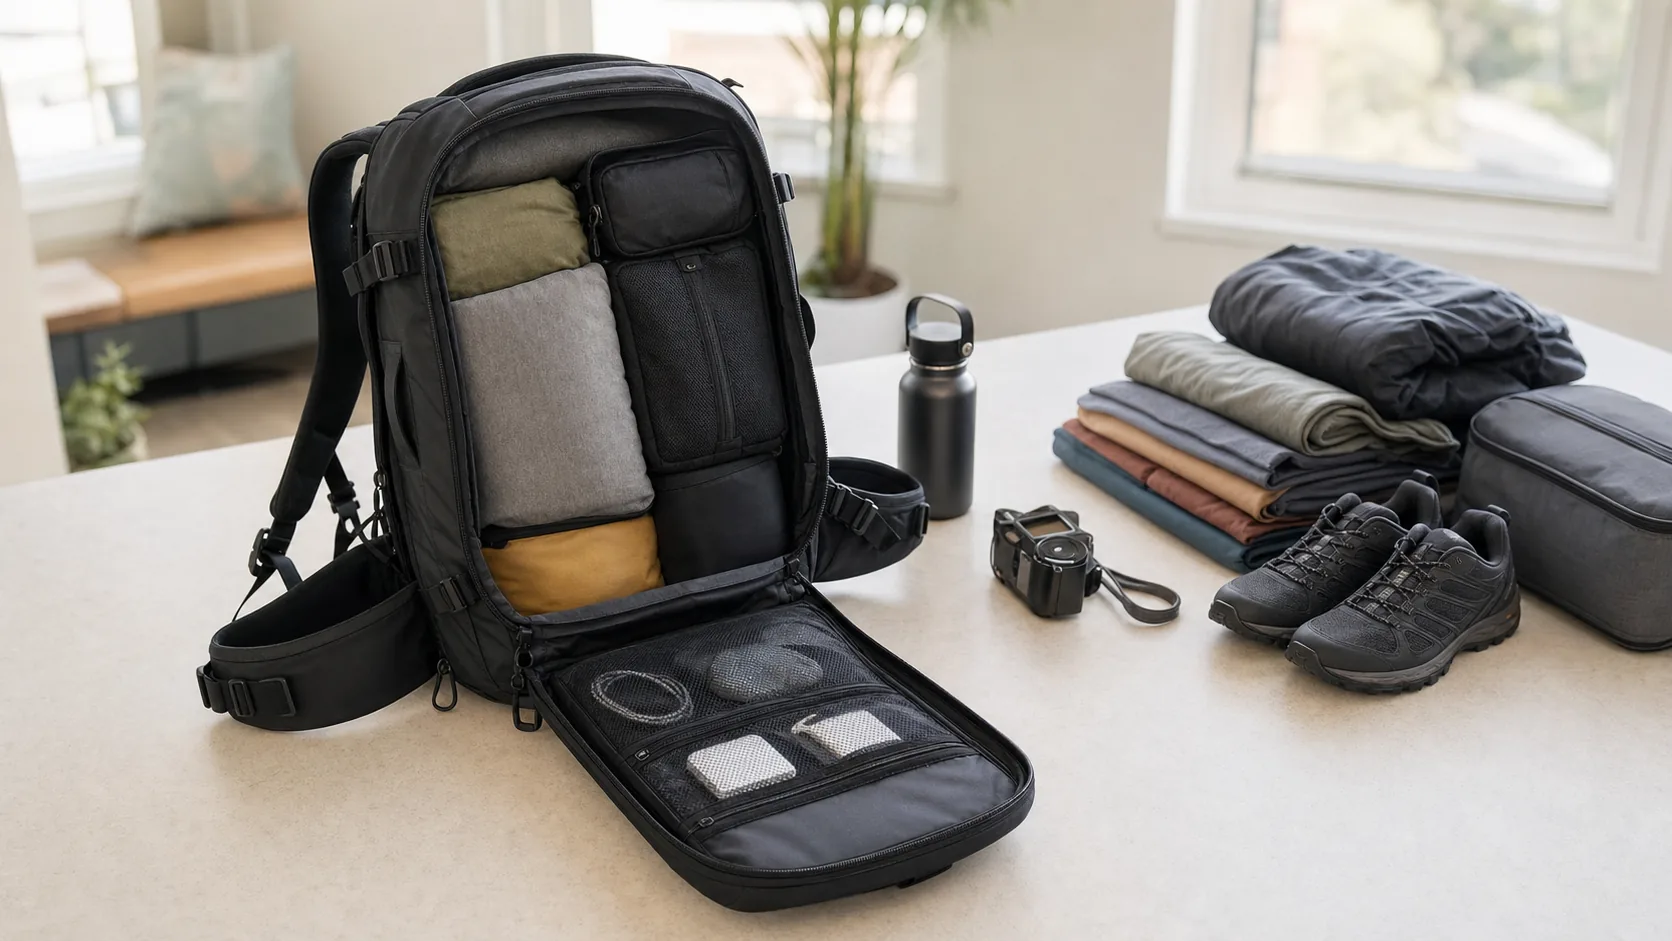
Deep top-loading designs make it hard to reach one item without pulling everything out. For travel, a panel-loading or clamshell-style backpack usually works better because it opens like luggage.
- You can see clothing, tech, and toiletries at once.
- You can repack quickly in hostels or hotel rooms.
- You reduce the chance of leaving small items behind.
What carry-on features should you check?
Check the packed size, strap support, and compression system. A hiking backpack that is too tall, too stiff, or overloaded may fail carry-on limits even if the listed liter capacity seems acceptable.
Key Takeaway: The right pack makes every later packing step easier because the structure supports visibility, balance, and access.
| Pack Feature | Travel Benefit | What to Check |
|---|---|---|
| Panel opening | Faster packing | Full front access |
| Hip belt | Less shoulder load | Padded, adjustable fit |
| Compression straps | Smaller profile | Side and internal straps |
For outdoor retail lines, outdoor gear applications often depend on the same balance between rugged carry and travel-friendly access.
How to pack a hiking backpack for travel easily?
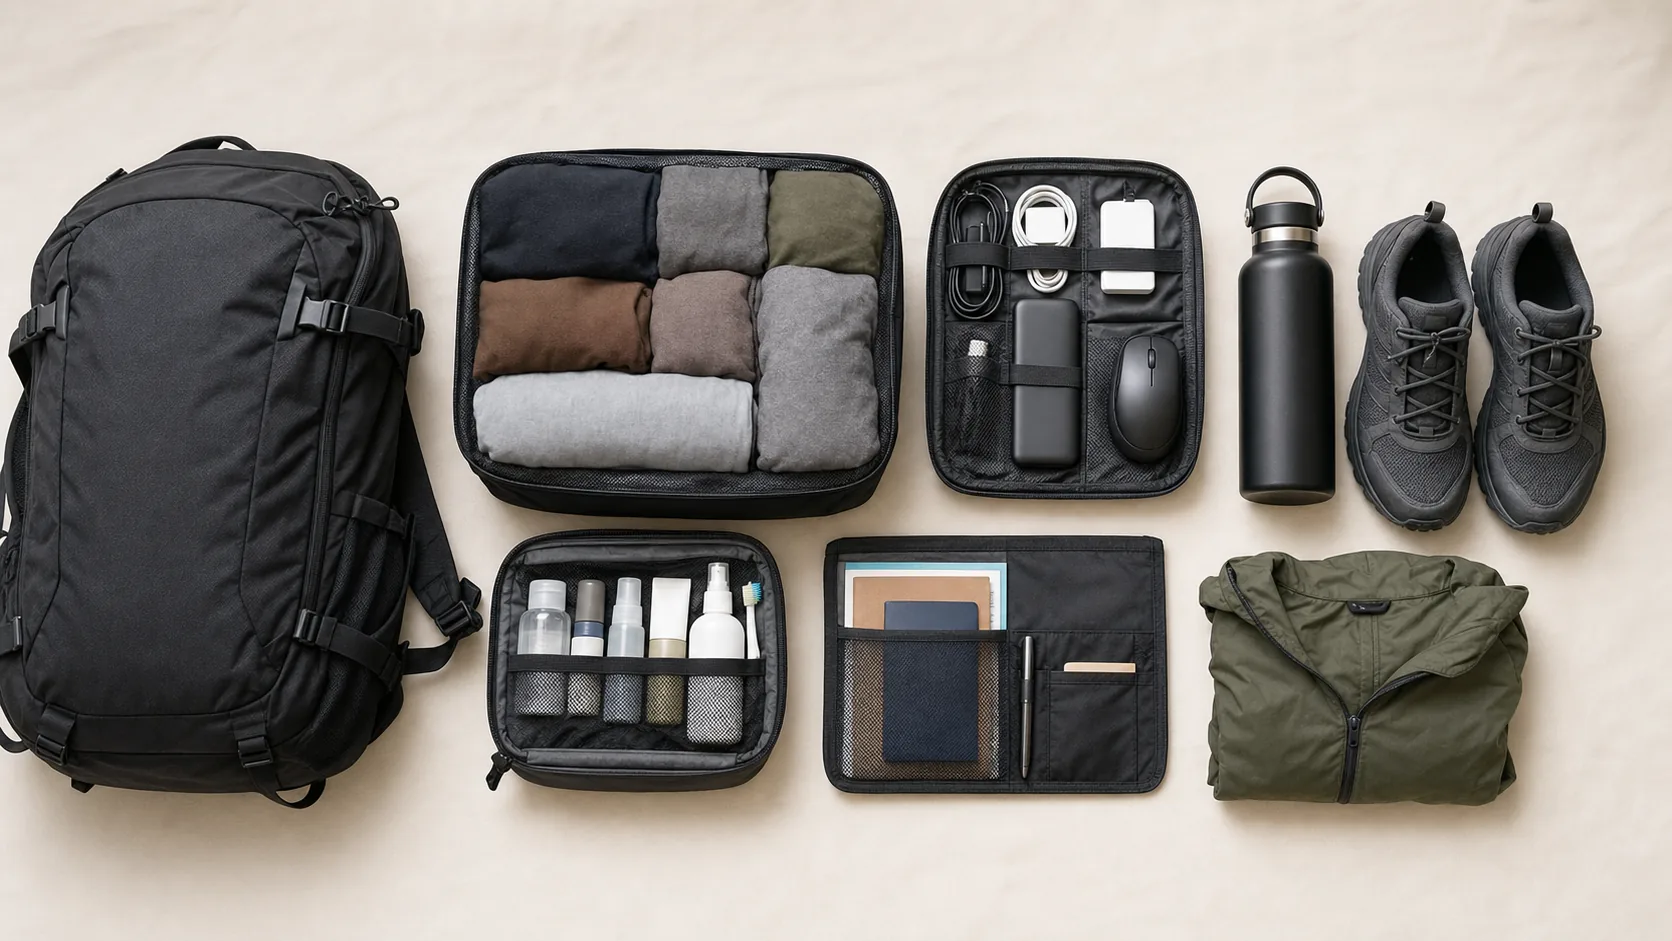
You can pack a hiking backpack for travel easily by grouping gear into categories before anything goes into the bag. Sorting items on a bed or table helps you remove duplicates, assign each category to a zone, and keep the final load compact.
Why should you sort gear by category?
Sorting gear by category prevents small items from spreading across every pocket. Use simple groups before packing.
- Clothing and layers.
- Documents and money.
- Tech and charging items.
- Toiletries and medical kit.
- Shoes, laundry, and rain gear.
How do compression straps help?
Compression straps pull soft items closer together and reduce empty air inside the pack. They also keep the load from shifting when you walk, climb stairs, or lift the backpack into overhead storage.
Key Takeaway: Pack by category, then compress the load only after every item has a clear location.
| Gear Group | Packing Zone | Access Need |
|---|---|---|
| Clothes | Main compartment | Medium |
| Documents | Inner or top pocket | High |
| Toiletries | Top or outer pocket | High |
This sorting stage is also useful for product teams mapping an outdoor durability case because real packing behavior shows where zippers, fabric panels, and reinforcements receive the most stress.
How should you organize the main compartment?
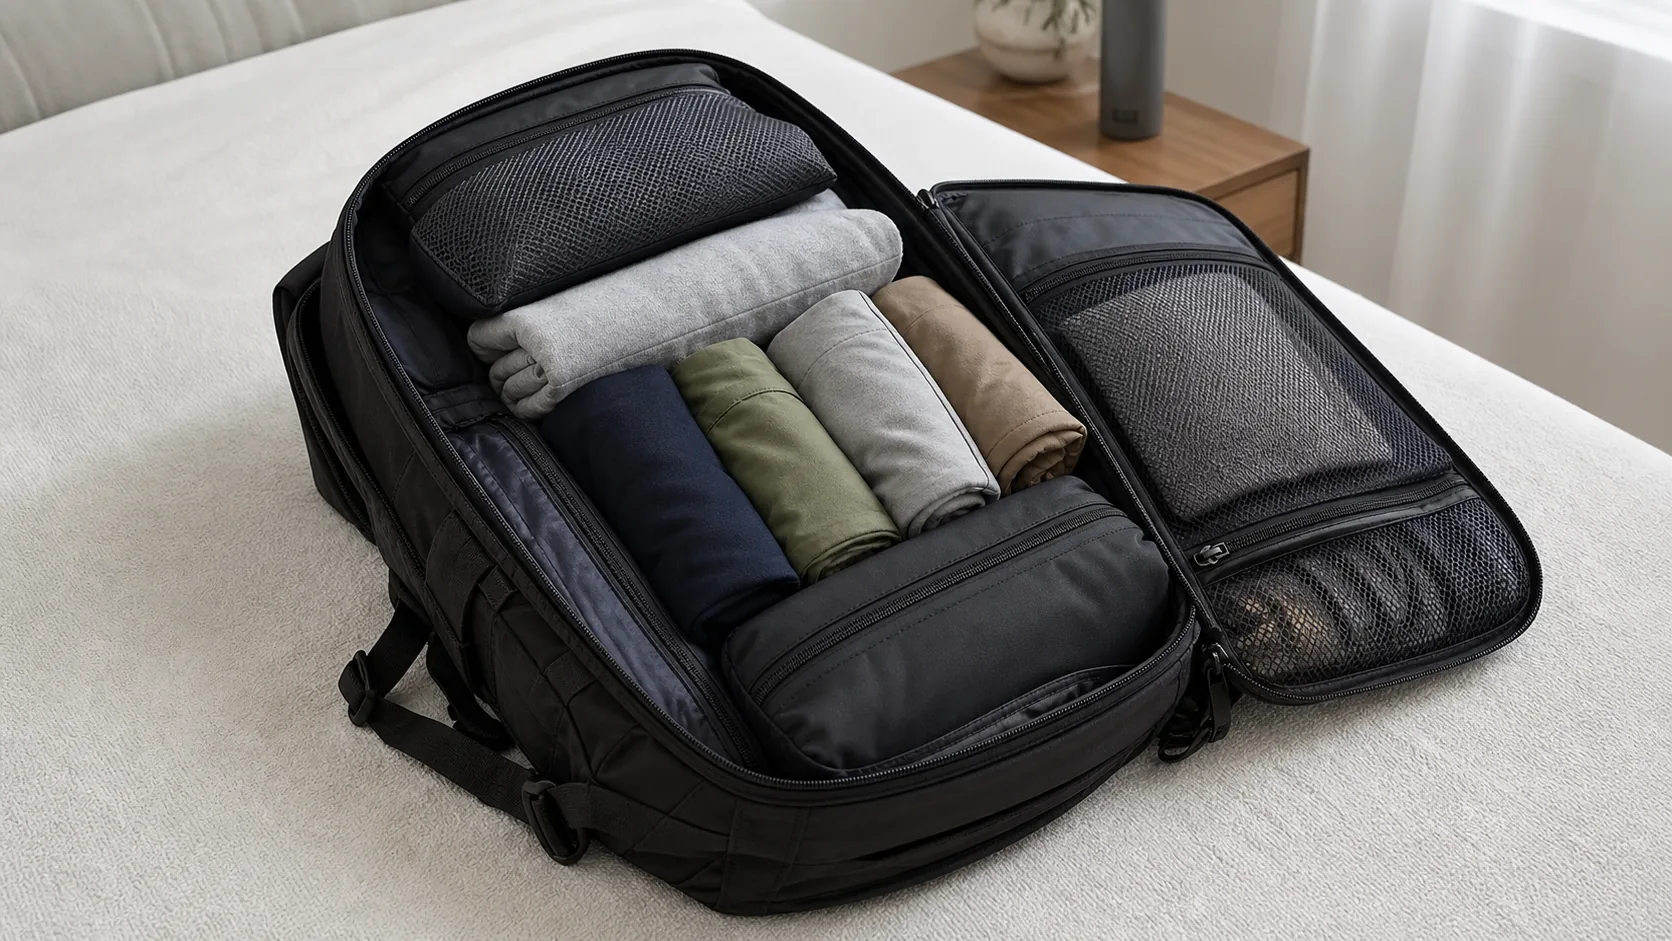
You should organize the main compartment by turning it into a stable grid, which is central to how to pack a hiking backpack for travel without wasting space. Soft, low-use items go lower, dense clothing cubes sit in the center, and flatter layers should rest against the back panel where they support the pack shape.
Should you roll or fold clothes?
Use both methods. Roll soft shirts, underwear, socks, and activewear. Fold structured shirts, trousers, and thicker layers flat so they do not create awkward lumps.
- Roll flexible garments to fill corners.
- Fold structured garments to keep a flatter profile.
- Use one cube per clothing category when possible.
How should bulky layers fit?
Wear the bulkiest jacket or boots during transit when practical. If a jacket must go inside, lay it flat or compress it in a cube instead of letting it expand across the whole compartment.
Key Takeaway: A mixed rolling and folding system keeps clothing compact while helping the backpack hold a stable shape.
| Clothing Type | Better Method | Reason |
|---|---|---|
| T-shirts | Roll | Fills small gaps |
| Trousers | Fold | Reduces hard creases |
| Sweater or fleece | Compress flat | Controls bulk |
For brands building OEM tactical backpack projects, this main-compartment logic can guide divider depth, compression placement, and reinforced panel design.
Where do your heaviest items belong?
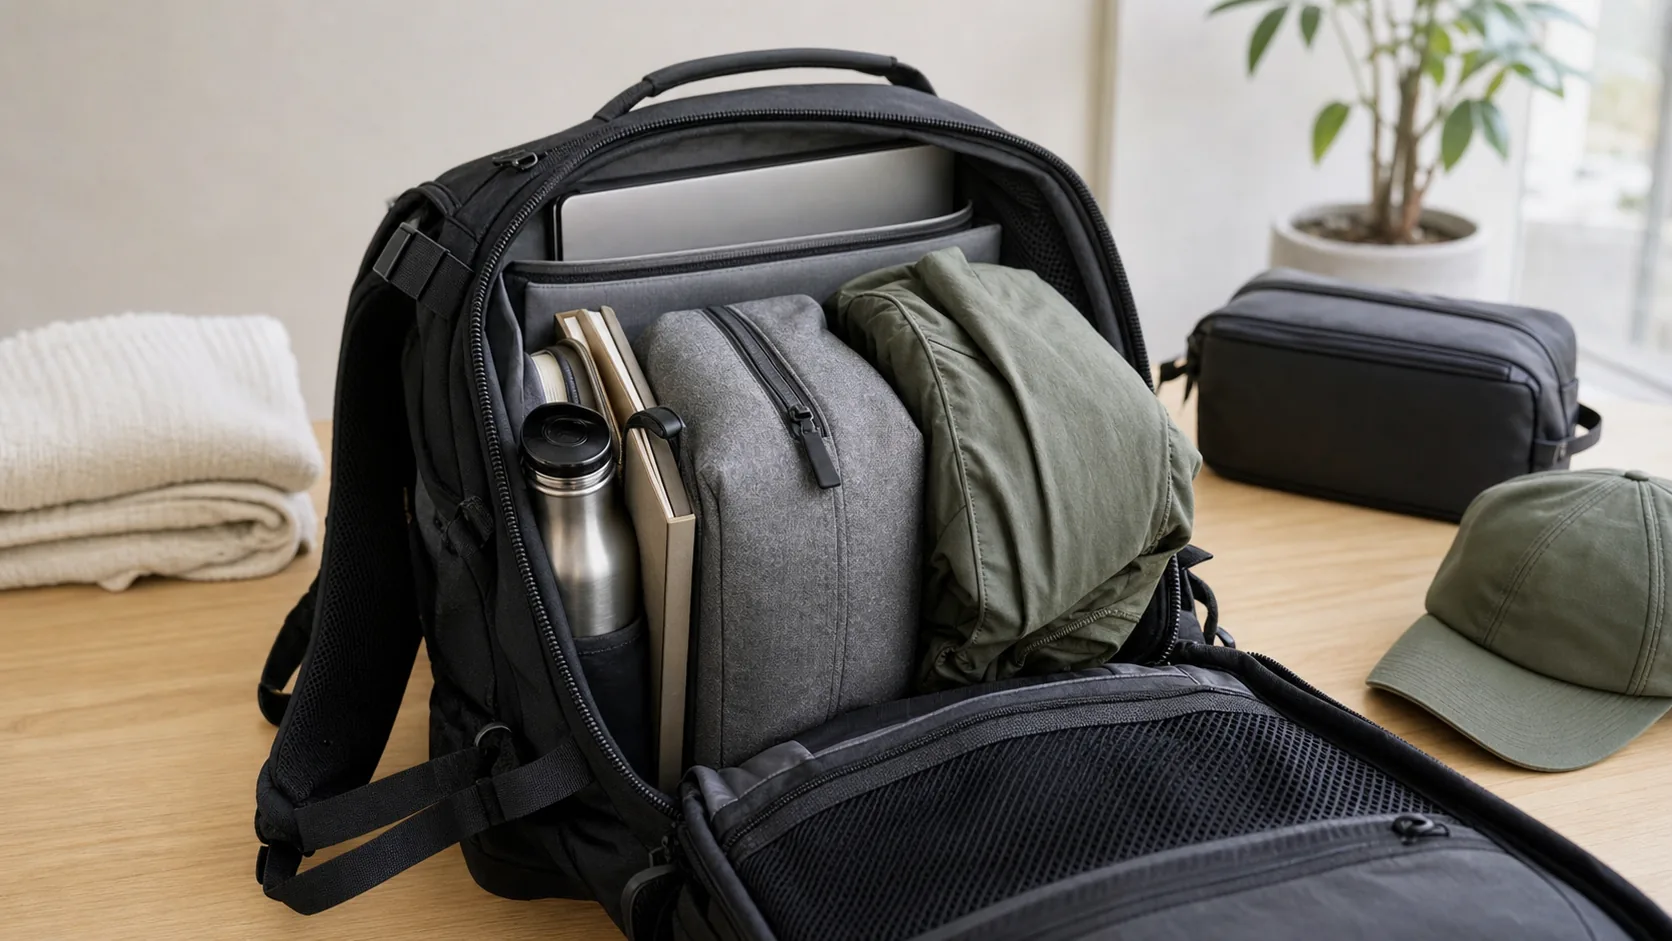
Your heaviest items belong close to your spine and near the vertical center of the pack, which is one of the most important rules in how to pack a hiking backpack for travel. This placement keeps the backpack from pulling backward and helps your hips carry more of the weight.
Why does close-to-back placement matter?
The farther heavy items sit from your back, the more leverage they create. That leverage makes the pack feel heavier and can force you to lean forward during long walks.
- Keep laptops and books close to the back panel.
- Place heavy cubes in the middle, not at the bottom.
- Balance left and right sides evenly.
What items should stay away from the outer front?
Avoid placing dense items in the outermost pocket. Shoes, books, power banks, cameras, and heavy toiletry kits can make the pack swing or sag when they sit too far from your body.
Key Takeaway: Keep dense gear centered and close to the body so the backpack feels lighter and more controlled.
| Weight Zone | Items | Carry Effect |
|---|---|---|
| Back-center | Laptop, books, dense cube | Stable carry |
| Top | Jacket, snacks, toiletries | Easy access |
| Outer front | Light layers only | Less pulling |
Good weight balance protects the traveler and also reveals where a hiking-travel backpack needs stronger stitching, better foam, and more reliable strap hardware.
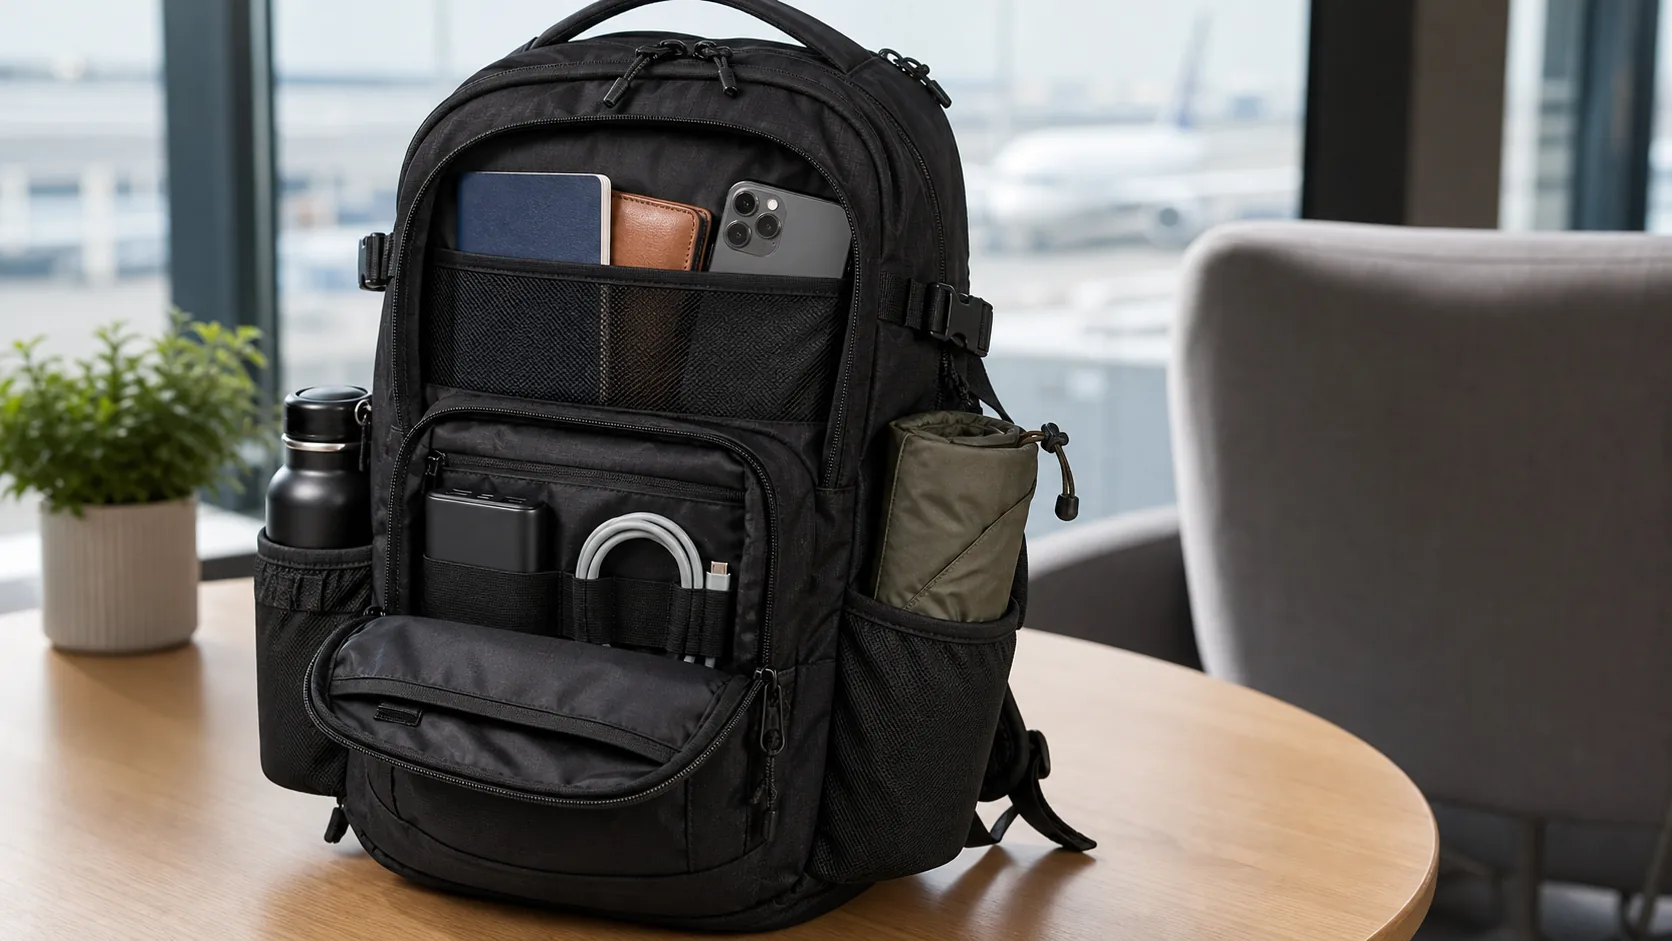
How can you access essentials without unpacking?
You can access essentials without unpacking by assigning documents, money, chargers, water, and rain gear to top, side, or body-side pockets. This is a practical part of how to pack a hiking backpack for travel because travel days often involve repeated checks at security, gates, taxis, hotels, and train stations.
Where should passports and money go?
Passports and money should go in a secure pocket close to your body. Avoid loose outer pockets in crowded terminals because they are easier to open without notice.
- Use an inner mesh pocket for passports.
- Keep a small daily wallet separate from backup cash.
- Store emergency contacts offline.
Which items belong in side pockets?
Side pockets are useful for a water bottle, compact umbrella, microfiber towel, or light rain shell. These items solve problems quickly and should not require opening the main compartment.
Key Takeaway: Fast-access packing reduces stress because the items you need during transit are not buried under clothing.
| Best Items | Risk to Avoid | |
|---|---|---|
| Body-side pocket | Passport, cash | Theft exposure |
| Top pocket | Chargers, snacks | Overstuffing |
| Side pocket | Bottle, umbrella | Poor balance |
For online sellers, clear pocket photos in e-commerce bag projects can help buyers understand exactly where travel essentials fit.
How should you pack sensitive electronics?
You should pack sensitive electronics in padded, water-resistant zones when planning how to pack a hiking backpack for travel with a laptop, tablet, camera, or power bank. Electronics need both impact protection and moisture separation, especially when the same pack carries rain gear, toiletries, and metal accessories.
Why should the laptop stay near the back panel?
The back panel is usually the flattest and most protected area. It also keeps a laptop's weight close to your body, which improves balance.
- Use a suspended padded sleeve if available.
- Keep the screen flat and away from hard edges.
- Remove the laptop easily for security checks.
How should cords and power banks be organized?
Use one tech pouch for cords, adapters, earbuds, and power banks. Coil cables neatly and keep batteries away from liquids or sharp metal items.
Key Takeaway: Electronics should be padded, grouped, and separated from liquids so they are protected and easy to inspect.
| Tech Item | Storage Method | Protection Goal |
|---|---|---|
| Laptop | Padded back sleeve | Impact control |
| Power bank | Tech pouch | Short-circuit prevention |
| Cables | Elastic loops or ties | Tangle control |
A compact tech system also prevents small accessories from disappearing into deep hiking-pack pockets.
How do you secure liquids and toiletries safely?
You secure liquids and toiletries safely by packing them in a clear, leak-resistant pouch near the top of the backpack, which supports how to pack a hiking backpack for travel through airport security and rough transfers. Liquids should never sit beside documents, laptops, or clean clothes without an extra barrier.
What makes a toiletry pouch travel-ready?
A travel-ready toiletry pouch is small, sealed, and easy to remove. Choose mini bottles, solid products, and tightly closed containers.
- Fill bottles below full capacity.
- Place liquids in a clear pouch.
- Use solid shampoo or soap where practical.
Where should the pouch sit?
Place the pouch near the top or in an outer vertical pocket. This keeps it accessible for security and limits damage if a bottle leaks.
Key Takeaway: Toiletries should be small, sealed, and isolated so one spill cannot affect the whole backpack.
| Toiletry Type | Better Format | Storage Tip |
|---|---|---|
| Shampoo | Solid bar or mini bottle | Seal separately |
| Toothpaste | Tablet or small tube | Keep in clear pouch |
| Sunscreen | Travel-size bottle | Store upright |
This section is especially important for travel packs with shared laptop and clothing compartments because moisture control affects both user experience and return risk.
What is the safest way to pack extra shoes?
The safest way to pack extra shoes is to place them in a shoe bag, soles facing outward, and position them near the center of the backpack when learning how to pack a hiking backpack for travel. Shoes are dense, dirty, and awkwardly shaped, so they need both hygiene control and balance control.
Why use a shoe bag?
A shoe bag keeps dirt away from clean clothes and prevents soles from rubbing against soft fabrics. A thin laundry pouch can work if a dedicated shoe bag is not available.
- Keep soles covered.
- Stuff socks inside shoes to save space.
- Wear the heaviest pair during transit.
Where should spare shoes sit?
Place spare shoes vertically near the back panel or middle zone. Avoid putting both shoes on one side because that can make the pack tilt.
Key Takeaway: Shoes should be isolated, stuffed, and centered so they save space without making the backpack dirty or unbalanced.
| Shoe Choice | Packing Method | Benefit |
|---|---|---|
| Hiking shoes | Wear during transit | Cuts pack weight |
| Sandals | Side or bottom zone | Low bulk |
| Spare sneakers | Shoe bag, center zone | Cleaner balance |
If the trip does not require a second pair, leave it out and use the saved space for weather protection or laundry separation.
How do you manage laundry and rain protection?
You manage laundry and rain protection by separating dirty or damp items and keeping waterproof layers easy to reach, which completes how to pack a hiking backpack for travel across changing climates. Clean clothing, wet jackets, and used socks should never share the same loose space.
How should dirty laundry be separated?
Use a thin laundry bag, dry pouch, or packing cube reserved for worn clothing. Roll dirty items tightly so they do not expand through the main compartment.
- Keep damp clothes outside the main clean zone.
- Air-dry towels before repacking when possible.
- Pack one small soap sheet or laundry strip for longer trips.
What protects the pack from rain?
Use a rain cover, internal dry bag, or waterproof electronics pouch when rain is likely. Store the rain layer near the opening so it can be reached before the pack gets soaked.
Key Takeaway: Laundry and rain gear need separation because odor and moisture spread quickly inside a packed backpack.
| Problem | Packing Fix | Placement |
|---|---|---|
| Dirty clothes | Laundry pouch | Bottom or side wall |
| Wet rain shell | External pocket | Outside clean zone |
| Electronics in rain | Dry pouch | Back or top zone |
If your brand needs hiking-travel backpacks designed around real packing behavior, weather storage, and retailer-ready pocket layouts, contact us today to discuss materials, compartments, samples, and production.
What FAQs help with how to pack a hiking backpack for travel?
These FAQs help with how to pack a hiking backpack for travel by answering common questions about carry-on fit, weight, wrinkles, toiletries, and shoulder comfort. Use them as a final check before closing the bag.
Can I bring a hiking backpack as a carry-on?
Yes, you can bring a hiking backpack as a carry-on if it fits your airline's size limit after packing. Measure the loaded backpack, including bulging pockets and frame height.
How heavy should my packed backpack be?
Keep it light enough that you can stand upright without leaning forward. Many travelers aim for a load that stays close to ten to fifteen percent of body weight, but comfort and airline limits matter too.
What's the best way to prevent wrinkles?
Use a mix of folding and rolling. Fold structured pieces flat, roll soft items, and use cubes to stop clothes from shifting during travel.
Can I pack toiletries without leaks?
Yes, if you use small containers, leave expansion space, and store all liquids in a sealed pouch near the top of the backpack.
How do I know if the weight is balanced?
The weight is balanced when the backpack stays close to your body, does not sag backward, and does not pull harder on one shoulder than the other.