
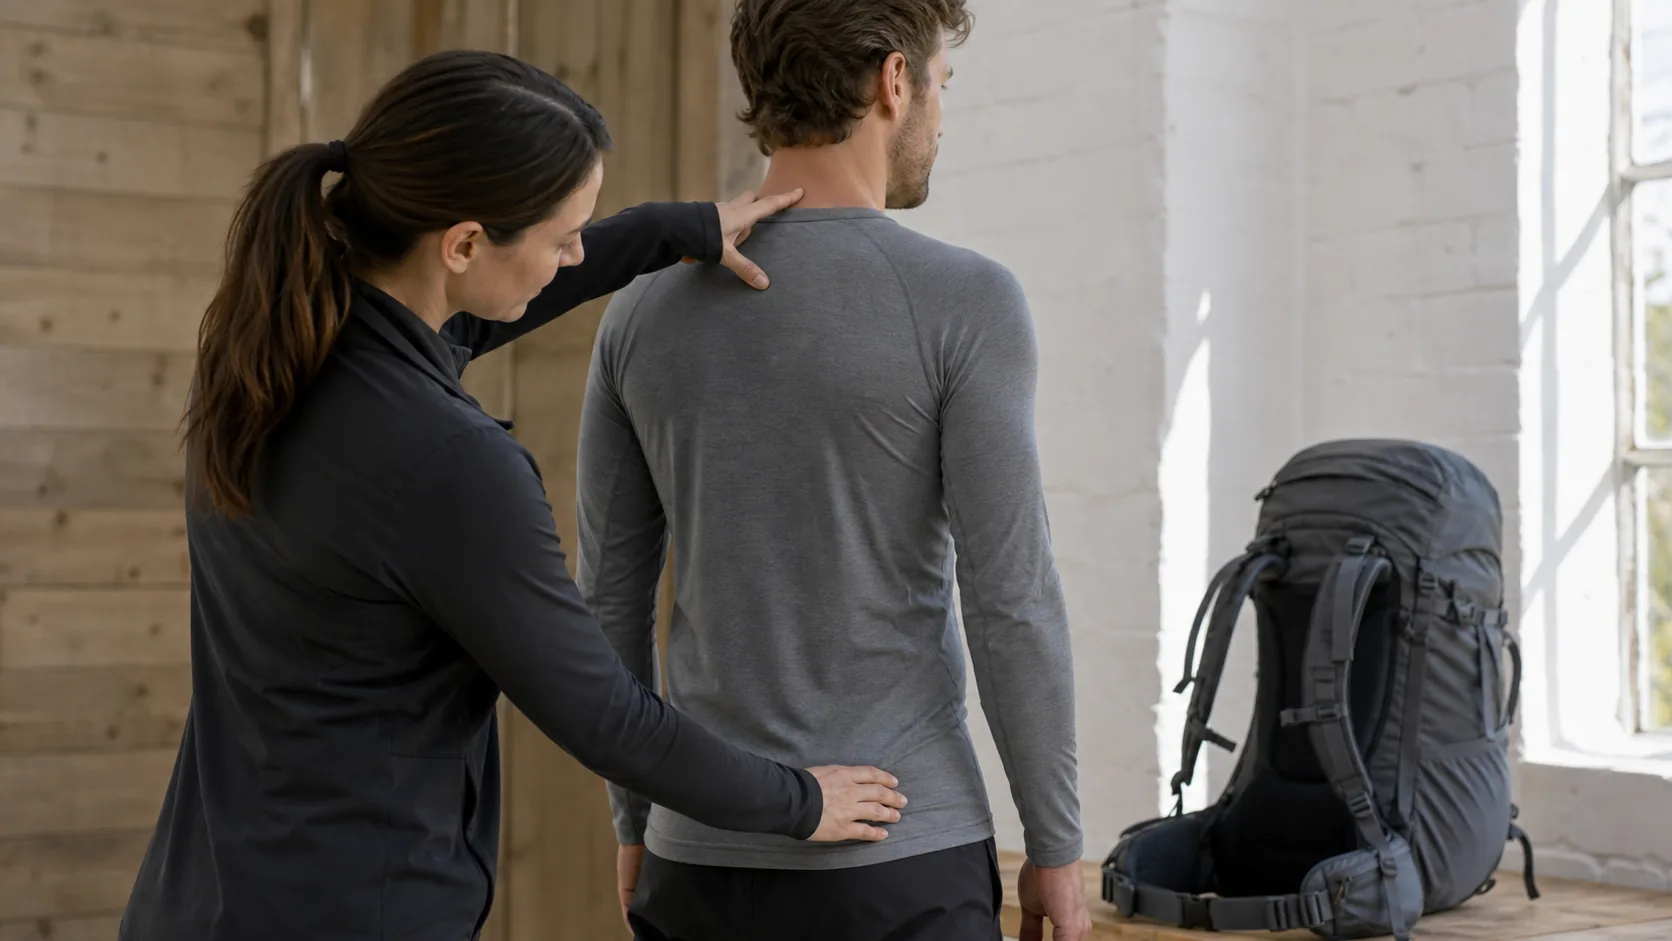
Picture this scene: you finally reach the trailhead after months of planning, strap on your brand-new pack, walk half a mile, and feel it bite into your shoulders. A hot spot forms on your lower back. Your hips carry almost nothing, and your neck starts to ache. Many “bad backpack” stories begin with a pack sized to the wrong torso length or hip circumference. The fix is not a new brand or a heavier wallet. It is a tape measure, two body landmarks, and five careful minutes.
To learn how to measure torso for backpack fit, find the C7 vertebra at the base of your neck, locate the top of your iliac crest, and measure the curved distance between those two points. Use a flexible tape, ask another person to help when possible, repeat the measurement, and compare the result with the specific manufacturer’s size chart. Get those numbers right and the pack can settle where it belongs: anchored at the hips, quiet on the shoulders, and ready for the miles.
What Is Torso Length and Why Does It Matter More Than Height?

Torso length is the distance from the C7 vertebra, the prominent bump near the base of your neck, to an imaginary horizontal line across the top of your iliac crest. It is not the same as your total height. Two hikers who both stand 5’10” can have very different torso lengths. Height bundles legs, torso, and neck into one number; the backpack needs to know where your shoulders end and your hips begin.
For a framed outdoor pack, torso length helps determine where the shoulder harness meets your body and whether the hip belt can sit over the pelvic bones. This principle is especially important in load-bearing designs such as heavy duty outdoor backpacks, where harness geometry must match the intended user.
Why Torso Length Beats Height for Backpack Sizing
Height tells a pack designer almost nothing about where the shoulder yoke should attach. Torso length tells the designer where the shoulder harness, hip belt, and load-lifter geometry need to meet the body.
- A frame that is too long may leave a gap around the shoulders or place the load lifters incorrectly.
- A frame that is too short may pull heavily on the shoulders and limit useful load-lifter adjustment.
- A correctly sized frame allows the hip belt and shoulder harness to work together.
A long-legged hiker with a short torso can look “tall” on a height chart and still need a compact frame. Same body weight, same pack, wrong number, ruined trip.
Which Body Landmarks Do You Need?
Only two landmarks define the torso measurement:
- C7 vertebra: the prominent bump at the base of the neck when the head tilts forward.
- Iliac crest: the upper edge of the pelvic bones, found by placing your hands on your hips.
Marking both points with a removable sticker or washable pen makes the tape easier to position.
Should You Use a Generic Torso Size Chart?
Generic ranges can help you understand the result, but they should not replace the chart supplied by the backpack manufacturer. Brands use different frame lengths, overlap ranges, harness shapes, and adjustable suspension systems.
| Measurement Result | What to Do Next |
|---|---|
| Clearly inside one size range | Start with that frame size |
| Inside two overlapping ranges | Try both or follow the brand’s fit guidance |
| At the end of an adjustable range | Check shoulder wrap and load-lifter position carefully |
| Outside the published range | Look for another frame length or an adjustable model |
Anchor the purchase decision to your torso number, not your height. Your measured number is the starting point; the manufacturer’s chart and a loaded fit test make the final decision.
What Tools Do You Need Before Measuring?

You need a flexible tailor’s tape, a mirror, a removable marker or small sticker, and ideally another person. That is the entire kit. No laser, phone app, or smart scale improves a measurement if the tape starts and ends at the wrong landmarks. A rigid metal tape also fights the natural curve of the back and produces an inconsistent reading.
Which Measuring Tape Works Best?
A soft fiberglass or fabric measuring tape is easiest to control. Check that it has readable inch or centimeter markings and has not stretched. If you are unsure, compare a section against a rigid ruler.
- Flexible tailor’s tape
- Full-length or wall mirror
- Washable marker, sticker, or small piece of tape
- Notepad or phone for recording results
- A helper to locate landmarks and read the tape
Why Is a Second Person Helpful?
Measuring yourself can make you twist, reach, or lift a shoulder. Those movements change your posture and make it harder to keep the tape on the centerline of the back. A helper can hold the upper end at C7, follow the spine, and read the iliac-crest line while you stand naturally.
If you must work alone, use a mirror and mark both landmarks before starting. Take at least three readings without turning your torso to look at the tape.
Quick Tool Checklist
| Tool | Purpose | Practical Alternative |
|---|---|---|
| Flexible tape | Follows the back’s curve | Non-stretch string, then measure it with a ruler |
| Mirror | Checks posture and tape alignment | Phone camera on a stable stand |
| Marker or sticker | Keeps landmarks visible | Small piece of removable tape |
| Helper | Holds and reads the tape | Mirror-based repeated measurement |
Prepare the tools before you start. Interrupting a measurement to hunt for a pen is a small thing, but small interruptions are exactly when posture and landmark placement drift.
How Do You Locate the C7 Vertebra Correctly?

Tilt your head forward and run your fingers down the center of the back of your neck. The prominent bony bump near the neck-to-shoulder transition is the upper landmark for backpack torso measurement. Every error above or below that point follows you all the way to the size chart, so do not rush it. Ask your helper to keep a finger on the point or mark it before you return your head to a neutral position.
Use the Tilt-and-Feel Method
- Stand upright with your shoulders relaxed.
- Tilt your chin gently toward your chest.
- Feel along the center of the lower neck for the prominent bump.
- Mark the point while keeping your body facing forward.
Do not force your chin hard against your chest. The movement only needs to make the landmark easier to feel.
Avoid Common C7 Errors
Thick collars and hoodies make the landmark difficult to locate, so measure over a thin shirt or directly against the skin. Do not choose a point simply because it looks like the base of the neck. Feel for the bone and keep the mark on the body’s centerline.
If two nearby bumps seem equally prominent, move the head gently from flexed toward neutral and have your helper confirm the lower-neck landmark. Professional pack fitters use the same simple tilt-and-feel method because the useful skill here is careful touch, not complicated equipment. The goal is a repeatable starting point, not a visual guess.
How Do You Find the Iliac Crest for Hip-Belt Alignment?

Place your hands on the sides of your hips with your fingers forward and thumbs pointing behind you. Slide your hands downward until they settle on the firm upper edge of the pelvic bones. Your thumbs create an imaginary horizontal line across your back; the point where that line crosses the spine is the lower torso landmark. Palm-slide, feel the ridge, mark the top: one move gives you both the torso endpoint and the hip-belt line.
Why the Iliac Crest Sets the Hip-Belt Position
A load-bearing hip belt is normally centered over the iliac crest so the pelvis, rather than soft waist tissue, supports the pack. If the belt sits far below the crest, it may slide. If it sits too high, it can press into the waist or ribs. Vertical position matters more than simply pulling the buckle tighter. Individual anatomy and belt shape vary, so a loaded fit test still matters.
Does Pelvic Shape Change the Method?
People have different pelvic widths, angles, and waist-to-hip shapes, but the measuring method remains the same: locate the actual top edge of your own iliac crest. Do not estimate it from the navel, trouser waist, sex, or overall height.
| Landmark Check | Correct Sign |
|---|---|
| Hands rest on a firm bony shelf | You are on the iliac crest |
| Thumbs point toward the spine at the same height | The horizontal line is level |
| Mark sits on the centerline of the back | The lower endpoint is aligned |
| Hands are resting only on soft waist tissue | Recheck the landmark |
Confirm the crest on both sides before marking the center point. Precise landmark placement drives every number that follows, so this is the moment to slow down.
How Do You Measure Torso Length Step by Step?

Place the zero end of the flexible tape at the C7 mark. Run the tape down the center of the back, allowing it to follow the natural curve of the spine rather than stretching it straight through the air. Read the measurement where the tape crosses the horizontal line formed by the tops of the iliac crests.
Follow This Measurement Sequence
- Wear a thin shirt and stand with your feet comfortably apart.
- Locate and mark C7.
- Locate both sides of the iliac crest and establish a level line between your thumbs.
- Hold the tape at C7 and follow the spine to that line.
- Record the number without rounding it to a preferred backpack size.
- Repeat the process from the beginning.
Keep your head level, arms relaxed, shoulders neutral, and weight balanced on both feet. Do not stand at military attention or exaggerate the curve in your lower back.
Why Should You Measure More Than Once?
Landmark placement and tape routing can shift slightly between attempts. Take two measurements. If they are close, use the average or the repeated value. If they differ noticeably, locate both landmarks again and take a third measurement rather than choosing the number you expected. Measure twice, average the result, and only then translate the number into a frame size.
How Do You Interpret the Result?
Compare the final measurement with the exact size chart for the pack you plan to buy. Do not assume that small, medium, and large mean the same thing across manufacturers.
| Situation | Fit Decision |
|---|---|
| Fixed-size frame | Choose the chart range containing your torso length |
| Adjustable torso system | Set the harness near your measured length, then fine-tune while loaded |
| Measurement falls between sizes | Test both sizes when possible |
| Torso and hip-belt sizes do not match one package | Look for interchangeable belts or separate component sizing |
The tape narrows the options; the loaded pack delivers the verdict.
How Do You Measure Hip-Belt Size the Right Way?
Measure around the body at the level where the hip belt will sit over the iliac crest, not around the natural waist and not along a low-slung jeans line. Keep the tape horizontal and snug without compressing the body. The torso number and hip-belt number work as a pair: one places the frame, the other decides whether the load transfers cleanly.
Use the Actual Belt Line
Wear the type of thin base layer you expect under the pack. Wrap the tape around the top of the hips, check in a mirror that it stays level, and record the circumference. Compare it with the hip-belt chart for the specific model.
- Do not measure at the navel unless it matches the crest line.
- Do not rely on jeans sizing, which varies by brand and rise.
- Do not add a fixed number based on sex or age.
- Recheck sizing if the belt reaches the end of its adjustment range.
Check the Belt on a Loaded Pack
The padded wings should wrap the hip bones without bottoming out at the buckle or leaving the padding too far behind the crest. Exact spacing varies by belt design, so use the manufacturer’s fit instructions rather than a universal gap measurement.
Removable hip belts are especially useful when a user’s torso frame and hip circumference fall into different nominal sizes. They also give brands a cleaner way to serve more body shapes without forcing every customer into one fixed frame-and-belt combination.
What Common Mistakes Cause a Poor Backpack Fit?
The most common errors are using the wrong landmarks, measuring over bulky clothing, changing posture during the reading, and treating a generic size chart as universal. These shortcuts look harmless in the bedroom and show up as hot spots on the trail three days later.
Avoid These Measurement Mistakes
- Measuring straight through the air instead of following the back’s curve
- Starting at the collar line rather than the C7 landmark
- Ending at the trouser waist or navel instead of the iliac-crest line
- Twisting to read the tape during self-measurement
- Taking one reading and rounding it immediately
- Choosing a frame before checking the manufacturer’s chart
Read Fit Symptoms Carefully
Shoulder pressure, belt slip, and poor load-lifter position can indicate a sizing problem, but they can also come from strap adjustment, packing balance, belt shape, or excessive load. Treat symptoms as clues, then recheck the complete system.
| Symptom | Possible Cause | First Check |
|---|---|---|
| Persistent shoulder pressure | Frame too short, loose belt, or heavy load | Torso setting and hip-belt tension |
| Gap behind the shoulders | Frame too long or harness shape mismatch | Shoulder wrap and frame size |
| Hip belt slides down | Belt too large, wrong position, or poor shape match | Crest position and belt range |
| Load lifters do not work effectively | Incorrect frame size or anchor geometry | Brand fit guide and torso setting |
| Belt presses ribs or abdomen | Belt sitting too high or unsuitable contour | Reposition and test another belt shape |
The diagnostic table turns vague discomfort into a useful place to start, but do not let one symptom make the whole decision. Re-measure before assuming the backpack itself is defective; the answer is often at the tape, the adjustment sequence, or the load inside the bag.
How Do You Adjust a Pack After Choosing the Right Size?
Start with a realistic test load and loosen every main strap. Center the hip belt over the iliac crest and tighten it securely. Next, snug the shoulder straps until they follow the shoulders without carrying all the weight. Adjust the load lifters gently, then fasten the sternum strap for stability. Correct order beats brute force: a badly sequenced fit cannot be rescued by pulling every strap harder.
Use a Consistent Adjustment Order
| Step | Action | Purpose |
|---|---|---|
| 1 | Loosen the harness straps | Resets the suspension |
| 2 | Center and tighten the hip belt | Establishes the main anchor |
| 3 | Snug the shoulder straps | Brings the pack toward the back |
| 4 | Adjust load lifters lightly | Controls upper-pack position |
| 5 | Fasten the sternum strap | Stabilizes shoulder straps |
Load-lifter angles vary with frame design and pack size; about 45 degrees is a common reference for many larger framed packs, not a universal requirement. Avoid overtightening them until the shoulder straps lift away from the body.
Test the Fit Under Movement
Walk, climb stairs, and move your arms while the pack is loaded. The belt should stay over the crest, the harness should not create concentrated pressure, and the pack should remain stable without excessive strap tension. Fit is confirmed through movement, not by standing still for a few seconds. A correctly sized pack should become quieter as you move, not demand your attention at every step.
How Should Brands Use Torso Measurements in Product Development?
Brands and OEM buyers should treat torso range, hip-belt range, shoulder-harness shape, and load-lifter geometry as product specifications, not marketing afterthoughts. A clear measurement guide helps customers choose the intended size and gives product teams better information when evaluating samples for outdoor gear applications. Fit engineering begins on the product brief months before the first customer walks a mile.
Build Sizing Around the Target Customer
Use target-market anthropometric data and wear trials instead of copying another brand’s small, medium, and large labels. A multi-size frame system, adjustable yoke, and interchangeable hip belts can cover more body shapes, but each option adds development and inventory complexity.
- State torso ranges in inches and centimeters.
- Publish the exact C7-to-iliac-crest method.
- Separate torso size from hip-belt size when the design allows it.
- Test the suspension with the pack’s intended load range.
- Record fit feedback by body measurements, not height alone.
Lessons from a durability-focused backpack project also matter here: harness attachment, webbing, reinforcement, and stitching must support the loads created by the suspension design.
Review the Fit System Before Production
| Checkpoint | What to Confirm |
|---|---|
| Torso range | Each size has a tested minimum, maximum, and overlap |
| Hip-belt range | Padding remains correctly positioned across the stated range |
| Harness geometry | Shoulder straps wrap without concentrated edge pressure |
| Load lifters | Anchor position works across intended torso settings |
| Sizing guide | Landmarks and measurement path are clearly illustrated |
| Wear testing | Samples are tested with realistic loads and target users |
These checks turn fit guidance into a verifiable part of the product brief rather than a copied size label. Factory partners with real fit engineering can co-develop yokes, belts, and shoulder harnesses around the target market instead of forcing the market to adapt to one generic sample.
Measuring torso length correctly comes down to two landmarks and one repeatable path: C7 to the iliac-crest line along the curve of the spine. Measure the hip-belt line separately, use the specific brand’s chart, and test the selected pack with weight inside it. Comfort on the trail is engineered upstream, at the tape measure, before the first mile. Get the numbers right and the pack fades into the background where it belongs, leaving the hiker to remember the ridgeline instead of the strap on the shoulder.
For custom backpack projects that need real torso ranges, interchangeable components, and wear-test planning, contact us today with your target user and expected load. We treat fit as a specification, not a slogan.
FAQ
Can I Measure My Torso Without Another Person?
Yes, but it is harder to keep a neutral posture and follow the center of your back. Mark C7 and the iliac-crest line first, use a mirror or stable camera, and take at least three readings. Ask someone to verify the result before ordering when possible.
Should I Measure Torso Length in Inches or Centimeters?
Either unit works. Record both if you are comparing several brands, and avoid rounding until you check the manufacturer’s chart. One inch equals 2.54 centimeters.
Is Backpack Torso Length the Same as Shirt Size?
No. Shirt sizing includes chest, shoulder, and garment-length assumptions that do not identify the C7-to-iliac-crest distance. Measure your torso directly for backpack fitting.
Can I Use My Pant Waist to Choose a Hip Belt?
Pant waist is only a rough reference because clothing brands and rises vary. Measure directly around the iliac-crest level and use the backpack’s hip-belt chart.
What Should I Do If I Fall Between Two Frame Sizes?
Check whether the ranges overlap and follow the manufacturer’s recommendation. If possible, load both sizes and compare hip-belt position, shoulder wrap, load-lifter function, and freedom of movement. Do not choose solely by load weight or overall height.