
A backpack fits when its harness matches your torso, its components sit where the design intends, and the packed bag stays controlled during normal movement. Check the actual load, shoulder contact, hip-belt fit and adjustment range. Numbness, restricted breathing or persistent pain are reasons to stop-not tighten harder.
The useful question is not whether every strap matches a photograph. It is whether this pack, on your body, works for the use you have in mind. A framed hiking pack and a simple everyday backpack need different checks. The following guide separates body sizing, component position, loaded evaluation and the limits of adjustment.
What Does a Good Backpack Fit Need to Accomplish?
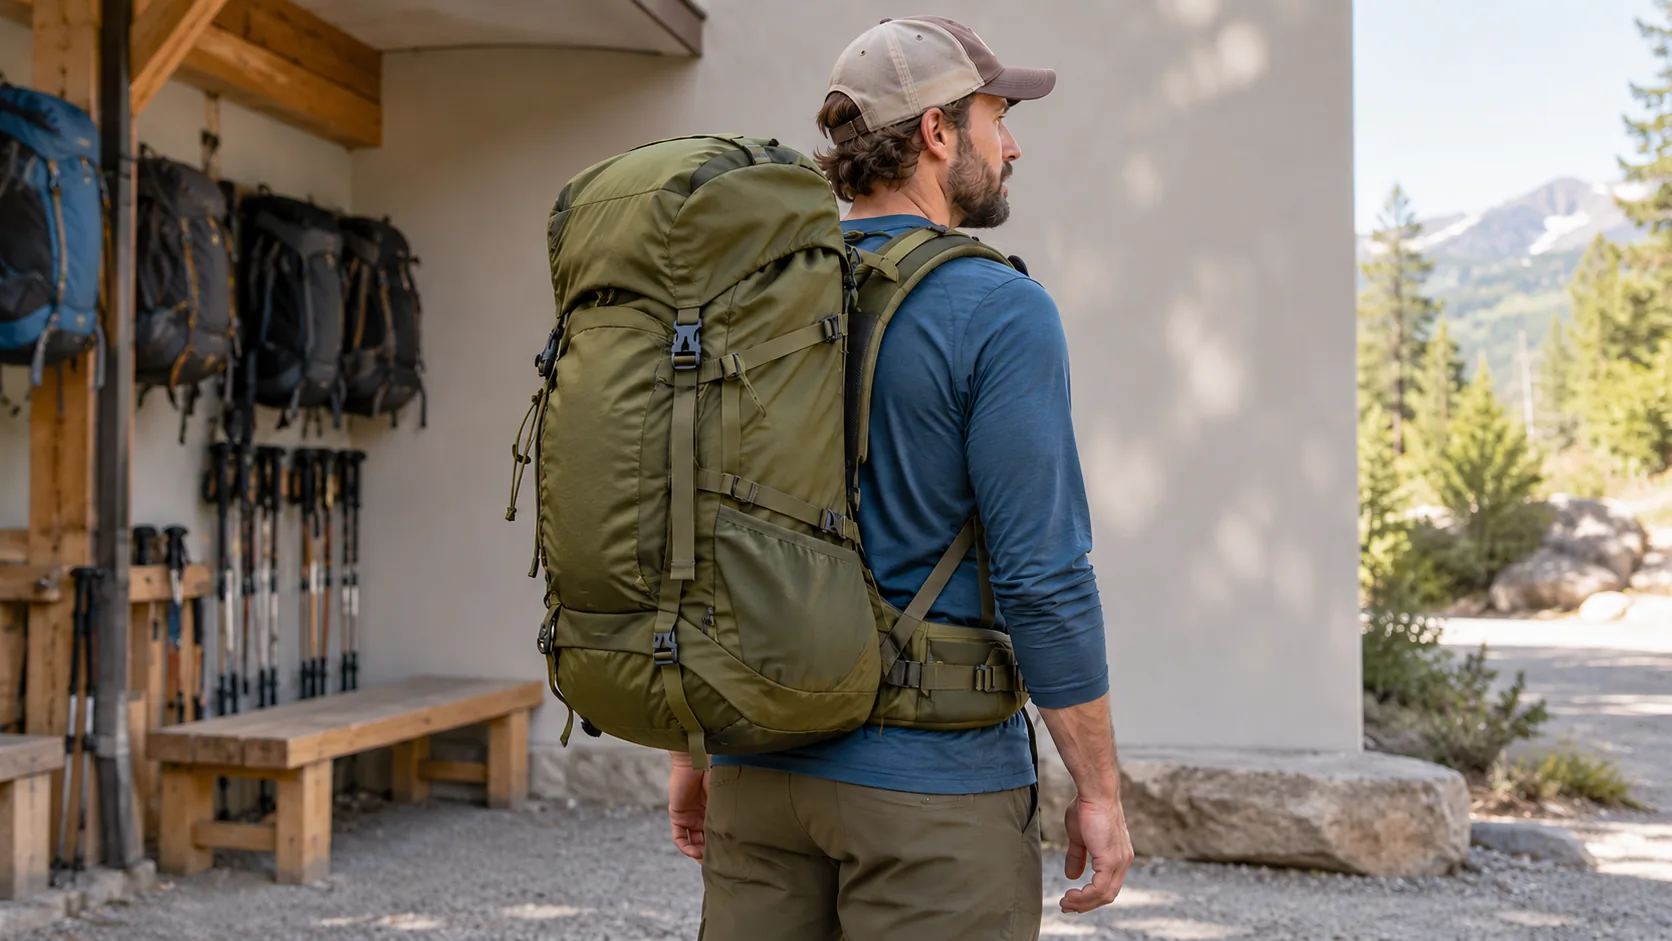
Check the harness as a system rather than judging one strap. You should be able to move your arms and breathe normally; the bag should remain controlled rather than repeatedly pulling away or shifting sideways. On a pack designed to use a load-bearing hip belt, assess that belt along with the shoulders and frame. Do not expect a decorative waist strap to behave like a supported hiking-pack belt.
Separate the decisions that lead to this check:
- Sizing: match body measurements to the exact model’s stated range.
- Fitting: evaluate position, contact and movement with the pack worn.
- Adjustment: change settings within the component’s available range.
- Packing: decide where contents go and what load you take.
- Repair: address damaged or slipping hardware rather than disguising it with more tension.
If you have not yet chosen a pack category, the hiking backpack selection guide covers capacity and trip requirements. Here, the task is checking the fit of a selected pack-not choosing liters or prescribing a carrying weight.
How Do You Match Torso Length to the Harness?
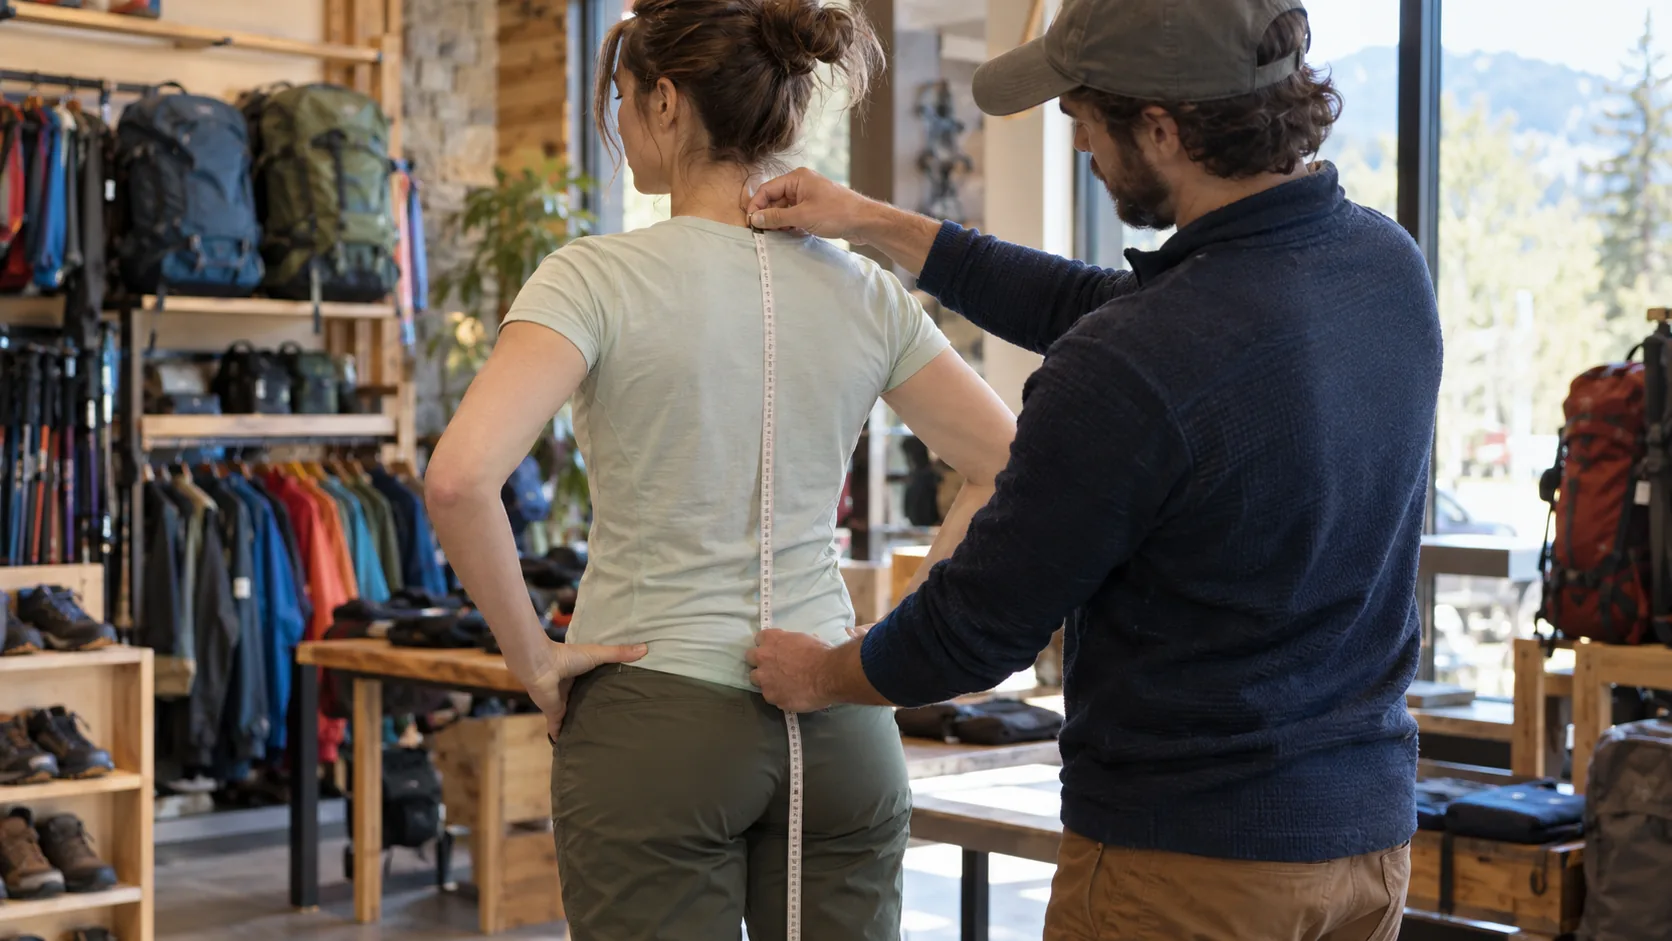
REI’s torso-sizing method uses the C7 landmark at the neck-shoulder junction and a line between the tops of the hip bones. Tilt your head forward to locate the neck bump, then identify the tops of your hips with your hands. Stand upright while a helper measures between those landmarks down your back with a flexible tape. Use that result-not overall height-to consult the exact pack’s size chart.
The chart is a starting point for a try-on, not proof of fit. Check the relevant hip-belt range too; a pant-waist measurement is not automatically the same measurement the maker requests. When you fall between sizes, try the options rather than rounding from height or clothing size.
A fixed-length harness has a defined size; strap tension cannot change that back length. An adjustable torso system can change the harness position, but only within its specified range and by its intended mechanism. Confirm the feature on your model before trying to move it. Osprey’s sizing and fitting guide distinguishes torso, harness and hip-belt checks and identifies situations that may require a different size, model or adjustment.
Do not treat men’s, women’s or unisex labels as a substitute for the actual chart and try-on. Record the version and size you tested. Body torso length also belongs in a different field from bag height: the backpack measurement guide covers the bag’s dimensions and volume, not your harness size.
Where Should the Hip Belt and Shoulder Straps Sit?
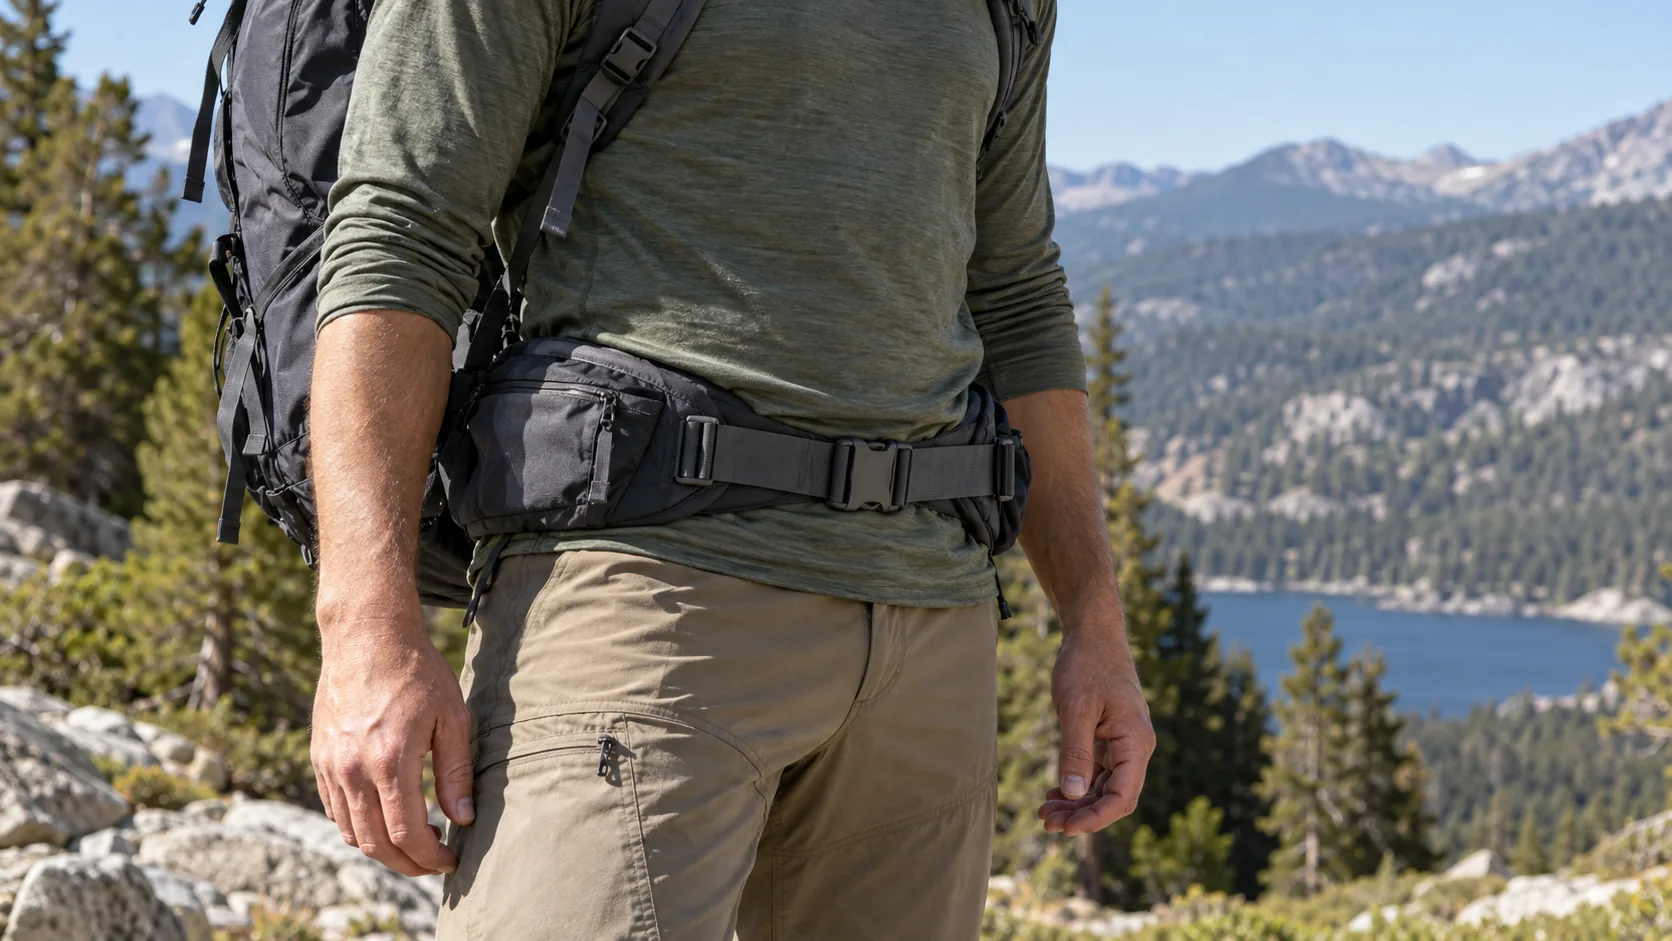
Apply each check only if the component exists. For a framed hiking pack, start with the maker’s hip-belt placement and torso instructions, then assess the shoulder harness and any stabilizing straps. A simple daypack may have neither a supported hip belt nor load lifters.
| Component | What to look for | What not to infer |
|---|---|---|
| Hip belt | Padding and buckle sit in the intended area and hold without pinching | A closed buckle alone does not prove belt size or load transfer |
| Shoulder harness | Pads follow the shoulder shape without persistent digging or an unexplained gap | Equal loose webbing tails do not prove equal fit |
| Load lifters | Intended stabilizing effect without excessive tension or displaced contact | One angle does not apply to every frame and pack size |
| Sternum strap | Shoulder straps remain positioned while arms and breathing stay unrestricted | Tightest available setting is not the goal |
| Back panel | Contact through the surface designed to meet your back | The outer bag body does not have to touch every part of the spine |
The angle examples show why model instructions matter. REI gives roughly 45° for load lifters in its guide. Deuter’s adjustment guidance describes 30-45° for stabilizers in its trekking context and explains that smaller, lighter-load packs can use much smaller angles. Osprey’s fitting page gives 30-60° in its own instructions. These are source-specific references, not a universal acceptance band assembled from three guides.
Back-panel gaps also need interpretation. The Gregory Zulu 55 product description describes a tensioned mesh system that creates space between the back and the pack body. That designed ventilation space is different from a shoulder pad that fails to follow the wearer. Inspect the actual contact surface and suspension design before deciding that any visible gap is a fault.
For children and teenagers, AAOS backpack guidance recommends a proportionate school bag, padded straps and use of both shoulder straps. That is child-scoped advice, not an adult hiking-pack torso range, ride-height rule or carrying limit.
How Should the Pack Feel With Its Real Load?

Fit the pack with representative contents that you can handle comfortably and that stay within the maker’s limits. An empty try-on does not evaluate the intended packed arrangement. Osprey’s fitting article advises adding weight before fitting and making the setup closer to real use; its instructions are not a requirement to use one fixed load for every person.
Once the pack is on and adjusted according to its manual, walk on a clear level surface and check ordinary turning and arm movement. Add other movements relevant to your use only where safe. Helly Hansen’s fit guide includes a loaded walk-around and warns against a chest strap tight enough to interfere with breathing. No exact walking duration is prescribed here.
Observe and record:
- Whether the belt and harness stay in their intended positions.
- Whether the load repeatedly sways or pulls away as you move.
- Where pressure, rubbing or restricted movement appears.
- Whether an adjustment changes the observation without causing another problem.
- Which contents, clothes, harness setting and bag size were used.
A useful comparison changes one thing at a time. Keep the load the same when comparing two torso settings; keep the torso setting recorded when comparing loads. Otherwise, you cannot tell which change affected the result. This is a practical comparison method, not a clinical test or a standardized pass protocol.
Recheck when the intended load or configuration changes. A result with light day-hike contents does not establish how the pack fits with a different multi-day arrangement. Do not apply a child’s forward-lean warning to an adult as a diagnosis, and do not force a prescribed posture to make a photograph look “correct.”
What Can Adjustment Fix, and When Should You Stop?
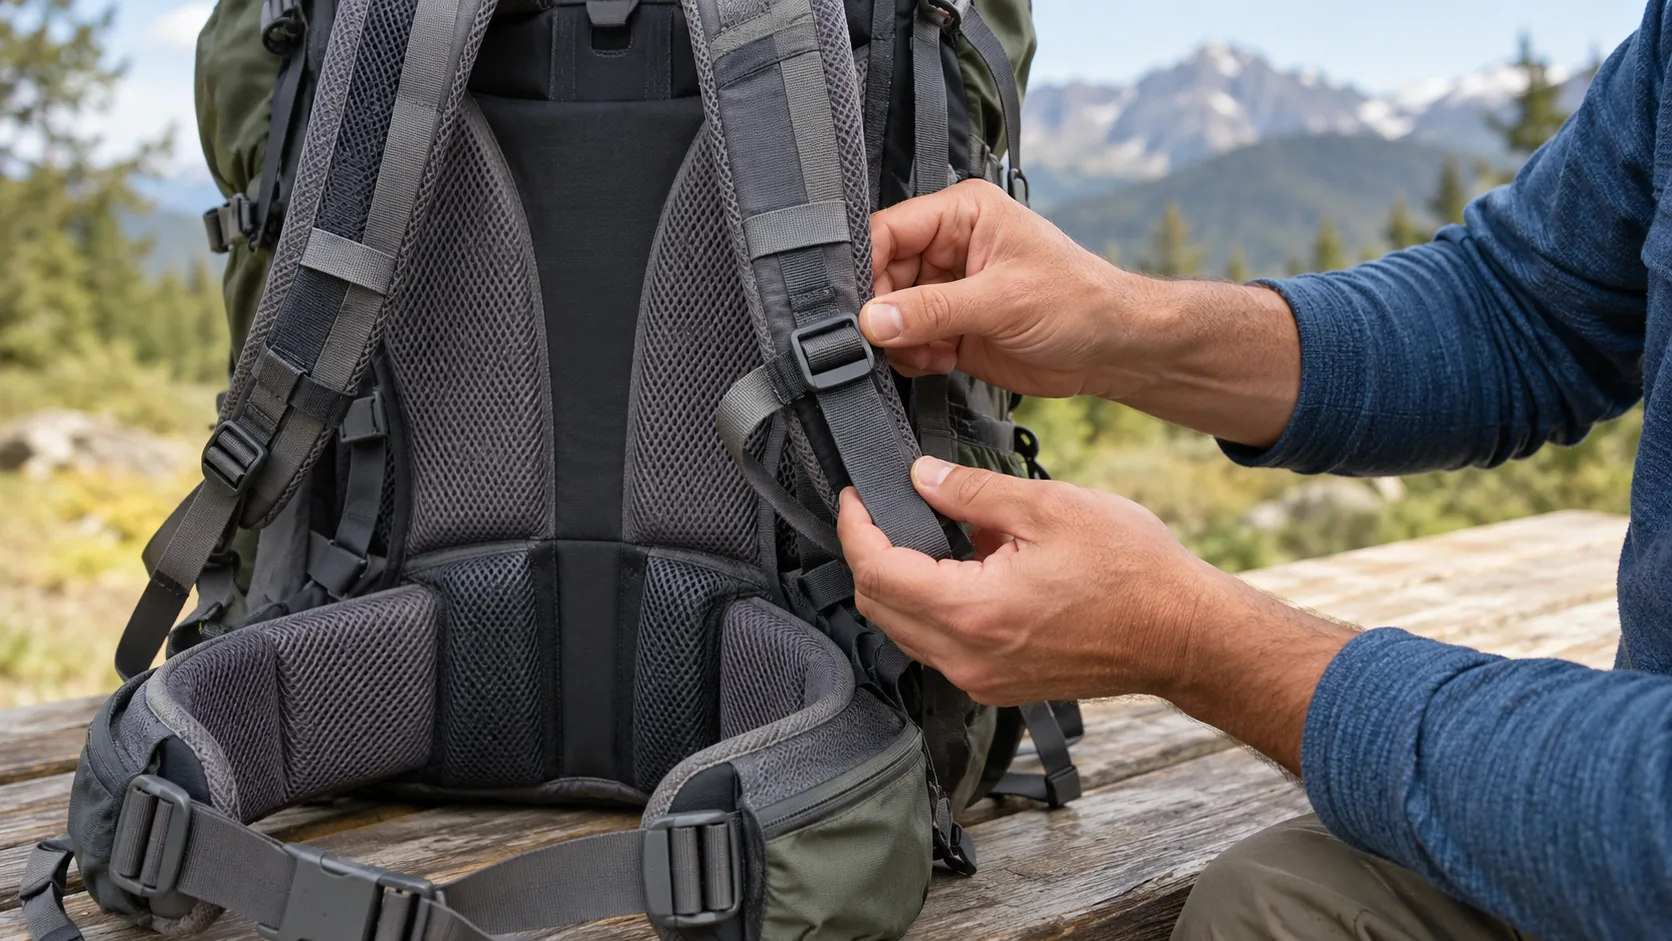
Adjustment can change available tension, component position and-when provided-the torso setting. It cannot add a missing component or turn a fixed harness into a different back length. A setting at the end of its travel is a reason to remeasure, check routing and compare another size or model; it is not an automatic incompatibility diagnosis.
Use this as an inspection matrix, not a table of medical causes:
| Observation | First checks | Next boundary |
|---|---|---|
| Shoulder pad gap or digging | Model size, torso setting, harness shape and excessive tension | If it remains, ask a fitter to compare another setting, size or model |
| Belt slides or pinches | Intended placement, belt range, buckle travel and clothing contact | Do not keep tightening a belt that cannot provide suitable coverage |
| Repeated sway or backward pull | Actual contents, compression, intended stabilizers and harness setting | Reassess the packed system rather than blaming one strap |
| Adjustment only works at its limit | Correct threading, available travel and chart match | Verify compatibility; do not force the mechanism |
| Webbing slips, buckle cracks or rail moves unexpectedly | Hardware and attachment condition | Stop relying on the damaged system; follow repair or replacement guidance |
| Numbness, tingling, pain or restricted breathing | Stop the carrying check and remove the pack safely | Do not use further tightening as treatment |
Identify the relevant parts before inspecting them; the backpack component guide helps distinguish webbing, adjustment hardware and attachment areas. These are different objects, and a visible symptom does not prove which one caused it.
If tingling or numbness persists or keeps returning, seek medical advice. The NHS guidance on pins and needles specifically advises medical review for constant or recurrent symptoms and cautions against self-diagnosis. Persistent pain or other concerning symptoms also deserve qualified advice. This article does not diagnose a condition or promise relief from a strap change.
What Should Brands Specify and Check in a Backpack Harness?
Define the intended users and carrying conditions before approving the harness. A sample that looks acceptable empty is not evidence for every loaded configuration or every body in the proposed range.
| Record | What to define for the project |
|---|---|
| Intended user range | Torso and hip measurements, measurement method and user population |
| Actual component set | Frame, belt, harness, lifters and chest strap present on each SKU |
| Component identities and interfaces | Webbing, adjusters, buckles, anchors, reinforcement and installation references where present |
| Available adjustments | Torso mechanism, usable travel, access and locking method |
| Loaded evaluation | Sample/version, contents and mass, wearer measurements, settings and activities |
| Observations | Contact, belt position, movement, pressure complaints and setting changes |
| Approval and follow-up | Who approved which sample/version, retained reference and defined production checks |
Load transfer should not be claimed as a fixed percentage without matching evidence. A 2015 PLOS ONE study compared configurations of one hip-belt backpack using pressure, strap force and relative-motion measurements. It supports recording conditions and endpoints; it does not certify another pack or provide a universal comfort threshold.
Keep the component identities and controlled specification version attached to the sample record. An approved sample is a reference, not a guarantee that every production unit meets the requirement. Reports need the product identity, version, tested configuration and method; complete fields still do not establish authenticity or applicability by themselves.
These records are for traceability. No complaint-frequency data, return reduction or ZWbags ergonomics test is claimed here. If you are developing a product, submit the body range, load, component list and required evidence through the backpack manufacturing page for a feasibility discussion-not an assumed fit-performance promise.
Frequently Asked Questions
How do I measure torso length for a backpack?
Use the maker’s method. The commonly described C7-to-hip-crest method uses a helper and a flexible tape down your back. Compare the result with the exact model’s chart, then verify with a try-on rather than selecting by height alone.
Where should a backpack sit on your back?
That depends on its suspension. A framed pack with a supported hip belt needs its intended belt and harness relationship; a simple daypack may lack those parts. Follow the model instructions and evaluate the packed bag instead of applying one height or angle to every design.
Does a gap mean the backpack is the wrong size?
Not necessarily. Check whether it is a designed ventilation space or a gap at the intended harness contact point. Review torso setting, tension and harness shape; a persistent unexplained gap is a reason for further fitting, not a diagnosis from a photograph.
Can tighter straps fix a backpack that does not fit?
They can change available settings, but cannot change a fixed back length or add a missing feature. Recheck sizing and routing if a setting only works at its limit. Compare another size or model where necessary.
What should I do if the pack causes tingling or pain?
Stop the carrying check and remove the pack safely. Do not keep tightening or continue through symptoms. Seek qualified advice for persistent or recurrent symptoms; this guide cannot determine their medical cause.