
To learn how to fix a backpack strap, start by identifying what failed. A slipping adjuster, cracked buckle, frayed webbing end, torn strap, and detached anchor need different repairs. Treating them as one problem can hide damage in the part that actually carries the load.
Rethreading or replacing compatible hardware may restore the intended strap path when the webbing and surrounding seams are sound. Tape, pins, knots, and cable ties can stabilize some damage long enough to stop using the bag or reach a repair shop, but they do not prove that a torn load-bearing strap is safe again.
What Part of the Backpack Strap Has Failed?
Empty the backpack and inspect the complete strap path before cutting, sewing, or ordering a replacement part.
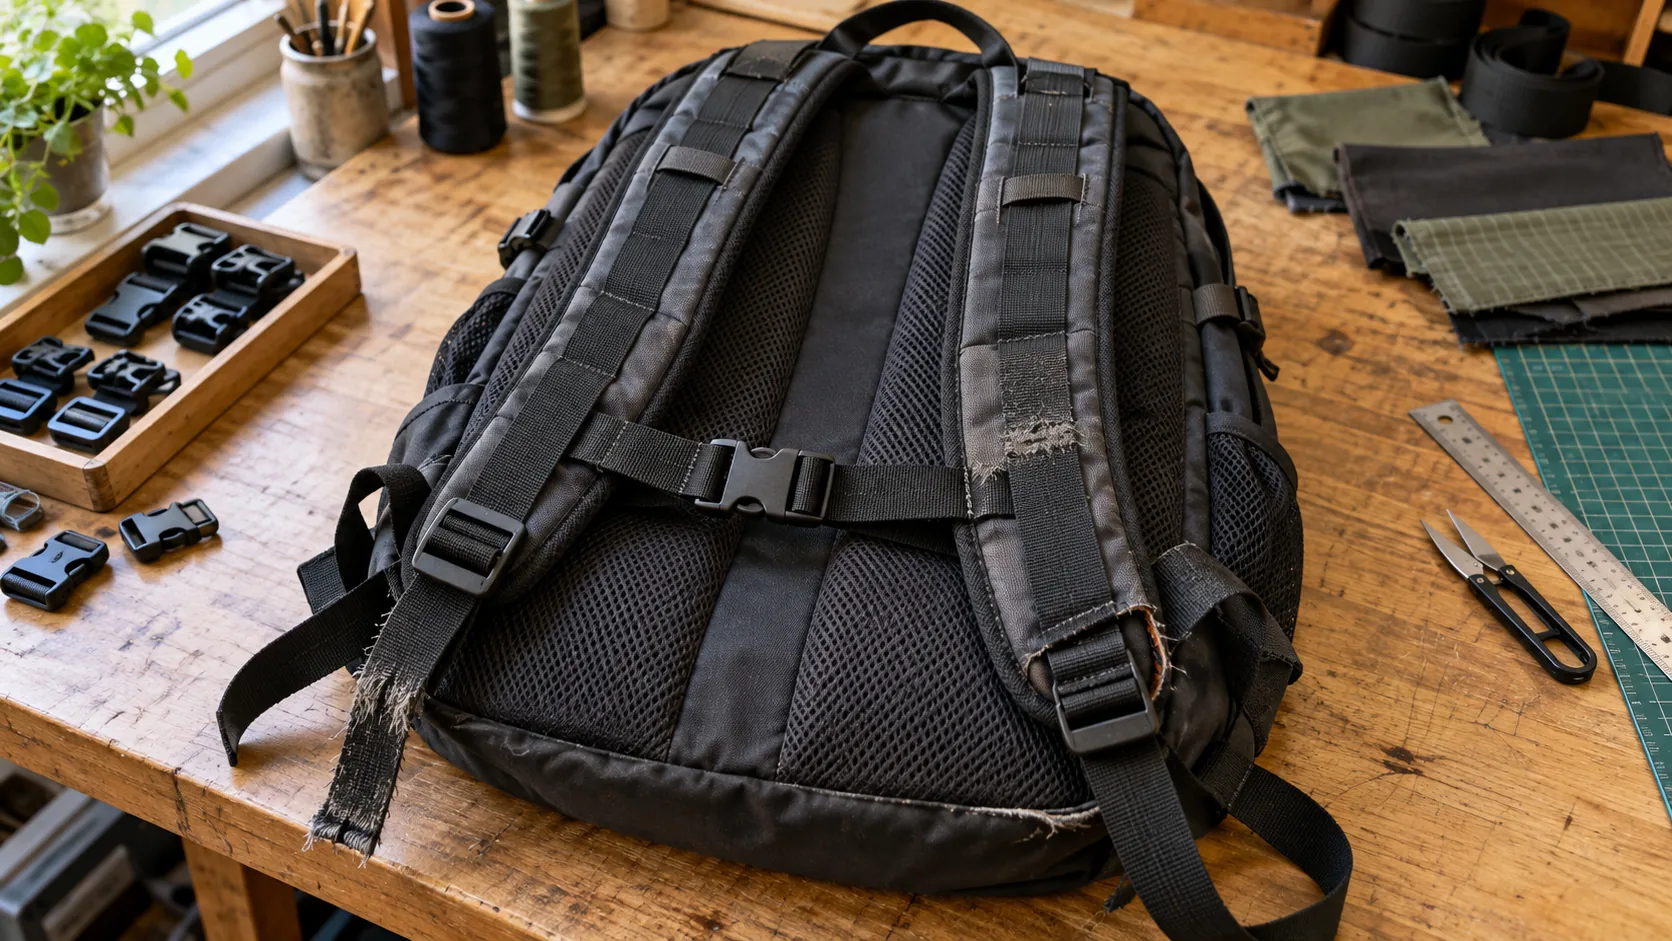
The load path may include webbing, an adjuster, a side-release buckle, sewn joints, reinforcement, and the shell fabric beneath the anchor. The exact parts vary by backpack, so diagnose the components that are actually present rather than relying on the word “strap.”
| What you see | Likely failed area | Appropriate next step | Stop the repair if |
|---|---|---|---|
| Strap slides after adjustment | Routing, adjuster, or worn webbing | Check the routing and inspect both contact surfaces | Webbing is cut, polished thin, or damaged at a seam |
| Buckle will not latch or has cracked | Buckle or mating half | Identify the buckle type, webbing width, and attachment style | The adjacent webbing or anchor is also torn |
| Loose fibers at the free end | Cut webbing end | Fold and stitch, bind, or finish according to the known material | Fraying reaches the adjuster or structural stitching |
| Cut or abrasion in the middle of webbing | Webbing body | Replace the damaged section or complete strap; consult a repairer for load-bearing damage | Damage crosses the full width or its cause is unclear |
| Strap pulls away from the bag | Anchor seam, reinforcement, or shell | Inspect the entire junction and underlying fabric | Shell fabric or reinforcement has torn away |
| Padding or binding opens | Strap cover or edge binding | Repair the cover only after checking the webbing underneath | Structural webbing is exposed or damaged |
Record where the damage first appeared, how the bag was loaded, and what happened immediately before the failure. The break location is evidence, but it does not establish the cause by itself. A sound-looking buckle beside a distorted anchor may be part of the same failure path.
If the straps stay at the chosen length but the bag still hurts or sits incorrectly, the problem may be fit rather than repair. For trail packs, check the suspension and torso position in our guide to choosing a hiking backpack. If the opening rather than the shoulder system has failed, use the separate guide to fix a zipper on a backpack.
How Do You Rethread a Slipping Strap Adjuster?
First compare the slipping side with an undamaged strap on the same bag. Photograph the working route before removing anything.
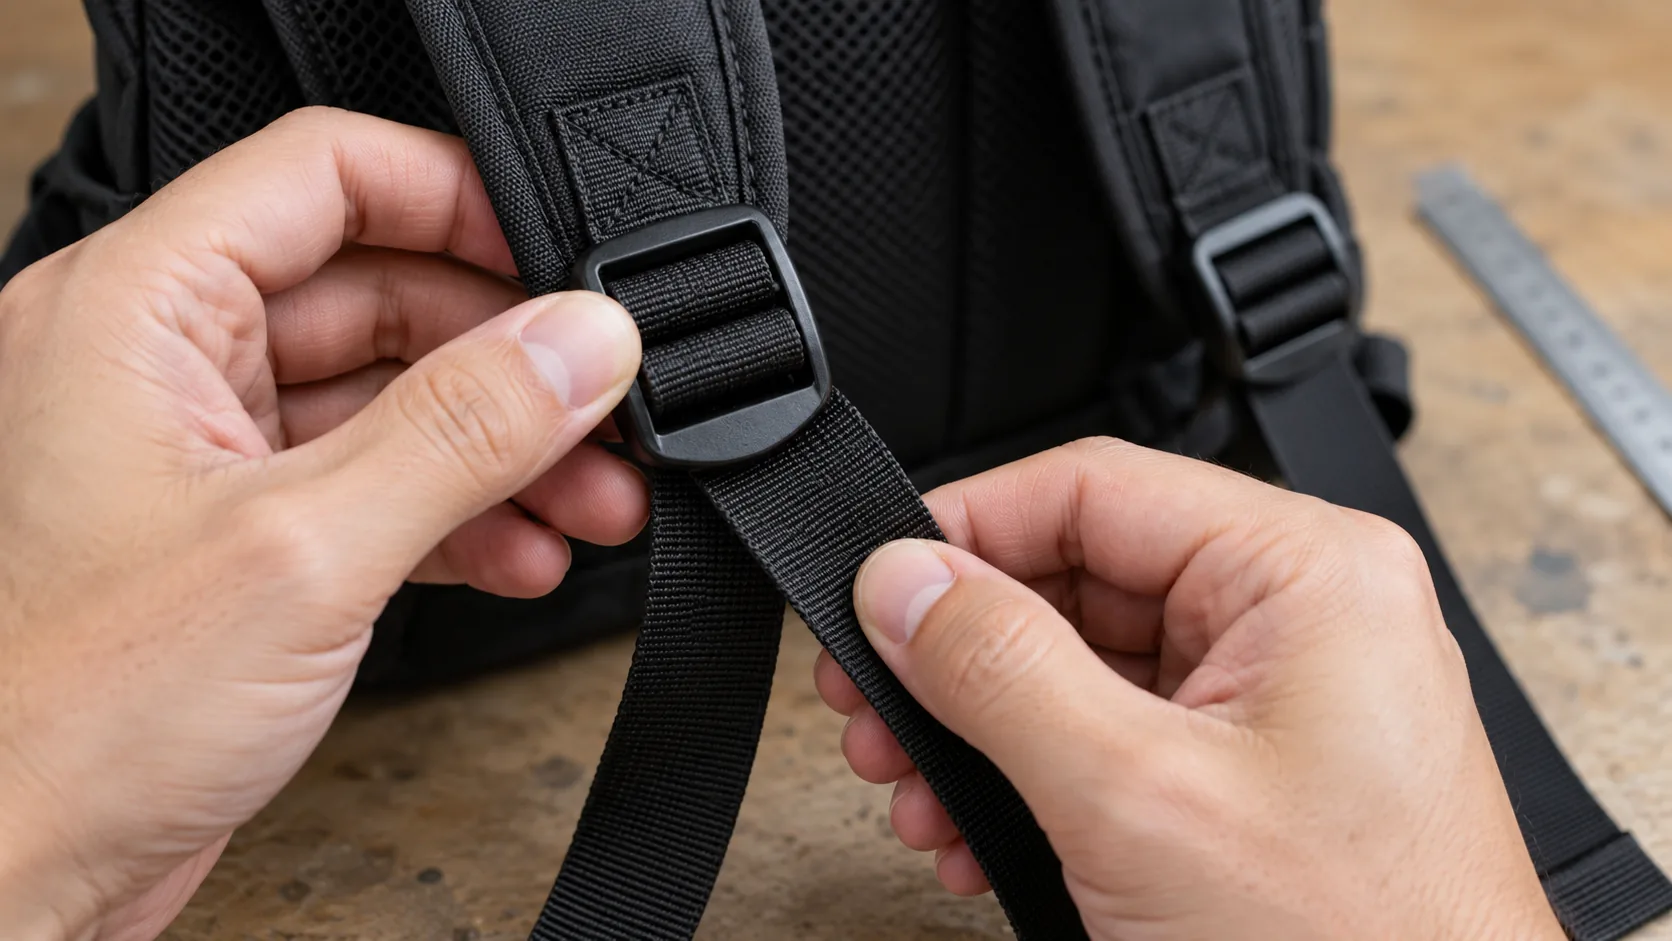
A typical ladder-lock route passes the webbing around the center bar so tension pinches the webbing against the buckle. The exact entry direction depends on how the adjuster is installed. Sailrite’s ladder-lock threading guide provides a clear visual reference for a standard configuration.
Use this sequence:
- Empty the backpack and release tension from the strap.
- Remove twists and flatten the webbing.
- Compare the adjuster’s orientation with the opposite strap or the hardware maker’s instructions.
- Feed the webbing through the slots without bunching or folding its edges.
- Pull the free end by hand while holding the bag body. Confirm that the webbing moves when adjusted and holds when tension is applied.
If correct routing does not hold, inspect compatibility and wear. Nominal width alone does not make webbing and hardware interchangeable. Actual webbing width, thickness, surface finish, buckle geometry, and routing all affect the combination. A replacement adjuster should be verified with the actual webbing rather than selected only by a listing title.
Replace the worn component when the buckle is cracked or rounded, or when the webbing is glazed, thinned, or cut where it contacts the adjuster. Rethreading cannot restore missing material.
How Can a Broken Buckle or Adjuster Be Replaced?
Identify the hardware before buying a replacement. Record the buckle type, the width of the webbing that passes through it, whether one or both ends are fixed, and whether the new half must mate with an existing half.
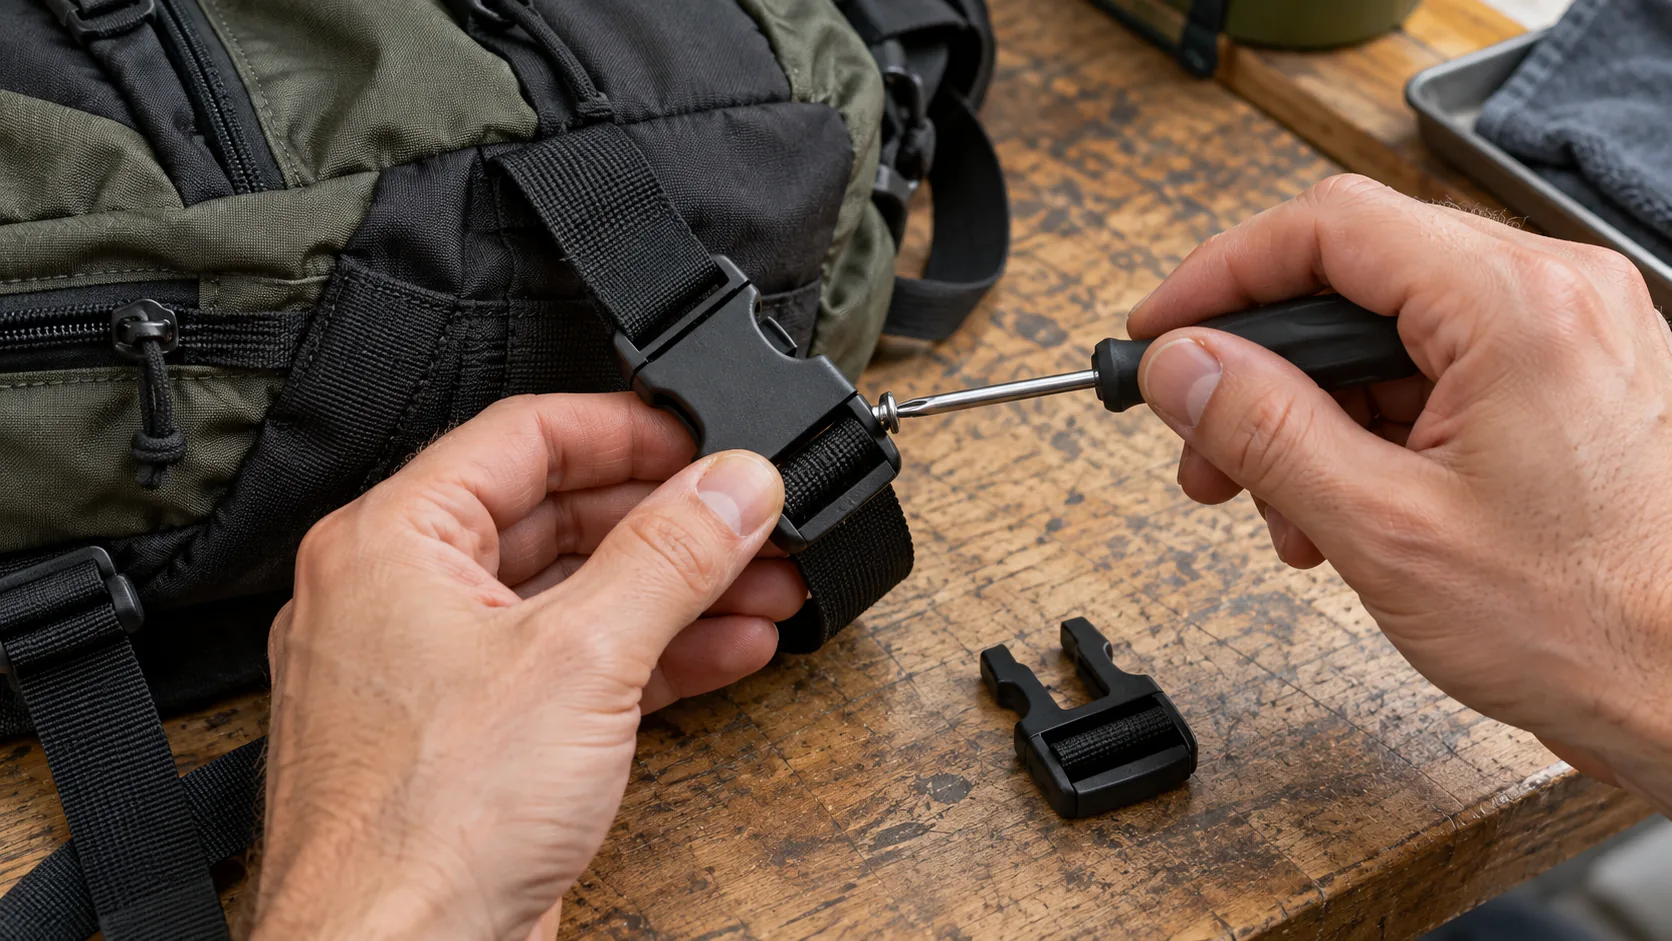
Field-repair buckles can avoid opening a sewn seam when their pin arrangement matches the original attachment. Sea to Summit’s current field-repair buckle documentation distinguishes one-pin and two-pin designs and states that size is based on webbing width, not the outside width of the buckle. That is one product system, not proof that every removable-pin buckle fits every backpack.
Before relying on a replacement:
- Compare the original and replacement attachment geometry.
- Confirm that the webbing lies flat through every slot.
- Check that both buckle halves are designed to mate; a similar silhouette is not enough.
- Tighten removable hardware according to its manufacturer’s instructions.
- Close and release the buckle repeatedly while the bag is empty.
- Apply increasing hand tension and watch for webbing creep, pin movement, deformation, or accidental release.
A buckle catalog number or component test value does not become a safe-load rating for the repaired backpack. Installed performance also depends on the webbing, routing, sewn attachment, reinforcement, shell, and direction of force.
If the buckle is sewn into a folded webbing loop, replacement may require opening and rebuilding that joint. Do not cut a structural strap until you know how it will be reassembled and what reference will be used to inspect it.
How Should Torn Webbing or a Detached Strap Be Repaired?
Separate damage to the webbing body from damage at the anchor. A mid-span tear affects the strap material; a detached anchor affects the junction between the strap and the backpack.
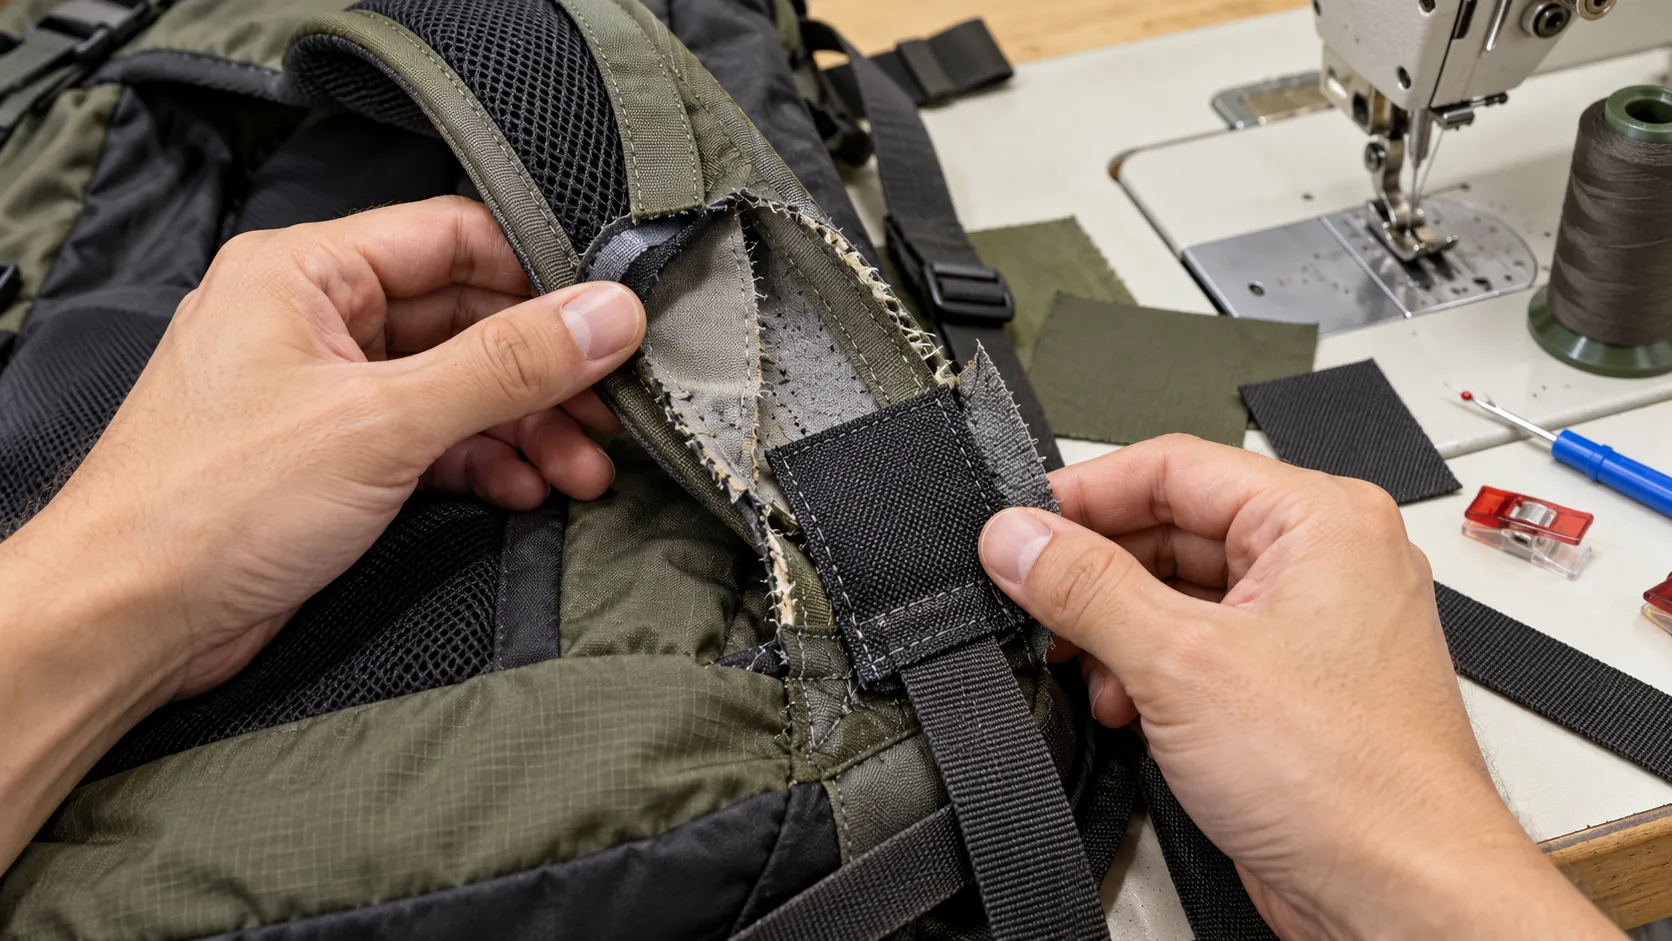
For a structural repair, the damaged material must be removed, replaced, or reinforced through sound material. Sewing across loose fibers or a growing tear can make the surface look closed without rebuilding the original load path.
A detached anchor needs a wider inspection:
- Webbing: Is it cut, stretched, abraded, or pulled out of shape?
- Stitching: Which rows opened, and are remaining stitches cutting into the material?
- Reinforcement: Is there an internal patch or folded panel behind the anchor?
- Shell: Did the seam open cleanly, or did the body fabric tear?
- Opposite strap: Does the intact side show the same distortion or early damage?
The iFixit torn-off shoulder strap guide demonstrates a backing patch folded around a strap end and stresses that stitches must pass through the intended layers. Use that as an example of repair structure, not as a universal stitch count, thread specification, or capacity guarantee.
A reproducible sewn repair needs more than “double stitched.” Record the materials being joined, joint geometry, thread and needle combination, stitch and seam layout, start and finish, reinforcement position, and the approved reference. The relevant fields depend on the risk and construction; there is no fixed sewing recipe for every backpack.
Choose a professional bag, luggage, or outdoor-gear repairer when the shell has torn around the anchor, the damage crosses load-bearing webbing, the internal reinforcement is inaccessible, or your equipment cannot penetrate the layer stack consistently. Deuter’s published repair safety guidance likewise advises using the necessary skills and tools and consulting a qualified professional when the repair is uncertain or complex.
The backpack production process explains why an anchor is more than a visible line of stitches: panels, reinforcement, webbing, and assembly sequence meet at that junction.
Can a Backpack Strap Be Fixed Without Sewing?
Sometimes-but only when the failed part was designed to be rethreaded or replaced without sewing.
| No-sew action | Appropriate use | What it does not prove |
|---|---|---|
| Rethread an intact adjuster | Incorrect routing with sound hardware and webbing | That worn webbing or hardware has been restored |
| Install a compatible field-repair buckle | Broken buckle with sound surrounding webbing and seams | That a different buckle shape or width is interchangeable |
| Secure a loose free end | Keep excess webbing controlled | That a torn structural section is repaired |
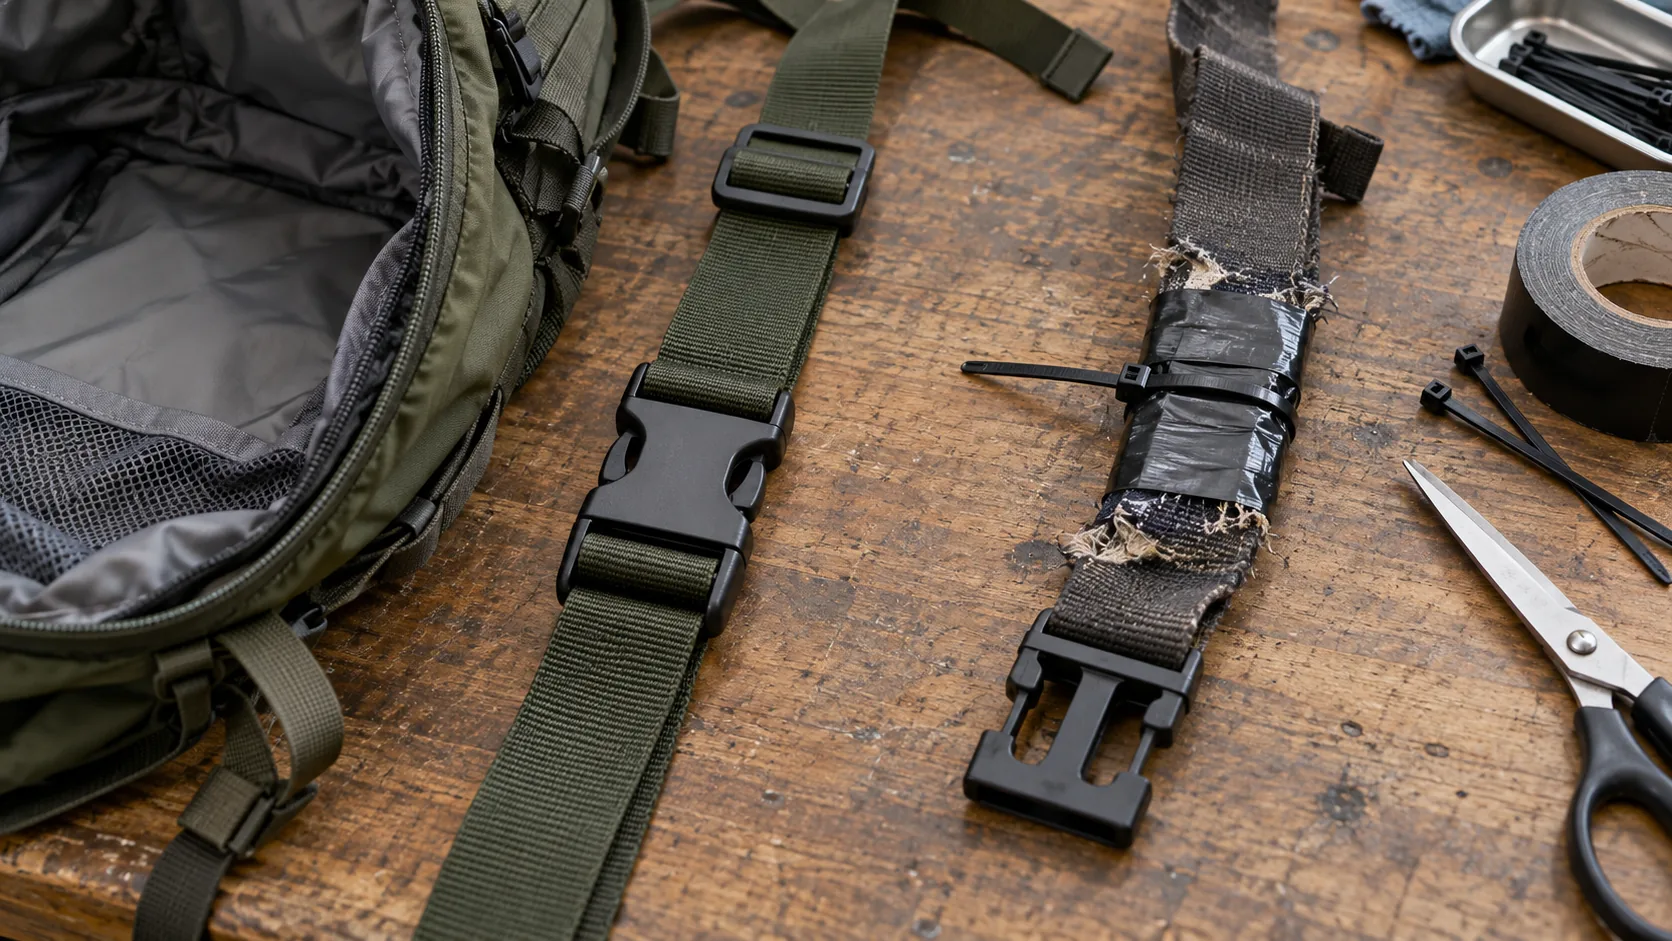
| Tape, tie, pin, or bind damaged material | Temporary stabilization while unloading and stopping use | Permanent capacity, durability, or original performance |
For temporary stabilization, remove or reduce the contents first. Keep sharp temporary hardware away from the wearer and the bag’s contents. Do not use a temporary repair to continue carrying fragile, valuable, or safety-critical equipment.
A knot may also shorten the strap, change the force direction, or concentrate stress next to damaged material. Tape can hide growth at the tear. These methods may control movement, but they make inspection harder and do not establish a working load.
Do not melt an unknown strap end as a default repair. Heat can burn the user, ignite nearby materials, create fumes, and damage fibers beyond the visible edge. If the webbing material and maker’s method are not known, fold and stitch the end, bind it, or have it professionally finished.
How Do You Check a Strap Repair Before Using the Bag?
Inspection and loading should be staged. A neat repair is not evidence of structural performance, and an ugly seam is not automatically weak; appearance and function must be checked separately.
Start unloaded:
- Confirm that webbing is flat and follows the intended route.
- Confirm that buckle halves engage and release normally.
- Inspect both faces of a sewn joint where accessible.
- Check the shell and reinforcement around the anchor for cuts, puckering, pulled yarns, or growing holes.
- Compare strap length, alignment, and anchor position with the undamaged side.
Then apply load gradually using the contents the bag is intended to carry. Keep the bag close to a safe surface during early checks. Pause between stages and inspect the adjuster position, buckle seating, stitch line, reinforcement, and shell. Stop if the webbing creeps, hardware deforms, a seam opens, a hole grows, or the two sides become asymmetrical.
The representative contents are a test condition, not a declared safe-load rating. A successful hand check or short carry does not certify the original capacity or predict service life. If the original manufacturer publishes a repair or inspection procedure, follow that procedure instead of substituting a generic one.
For repeatable product validation, record the backpack configuration, sample identity, payload and distribution, closure state, loading direction, duration or cycles where applicable, inspection points, endpoints, and results. These fields make two checks comparable; they do not turn a project-specific protocol into an industry standard.
What Should Brands Specify for Repairable Backpack Straps?
Repairability begins with component identification and an accessible load path. A buyer should be able to identify the webbing, hardware, sewn joint, reinforcement, and substrate without reverse-engineering the finished bag.
Use this specification checklist:
| Area | Record in the specification | Repair benefit |
|---|---|---|
| Webbing | Supplier or item code, material/construction, actual width range, thickness or matched reference, color, routing | A replacement can be checked against the original combination |
| Adjuster and buckle | Item code, size, mating part, orientation, attachment style | Prevents visually similar but incompatible substitutions |
| Anchor | Drawing or callout showing material layers, insertion depth, reinforcement, and sewing layout | Repairer can rebuild the intended junction |
| Sewing | Controlled stitch/seam reference, thread, needle, spacing or density where critical, start and finish | “Double stitched” is replaced by inspectable fields |
| Validation | Product configuration, representative payload, method, endpoints, and result record | Repair and production samples can be compared under the same conditions |
| Spare parts | Replacement part list and compatibility notes | Service teams can replace hardware without guessing |
| Change control | What changed, why, approval, new version, and affected production | Later orders do not silently change the repair reference |
Test loads, failure results, component targets, and declared working loads are different numbers. Label each one by meaning and evidence. Do not convert a buckle supplier’s component result or one successful sample into a safe-load statement for the complete backpack.
When comparing backpack manufacturers, ask how each supplier identifies strap components, records anchor construction, controls replacements, and documents the complete-bag validation conditions. That makes the discussion auditable without requiring invented universal limits.
Frequently Asked Questions
Why does my backpack strap keep slipping after I tighten it?
The webbing may be routed incorrectly, twisted, too thin for the adjuster, polished from wear, or paired with damaged hardware. Compare the route with the intact side, flatten and rethread it, then replace the worn or incompatible part if it still creeps.
Can I replace a backpack buckle without sewing?
Yes, when a compatible field-repair buckle fits the existing webbing loop and attachment arrangement. Match the webbing width, one-pin or two-pin layout, and mating half. A removable pin does not make an otherwise incompatible buckle suitable.
How do I repair a backpack strap that tore off at the seam?
Inspect the shell, reinforcement, webbing, and remaining stitching together. The repair must join sound material and rebuild the anchor junction. If the shell tore, reinforcement is inaccessible, or the bag carries consequential loads, use a qualified repairer.
Is tape a permanent repair for a torn backpack strap?
No. Tape may stabilize the area while you unload the bag or arrange a repair, but it does not establish structural capacity. It can also conceal movement at the damaged joint.
How do I know whether a repaired backpack strap is safe?
There is no universal visual or household test that certifies every repair. Inspect it unloaded, apply the intended contents gradually, stop at any change, and follow the original maker’s guidance where available. For uncertain or high-consequence damage, ask a qualified repairer to assess it.
Conclusion
Fix the failed component, not the symptom. Correct routing can solve an intact slipping adjuster, and compatible field hardware can replace some broken buckles. Torn webbing and detached anchors require a wider inspection because the repair must reconnect sound material through the complete load path.
After any repair, load the bag gradually and document what was checked. If the shell, reinforcement, or load-bearing webbing is damaged-or if the consequences of another failure are high-stop using the backpack until a qualified repairer has assessed it.