
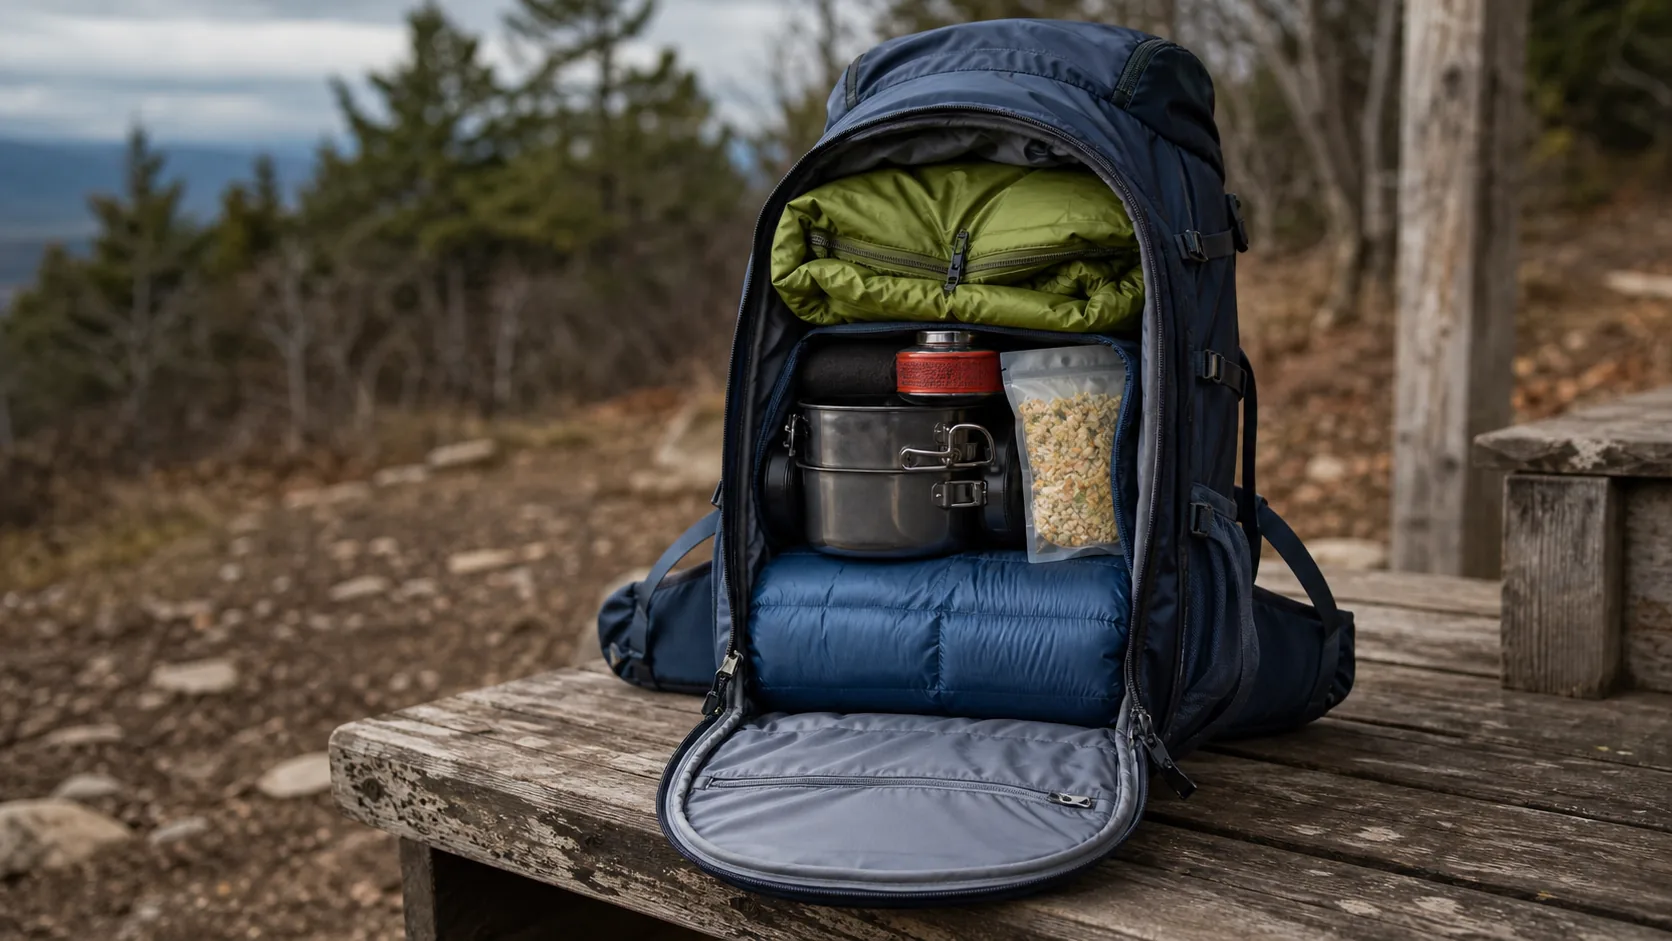
To pack a backpack well, place light and bulky items at the bottom, keep dense gear close to your spine around mid-back height, and reserve the top and exterior pockets for items you need quickly. A balanced load should feel stable rather than top-heavy, and the hip belt should carry most of the pressure.
The right packing method protects your gear, reduces wasted space, and makes water, snacks, rainwear, and safety items easy to reach. The process is less about fitting in as much as possible and more about giving every item a logical place.
Poor pack loading can turn a promising day outdoors into a frustrating grind: shoulders ache, the rain jacket sits beneath the sleep system, and the water bottle becomes difficult to reach. The fix is usually not a new bag. It is a repeatable loading system that keeps the center of gravity controlled and the day’s essentials accessible.
How Do You Pack a Backpack for Maximum Comfort?
Comfort starts with balance, not extra padding. Heavy items belong close to your back, medium-weight items fill the space around them, and soft gear cushions the bottom and any hard edges.

A useful loading framework is ABCD: Accessibility, Balance, Compactness, and Dryness. Each principle addresses a common trail problem.
- Accessibility: Keep water, snacks, navigation tools, and rainwear within easy reach.
- Balance: Center dense items from left to right and keep them close to your spine.
- Compactness: Fill gaps so the load cannot shift as you walk.
- Dryness: Protect critical gear with an interior liner or dry bags.
Weight placement matters because a load held far from your back creates leverage that pulls your torso backward. You then compensate by leaning forward, which can increase fatigue. A compact load near your center of gravity is easier to control on climbs, descents, and uneven ground.
Many hikers place too much dense gear at the top or far from the back panel. Shifting that equipment inward and centering it from left to right can improve stability without changing the total load.
Before leaving, lift the packed bag by its haul loop and set it upright. If it twists strongly to one side or collapses away from the back panel, redistribute the load. Then take a short test walk and adjust anything that presses, rattles, or shifts.
| Loading Principle | Problem It Solves | Where to Apply It |
|---|---|---|
| Accessibility | Repeated stops and unpacking | Lid, hip pockets, side sleeves |
| Balance | Shoulder and lower-back fatigue | Main compartment near the back panel |
| Compactness | Shifting load and wasted space | Gaps around dense items |
| Dryness | Wet clothing and sleep gear | Interior liner and dry bags |
How Should You Pack Each Backpack Zone?
Divide the bag into four practical zones: bottom, core, top, and exterior. Each zone should hold gear based on weight, how often you need it, and whether it is clean, wet, or bulky.

What Goes at the Bottom?
Soft, bulky, seldom-needed gear belongs at the base. A sleeping bag, camp clothing, and lightweight camp shoes create a stable foundation and keep hard equipment from pressing into your lower back.
Typical bottom-zone items include:
- Sleeping bag inside a liner, dry bag, or suitable compression sack
- Camp sandals or lightweight shoes
- Down or synthetic jacket reserved for camp
- Extra base layers that will not be needed during the day
What Belongs in the Core?
The core, roughly between your lower ribs and shoulder blades, holds the densest gear. Food, cookware, a stove, and a hydration reservoir usually fit here. Keep this weight close to the back panel and centered left to right.
If you are comparing compartment layouts for a product line, a well-designed waterproof travel backpack also shows how back-panel access, bottle storage, and compression features can support organized loading.
What Goes at the Top?
The top of the main compartment is for lighter items you may need during the day: an insulated layer, rain shell, first-aid kit, or lunch. These items should be easy to remove without disturbing the core load.
| Zone | Typical Items | Loading Priority |
|---|---|---|
| Bottom | Sleep system, camp clothing | Light, compressible, used at camp |
| Core | Food, cookware, water | Dense and close to the spine |
| Top | Shell, insulation, first aid | Light and frequently needed |
| Exterior | Trekking poles, wet fly | Secure, limited, weather-exposed |
How Do You Keep Essentials Accessible on the Trail?
Store frequently used items in the lid, hip-belt pockets, and side sleeves. Before closing the main compartment, ask what you are likely to need during the next two hours and place those items where you can reach them without unpacking.

Which Items Belong in the Top Lid?
Use the lid for small objects that would otherwise disappear inside the main compartment:
- Sunscreen and lip balm
- Headlamp and spare batteries when required
- Compact first-aid supplies
- Trail map in a weather-resistant sleeve
- Snacks for the next section of the route
The lid should remain easy to close and should not become a second heavy compartment above the shoulders.
Why Should Water Stay Within Reach?
Easy access supports regular drinking and reduces unnecessary stops. Bottle users should test whether they can reach and replace the bottle while wearing the pack if that matters to them. Reservoir users should check the sleeve, hanging point, hose route, and bite-valve clip with the pack fully loaded.
Accessibility also supports safety. A rain shell that is buried beneath the sleep system is of little use when weather changes quickly. The same applies to navigation tools, medication, sun protection, and emergency layers.
| Location | Best Use | Packing Check |
|---|---|---|
| Lid pocket | Map, headlamp, first aid, snacks | Keep it light and easy to close |
| Hip-belt pocket | Phone, lip balm, energy food | Confirm access with the pack on |
| Side sleeve | Water bottle or poles | Test retention while bending |
| Hydration sleeve | Water reservoir | Prevent hose kinks and leaks |
How Do You Balance a Backpack for Stable Carrying?
Think in three dimensions: vertical position, left-right symmetry, and distance from the back panel. Dense gear should sit near the spine around mid-back height, with comparable weight on both sides.

How Do You Handle Vertical Balance?
Vertical balance keeps the densest part of the load around the middle or upper-middle of the main compartment rather than at the very top or bottom. A common arrangement is:
- Water reservoir flat against the back panel
- Cook pot and stove near mid-back height
- Food bag beside or just above the cook kit
- Light clothing around the dense core
What About Left-Right Symmetry?
Perfect symmetry is rarely possible, but large differences are easy to avoid. Compare the two sides by lifting the bag from its haul loop and by wearing it for a short walk. Correct the internal layout before tightening one shoulder strap more than the other.
The same principles apply to heavier-duty tactical and outdoor backpacks, where attachment systems provide more options but do not replace careful weight placement.
| Balance Axis | Useful Rule | Common Mistake |
|---|---|---|
| Vertical | Dense gear near mid-back height | Heavy gear at the lid or sagging at the base |
| Horizontal | Comparable weight on both sides | Full bottle and cookware on one side |
| Depth | Dense gear close to the spine | Heavy items in the front pocket |
How Can You Save Space Without Damaging Gear?
Compress soft goods, fill safe empty spaces, and cushion hard or fragile items. Efficient packing reduces movement inside the bag, but overstuffing can stress seams, zippers, and delicate equipment.

Roll or fold clothing according to the shape of the available gap. Stuff socks or gloves inside clean cookware only when hygiene and moisture are not concerns. Compression sacks are useful for sleeping bags and insulated jackets, but excessive compression can make awkward hard shapes that are difficult to pack around.
Which Compression Techniques Work?
- Roll or fold clothing to match the available space rather than following one rule for every fabric
- Fill clean cookware or footwear with suitable small soft items
- Push flexible clothing into safe corners around the dense core
- Use compression sacks for bulky insulation when the resulting shape still packs well
- Remove unnecessary packaging and duplicate group equipment
Why Do External Compression Straps Matter?
Side and lid straps pull the load toward the frame and reduce internal movement. Tighten them until the contents are stable, but stop before the pack body distorts or hard equipment begins to crush softer items.
Protect fragile items before using them to fill space. Electronics belong in padded, water-resistant pouches. Sunglasses need a hard case. Keep sharp corners, stove parts, and tent stakes away from the backpack fabric and inflatable gear.
What Protects Fragile Items Best?
Clothing can cushion a camera, headlamp, or water filter, but padding should not hide a sharp object against an inflatable sleeping pad. Keep electronics inside the main weather barrier, place sunglasses in a hard case, and nest a fuel canister only in cookware designed to hold it safely.
Do not force the main zipper shut. Leave enough room for the slider to travel without pulling the two sides together under tension. Compression straps should stabilize the load, not deform the pack or crush its contents.
How Do You Reduce Zipper and Fabric Damage?
Overstuffing strains zipper coils, sliders, and seam allowances. Pull a zipper along its designed path rather than sideways around a corner. Clean dirt from the track and use a zipper-compatible dry lubricant when the care guidance allows it; avoid oily products that attract grit or stain fabric.
Practical space-saving methods include:
- Filling footwear with clean socks or small soft items
- Nesting a fuel canister securely inside compatible cookware
- Using clothing to pad a camera or water filter
- Removing unnecessary retail packaging before the trip
- Sharing group equipment so the same tool is not carried twice
Compactness is successful when the load is quiet, stable, and easy to close. A bag that is smaller but difficult to access or at risk of zipper failure is not packed efficiently.
| Gear or Area | Protection Strategy | Common Failure |
|---|---|---|
| Sleeping pad | Keep inside and away from sharp items | Puncture |
| Electronics | Padded pouch inside the weather barrier | Impact or water damage |
| Water filter | Cushion and protect from freezing conditions | Cracked housing |
| Main zipper | Leave closure space and pull straight | Split coil or worn slider |
How Do You Keep a Backpack Dry in Bad Weather?
Use an interior waterproof liner as the primary barrier, place critical items in dry bags, and add a pack cover when conditions justify it. Most sewn backpacks are water-resistant rather than completely waterproof because seams, zippers, and harness attachment points can admit water.
What Is the Best Interior Waterproofing Method?
A pack liner protects the main compartment as one system. Individual dry bags add redundancy for items that must stay dry. Select a liner strong enough for the load and check it for punctures before a long trip. Bright liners can also make small dark items easier to find inside the bag.
Are Pack Covers Worth Using?
They are useful in sustained rain, snow, or brush because they shield much of the pack exterior. Confirm that the cover fits over filled side pockets and attached gear. In strong wind, use its retention strap or secure it according to the product instructions.
For brands and buyers developing packs for wet conditions, material choice is only part of the solution. Construction details such as seam placement, zipper garages, coated fabric, drainage, and liner design all matter in outdoor and tactical bag applications.
| Protection Layer | Main Function | Limitation |
|---|---|---|
| Pack liner | Protects the main compartment | Does not keep exterior fabric dry |
| Individual dry bag | Protects critical equipment | Adds organization and packing bulk |
| Pack cover | Shields much of the exterior | Open area remains near the back panel |
| Coated fabric | Slows absorption | Seams and openings may still leak |
How Should You Pack for a Multi-Day Trip?
Use the same zone system, then account for additional food, shelter, changing weather, and waste. Grouping gear by activity makes a larger load easier to manage: sleep, kitchen, clothing, safety, and daily-access items.
How Do You Organize Multi-Day Gear?
Group equipment by activity so that camp, kitchen, sleep, clothing, and safety items are easy to locate. Color coding is optional, but a consistent system can reduce searching:
- One sack or area for first aid and safety equipment
- One for kitchen and food items
- One protected section for the sleep system
- One sack for dry spare clothing
What Changes on Longer Trips?
Food weight and volume decrease as the trip progresses, so adjust the core each morning to prevent empty space and movement. Bear-resistant containers, extra water capacity, cold-weather layers, or technical equipment can dictate the geometry of the entire load. Plan around required equipment first.
| Trip Variable | Packing Effect | Daily Check |
|---|---|---|
| Food consumption | Core becomes lighter and smaller | Re-center remaining food |
| Water availability | Capacity changes by route section | Confirm the next reliable source |
| Wet shelter | Must stay separate from dry gear | Use exterior or isolated storage |
| Resupply | Load changes sharply | Rebuild the core after resupply |
How Do You Attach Gear to the Outside of a Backpack?
Carry most gear inside the pack. Use exterior attachment points for wet, dirty, or oversized items that cannot reasonably fit inside, and secure them tightly against the pack body.
Trekking poles can sit in a lower pocket with their upper sections held by a compression strap. A wet tent fly may fit beneath the lid, while a foam sleeping pad can use dedicated bottom or side straps. Technical equipment such as an ice axe should use the attachment system designed for it.
Avoid hanging heavy items from a single clip or length of shock cord. Swinging gear changes balance, catches on branches, and can fall without notice. Fragile electronics, food, water filters, and anything essential to safety belong inside whenever possible.
Use at least two secure contact points for long equipment and keep loose strap ends controlled. After attaching gear, check that it does not block access to water, interfere with your arms, or extend beyond the pack in a way that creates a snag hazard.
If losing an item would end the trip, pack it behind a zipper or inside a closed compartment.
| Item | Exterior Placement | Secure Method |
|---|---|---|
| Trekking poles | Side sleeve | Upper compression strap plus lower pocket |
| Wet tent fly | Under lid or stretch pocket | Compression strap or closed pocket |
| Foam pad | Side or bottom | Dedicated straps at two points |
| Ice axe | Designed tool loop | Shaft keeper and protected pick position |
How Do You Adjust a Loaded Backpack for the Right Fit?
Adjust the harness after the backpack is fully loaded. Begin with all straps loosened, position the hip belt over the top of the hip bones, then tighten the shoulder straps, load lifters, and sternum strap in that order.
The hip belt should wrap securely without pinching or sliding. Shoulder straps should follow the body without carrying all the load. Load lifters draw the upper pack toward the torso; their useful angle depends on the pack and torso length, so aim for firm contact rather than a universal number. The sternum strap should stabilize the shoulder straps without restricting breathing.
Walk for several minutes with the complete load. Step up, turn, reach overhead, and pay attention to pressure points. If your shoulders take most of the weight, reset the hip belt and check whether the torso length is appropriate. If the bag pulls sideways, correct the internal load before tightening one strap more than the other.
What Is the Right Adjustment Sequence?
- Loosen the harness before putting on the loaded pack
- Position and tighten the hip belt first
- Snug the shoulder straps without lifting the belt
- Adjust load lifters until the upper pack feels stable
- Set the sternum strap for shoulder-strap position without restricting breathing
How Do You Test the Fit?
Use the complete trail load, not an empty bag. Walk on level ground, climb a few steps, turn, and reach. The harness should stay in place without numbness, pinching, excessive sway, or the need to overtighten one side.
Loading and fit should be tested together during product development. Fabric strength, reinforced shoulder-strap anchors, back-panel structure, buckle placement, and realistic carry tests all influence long-term performance. Our outdoor backpack durability case shows how construction and testing decisions can address repeated field-use problems.
| Adjustment | Set When | Main Purpose |
|---|---|---|
| Hip belt | First, with the pack loaded | Transfer and stabilize the lower load |
| Shoulder straps | Second | Hold the upper pack close |
| Load lifters | Third | Manage upper-pack position |
| Sternum strap | Last | Keep shoulder straps positioned |
Packing a backpack correctly reduces shoulder fatigue, protects equipment, and avoids unnecessary stops. Use a repeatable zone system, keep dense items close to the spine, protect dry gear, limit exterior carry, and test the loaded harness before setting out. For custom backpack development based on real loading conditions, contact ZWbags to discuss materials, structure, and compartment design.
FAQ
Can I put my sleeping bag anywhere in my backpack?
The bottom of the main compartment is usually the best place because a sleeping bag is light, bulky, and normally not needed until camp. Keep it inside a waterproof liner or dry bag. A pack with a separate sleeping-bag compartment may provide another suitable layout.
What is the best way to protect electronics from rain?
Place electronics in a sealed water-resistant pouch or dry bag, then keep that pouch inside the main pack liner. Add padding and avoid exterior pockets where the item is more exposed to impact and water.
How do I know whether my backpack is balanced?
Take a short walk with the full load. The pack should not pull strongly backward or to one side, and it should follow your torso when you turn. If it sways, move dense items closer to the spine and correct left-right weight differences.
Can I skip a rain cover if I use an interior liner?
An interior liner can keep contents dry without a cover, but the backpack fabric may absorb water and exterior pockets remain exposed. A cover is useful in sustained rain, while the liner remains the more important protection for critical contents.
Where should I pack a bear canister?
Follow the canister manufacturer’s instructions and local regulations. In many packs, the canister fits horizontally or vertically in the core near the back panel. Keep it centered and prevent it from pressing uncomfortably into your back or distorting the pack.